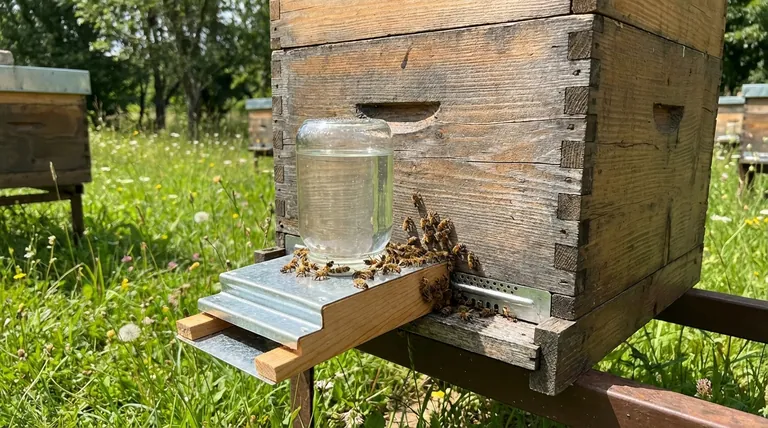
To make a simple entrance feeder for bees, you will typically use a standard canning jar (like a Mason jar) and a specialized perforated lid. The jar is filled with syrup, the lid is screwed on, and the entire assembly is inverted into a small wooden or plastic base that slides directly into the hive's entrance, allowing bees to feed safely from inside the hive.
While building a feeder is straightforward, the most critical task is understanding the different feeder types and their specific risks. The term "entrance feeder" is often misused; a true entrance feeder sits at the hive's bottom entrance and carries a high risk of inciting robbing from other colonies.
First, A Critical Distinction: Feeder Types
To effectively feed your colony, you must first select the right tool for the job. The plans you may find online often confuse different designs, leading to unintended consequences for your hive.
What is a True Entrance Feeder?
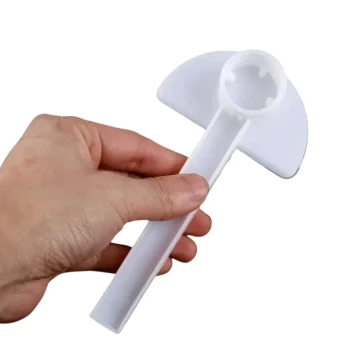
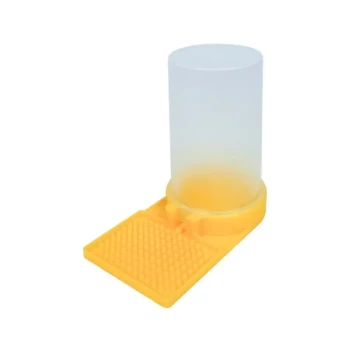
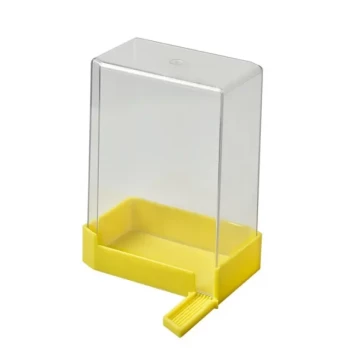
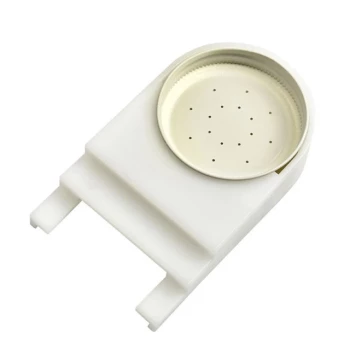
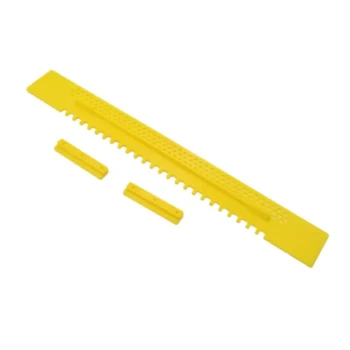
A true entrance feeder, also known as a Boardman feeder, is a device designed to fit into the entrance of the bottom board. It typically consists of a small base that holds an inverted jar.
The bees access the syrup by crawling into the feeder base from inside the hive and drinking from tiny holes in the jar's lid. They are small and easy to monitor and refill without opening the hive.
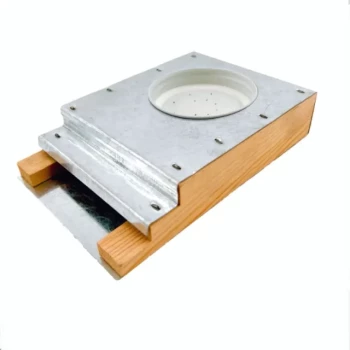
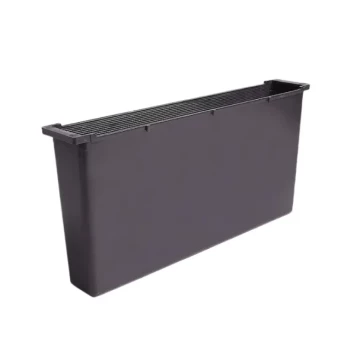
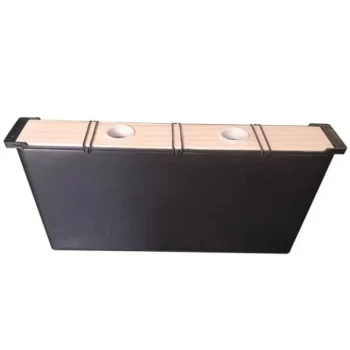
What is a Top Feeder?
The designs described in several references—using pans and hardware cloth placed on top of the hive—are top feeders.
These are large-capacity reservoirs that sit on the uppermost hive box, directly above the inner cover's hole. They are enclosed by an empty hive body and the outer cover to protect them from weather and robbers.
Why the Distinction Matters
Entrance feeders are best for providing small amounts of syrup to a single, small colony. Their biggest drawback is that the food source is at the entrance, acting as a beacon for robber bees from stronger hives.
Top feeders are designed for rapid, large-volume feeding, such as when preparing a colony for winter. Because they are contained within the hive stack, they are much less likely to cause robbing.
Building a Safe DIY Feeder: Key Principles
Whether you build or buy, safety is paramount. The goal is to deliver syrup without letting bees drown or attracting pests and robbers.
The Classic DIY Entrance Feeder (Jar Method)
This is the simplest and most common DIY entrance feeder. You need a small glass jar and a metal lid.
Use a small nail (1/16 inch or about 1.5mm) to punch 10-15 small holes in the center of the lid. Fill the jar with a 1:1 sugar-water solution, screw the lid on tightly, and invert it. The vacuum pressure will keep the syrup from leaking out. You can then place this in a purpose-built wooden base or even a simple, shallow tray at the entrance.
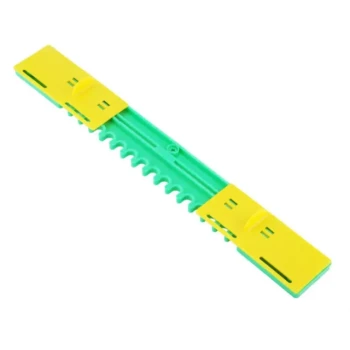
The Role of Hardware Cloth in Other Feeders
Hardware cloth is a critical safety feature for any feeder with an open reservoir of syrup, such as a top feeder or a frame feeder.
Bees are not strong swimmers and will drown easily. A screen or mesh of hardware cloth acts as a ladder and a safety raft, allowing bees to climb down to the syrup's surface and drink without falling in.
Ensuring a "Bee-Tight" Design
When using hardware cloth, it must be fit securely so bees cannot get into the main reservoir. If they can access the syrup from underneath the cloth, they will become trapped and drown in large numbers. Always check that all edges and corners are sealed.
Understanding the Trade-offs of Entrance Feeders
While simple, entrance feeders come with significant disadvantages that you must manage carefully.
High Risk of Robbing
This is the single greatest drawback. The smell of sugar syrup right at the entrance can trigger a "robbing frenzy," where bees from nearby hives attack your colony to steal its resources. This can decimate a weak hive in hours. Always use an entrance reducer to make the opening smaller and easier for your bees to defend.
Limited Capacity and Frequent Refills
A typical jar-style entrance feeder holds only a quart of syrup or less. During periods of high need, you may have to refill it daily, which can be inconvenient.
Poor Performance in Cold Weather
Bees form a tight cluster to stay warm in cool temperatures. If the entrance feeder is too far from the cluster, the bees will not break formation to travel to it, rendering it useless. Internal feeders (top or frame feeders) are much more effective in the cold as they are closer to the bees.
Making the Right Choice for Your Goal
Select your feeding strategy based on the specific needs of your colony and the time of year.
- If your primary focus is stimulating a small or new colony: An entrance feeder can work, but you must install an entrance reducer and monitor it daily for any signs of robbing.
- If your primary focus is preparing a strong colony for winter: A large-capacity top feeder is a far superior and safer choice for delivering gallons of syrup quickly.
- If your primary focus is absolute safety from robbing: An internal frame feeder or a top feeder are the best options, as the food source is entirely contained within the hive.
Ultimately, choosing the correct feeder is as important as the feed itself for ensuring your colony thrives.
Summary Table:
| Feeder Type | Best For | Key Risk |
|---|---|---|
| Entrance Feeder | Stimulating small/new colonies | High risk of robbing |
| Top Feeder | Large-volume feeding for winter | Low risk of robbing |
| Frame Feeder | Absolute safety from robbers | Must be placed inside the hive |
Equip Your Apiary with Confidence
Choosing the right feeding equipment is critical for your colony's success. At HONESTBEE, we supply commercial apiaries and beekeeping equipment distributors with the durable, reliable supplies needed for large-scale operations. From high-capacity top feeders to essential hardware, our wholesale-focused solutions help you manage your hives efficiently and safely.
Let's discuss your apiary's needs. Contact our team today to find the right equipment for your operation.
Visual Guide

Related Products
- White Plastic 0.5L Beekeeping Entrance Feeder for Bees
- HONESTBEE Entrance Bee Feeder Professional Hive Nutrition Solution for Beekeeping
- HONESTBEE Entrance Bee Feeder Efficient Hive Front Liquid Feeding Solution for Beekeeping
- Boardman Entrance Bee Feeder Durable Galvanized Steel and Wood Construction for Beekeeping
- HONESTBEE Professional Entrance Bee Feeder Hive Nutrition Solution
People Also Ask
- How do you make an entrance feeder for bees? A Guide to Safe & Effective Hive Feeding
- What types of bee feeders are available for beginners? Start with the Simple Entrance Feeder
- What is a bee entrance feeder and what are its drawbacks? Essential Guide to Hive Security and Feeding Efficiency
- How does a bee entrance feeder work? A Simple Guide to Convenient Hive Feeding
- What are the advantages and disadvantages of using an entrance feeder for bees? Balance Convenience and Hive Security.