Successful larval grafting depends on three things: very young larvae, precise handling, and a well-prepared cell-building colony. The essential process is to select larvae that appear as tiny “C” shapes or commas, lift them gently with a grafting tool, place them correctly into artificial queen cups, protect the grafts from chilling and contamination, and transfer them promptly to a strong queenless starter or cell-builder colony.
Core takeaway: The equipment standardizes the work, but larval age and handling determine success. Use the youngest suitable larvae, never bruise or invert them, and plan for natural rejection by grafting approximately 50% more cells than the number of queens required.
Prepare the Grafting System
Select the right queen-rearing equipment
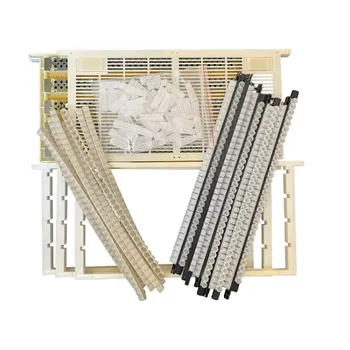
A practical grafting setup should include:
- Precision grafting tool, such as a flexible Chinese-style tool, fine needle, or probe
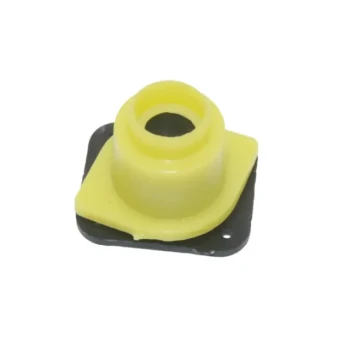
- Artificial queen cups, made from beeswax or plastic
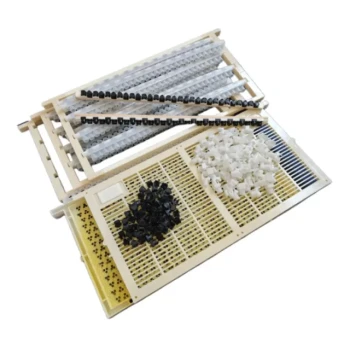
- Cell bars fitted to standard hive frames
- Queen cell bar frame
- Lighted magnifying glass or other suitable magnification
- Sharp scalpel for reducing donor-cell walls
- Wax heating vessel, water bath, or double-jacketed wax tank
- Cell former dowel, if producing wax cups
- Clean cloth for covering completed grafts
The equipment should be clean, organized, and positioned so that the operator can work quickly without exposing larvae unnecessarily.
Prepare artificial wax cups when required
Soak smooth wooden or glass formers in water before dipping them into clean beeswax. Re-moisten the formers between dips to reduce sticking.
Dip the formers approximately five times into beeswax melted just above its melting point, to a depth of about 5/16 inch. Once cooled, remove the cups and attach them to cell bars using molten wax.
Space the cups correctly
Attach cups approximately 25–50 mm, or 1–2 inches, apart. This gives nurse bees room to draw out the cells and allows completed queen cells to be removed without damaging neighboring cells.
A Langstroth frame cell bar may hold up to approximately 12 queen cells. A British Standard bar typically holds 8–10, depending on the frame and spacing used.
Prepare Larvae and the Cell Builder
Control the breeder queen’s laying date
For more consistent larval age, confine the breeder queen on empty comb approximately four days before grafting using a push-in queen cage.
This helps produce larvae that are at the desired early stage on grafting day. The preferred targets are generally under 24 hours old, while the broader practical limit is often under 36 hours.
Identify suitable larvae
Choose larvae that appear as tiny “C” shapes or commas floating on royal jelly. These are preferable to older, larger, or more developed larvae.
Use a magnifying glass when necessary. Consistent selection is particularly important in commercial production, where uneven larval age can produce uneven queen development.
Remove unsuitable larvae immediately
Discard larvae that are:
- Rolled over
- Bruised
- Torn or damaged
- Dry or visibly deteriorated
- Too old or excessively large
Damaged larvae are likely to be removed by worker bees and should not be used to fill a cell cup.
Prepare a strong starter colony
Assemble a queenless starter nuc or cell-building unit approximately two days before grafting. It should contain a high population of nurse bees together with adequate pollen or pollen patties and honey.
The objective is to create strong royal jelly production and prompt acceptance of the newly grafted larvae. A weak or poorly supplied starter colony can undermine otherwise careful grafting.
Perform the Grafting Procedure
1. Lay out the cell bars and tool
Place the cell bars with their artificial cups, the grafting tool, and any magnification equipment within easy reach.
If the cups require priming according to the operating method, complete that preparation before transferring larvae so the grafting process is not interrupted.
2. Expose the donor larva carefully
If the walls of the donor comb are high or obstruct the tool, pare them down carefully with a scalpel. This improves access and reduces the chance of scraping or crushing the larva.
Work over larvae that are still resting on royal jelly. Avoid unnecessary movement of the comb.
3. Lift the larva in one motion
Using a Chinese-style grafting tool or equivalent instrument, slide the tip down the cell wall and position it beneath the royal jelly and larva.
Lift the larva in a single, controlled upward motion. The purpose is to support the larva rather than hook, drag, or compress it.
4. Maintain the larva’s orientation
Do not flip the larva upside down during transfer. Larvae breathe through small lateral openings, and incorrect positioning can interfere with respiration.
Avoid bruising the body or removing the larva from the royal jelly for longer than necessary.
5. Deposit the larva into the cup
Move the tool to the artificial queen cup and place the larva near the center. With a plunger-style tool, push gently to release it.
The larva should remain properly oriented and supported by the material in the cup. If it is visibly damaged or incorrectly positioned, replace it rather than relying on a poor graft.
6. Protect a completed bar
After filling a bar of cups, cover it with a clean cloth. This helps maintain warmth and reduces exposure to contamination while the remaining bars are prepared.
Avoid leaving completed grafts exposed on the workbench.
7. Install the bar in the frame
Gently insert the filled cell bar into the cell bar frame with the cups facing downward. Cover the frame after installation.
Handle the frame carefully because freshly transferred larvae are vulnerable to disturbance.
8. Transfer the graft to the cell builder
Carry the covered frame promptly to the prepared cell-building unit. Remove the cloth and place the frame in the center of the starter or cell builder.
Record the date and time of grafting. This information is essential for monitoring development and coordinating later queen-cell management.
Manage Quantity and Quality
Plan for natural rejection
Some grafted larvae will fail to establish or will be rejected by nurse bees. For that reason, graft approximately 50% more cells than the number of viable queens required.
For example, producing 20 queens may require grafting approximately 30 cells, subject to the apiary’s actual acceptance and survival rate.
Standardize the workflow
Commercial operations benefit from a repeatable sequence:
- Prepare and inspect equipment.
- Select larvae within the target age range.
- Graft without unnecessary delays.
- Cover completed bars.
- Install them correctly in the frame.
- Transfer them to a strong starter.
- Record timing and batch information.
This approach makes performance easier to compare across operators, apiaries, and equipment suppliers.
Understanding the Trade-offs
Wax cups versus plastic cups
Wax cups can be produced using standard beekeeping materials and provide a traditional substrate for grafting. They require controlled dipping, cooling, removal from formers, and attachment to cell bars.
Plastic cups offer a standardized, ready-made alternative and can simplify preparation. However, they still require correct mounting, spacing, handling, and acceptance by the cell-building colony.
The choice should reflect production volume, labor availability, equipment compatibility, and the operator’s preferred workflow.
Manual tools versus magnified precision work
A basic grafting tool can be sufficient for experienced operators working with good-quality comb. Magnification becomes more valuable when larvae are extremely small, lighting is inconsistent, or high uniformity is required.
The tool does not compensate for poor larval selection. A well-designed setup improves consistency, but operator technique remains decisive.
Speed versus careful handling
Fast grafting reduces the time larvae are exposed to air and temperature changes. Excessive speed, however, can result in inverted, bruised, or misplaced larvae.
The correct objective is controlled efficiency: prepare everything in advance, then transfer each larva with one deliberate lift and placement.
Common handling failures
The most damaging mistakes include:
- Selecting larvae that are too old
- Scraping or crushing larvae against the cell wall
- Flipping larvae upside down
- Leaving completed grafts uncovered
- Using a weak or poorly provisioned starter colony
- Crowding cups too closely on the cell bar
- Failing to record grafting time
- Grafting only the exact number of queens required
Avoiding these errors is usually more valuable than adding complexity to the equipment setup.
Making the Right Choice for Your Goal
A reliable grafting operation depends on matching equipment, labor, and colony preparation to the intended production scale.
- If your primary focus is small-scale queen production: Use a dependable grafting tool, magnification, correctly spaced cups, and a strong queenless starter prepared in advance.
- If your primary focus is commercial production: Standardize cell bars, cup spacing, grafting tools, timing records, and replacement rates across every batch.
- If your primary focus is equipment sourcing: Prioritize suppliers that can provide grafting tools, artificial cups, cell bars, frames, wax-heating equipment, and related components as a coordinated system.
- If your primary focus is rapid order fulfillment: Maintain ready access to consumable cups, replacement grafting tools, cell bars, and wax-processing equipment so production is not interrupted.
With young larvae, precise equipment, disciplined handling, and adequate cell-builder capacity, grafting becomes a repeatable foundation for high-quality queen production.
Summary Table:
| Step | Key Considerations |
|---|---|
| Equipment Setup | Use precision grafting tool, artificial queen cups, cell bars, magnification, and clean cloth to ensure efficiency and minimize contamination. |
| Larval Selection | Choose tiny 'C' or comma-shaped larvae under 24-36 hours old; remove damaged or old larvae. |
| Grafting Process | Lift larvae gently with one motion, maintain orientation, deposit in cup center, cover bars, and transfer promptly to a queenless starter. |
| Quantity Planning | Graft 50% more cells than needed to compensate for natural rejection. |
| Quality Management | Record grafting date/time, standardize workflow, avoid common handling failures for consistent results. |
Ready to optimize your queen-rearing operation with top-quality grafting tools and equipment? HONESTBEE offers a comprehensive range of precision instruments, artificial cups, and cell-rearing supplies tailored for commercial apiaries and distributors. Benefit from our one-stop sourcing, rapid fulfillment, and expert support to enhance your grafting success and efficiency. Contact us today to discover how we can streamline your production and boost your bottom line — Get in touch with HONESTBEE now.
Related Products
- Retractable Chinese Queen Rearing Grafting Tools Equipment
- Plastic Beekeeping Honey Bee Larvae Grafting Tools for Queen Rearing and Chinese Grafting
- Stainless Steel Queen Grafting Tool for Beekeeping and Bee Queen Grafting
- HONESTBEE Improved No Grafting Queen Rearing Kit For Queen Rearing and Royal Jelly Production
- Clear Black Plain Polystyrene Queen Bee Grafting Cell Cups No Lug for Bee Queen Cup
People Also Ask
- Which specialized tools are necessary for implementing standardized queen rearing? Scale Your High-Yield Apiary
- How does selective queen rearing benefit an apiary? Discover Essential Tools for High-Quality Queen Bees
- Why are specialized queen rearing tools necessary to mitigate winter hive losses? Boost Apiary Survival and Recovery
- What operational workflows and queen rearing tools are required for implementing instrumental insemination and isolated mating in commercial queen breeding programs?
- How do queen-rearing tools facilitate the sustainability and expansion of a commercial apiary? Drive Scalable Growth