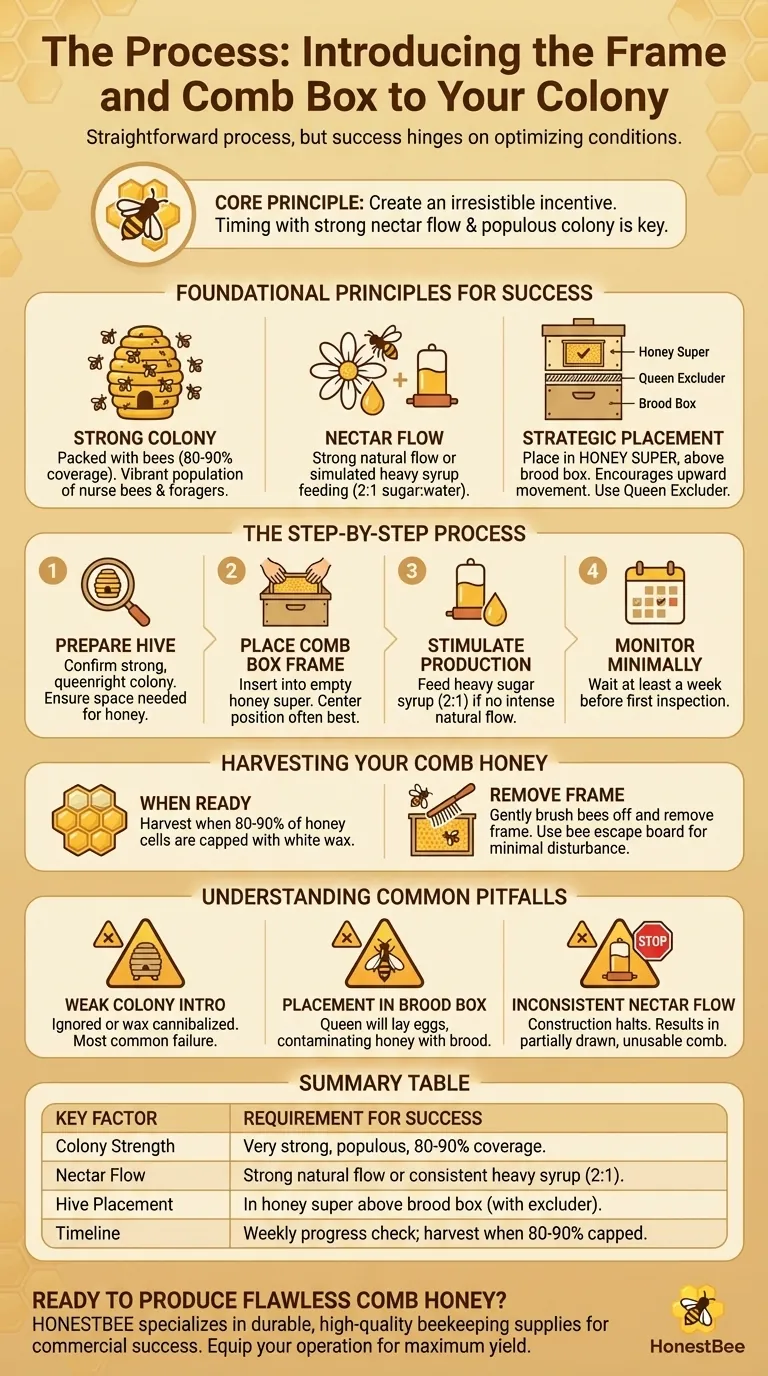
The process is straightforward, but its success hinges entirely on the right conditions within the hive. To introduce a frame and comb box, you place the complete unit into a honey super on a very strong, healthy colony and provide a heavy sugar syrup feed to stimulate wax production and honey storage.
The core principle is not just to add equipment, but to create an irresistible incentive for your bees. Success depends on timing the introduction with a strong nectar flow (natural or simulated) and using a powerful, populous colony that has the resources to spare for building perfect comb honey.
Foundational Principles for Success
Before you place the box in the hive, you must ensure the conditions are optimized. Simply adding the equipment without the right hive environment will result in the bees ignoring it.
The Critical Role of a Strong Colony
A "strong" colony is one that is packed with bees, covering at least 80-90% of the frames in the brood box. It should have a vibrant population of nurse bees and foragers, a consistent brood pattern from a healthy queen, and be visibly thriving.
Weak or moderately-sized colonies will not have the surplus population or resources to dedicate to drawing out new comb in a separate box. They will prioritize the needs of the brood nest first.
The Importance of a Nectar Flow
Building beeswax is one of the most energy-intensive activities for a honeybee. They will only engage in large-scale comb construction when they have an abundance of incoming resources.
This is why introducing the comb box during a strong natural nectar flow is the ideal scenario. If a natural flow is absent or weak, you must simulate one by feeding.
Strategic Placement in the Hive
The comb box frame should be placed inside a honey super, not directly in the brood box. The goal is to produce pure honey, not to have the queen lay eggs in your new comb.
Position this honey super directly on top of the uppermost brood box. This encourages the bees to move upward into the new space as they run out of room below, making it the next logical place for them to build and store honey.
The Step-by-Step Process
With the foundational principles understood, the execution is methodical and precise.
Step 1: Prepare the Hive
Before starting, perform a quick inspection to confirm the colony is indeed strong, queenright, and disease-free. Ensure they have sufficient room in the brood nest but will soon need more space for honey.
Step 2: Place the Comb Box Frame
Place the fully assembled frame and comb box unit into an empty honey super. It's often best to place it in the center, flanked by one or two drawn-out frames on either side to entice the bees upward into the super.
Step 3: Stimulate Production with Feeding
If you are not in a period of intense nectar flow, you must feed the colony a heavy sugar syrup. The standard ratio for this is 2 parts sugar to 1 part water. This thick syrup mimics a rich nectar source and provides the carbohydrates necessary for wax production.
Step 4: Monitor with Minimal Disturbance
Wait at least a week before your first inspection. A "couple of days" is rarely enough time to see significant progress. After a week, you can quickly check to see if the bees are drawing out the foundation and starting to fill the cells.
Harvesting Your Comb Honey
Once the bees have done their work, the final steps are about carefully removing the product.
Step 5: Determine When the Comb is Ready
The comb sections are ready for harvest when at least 80-90% of the honey cells are capped with a layer of white wax. Uncapped cells contain nectar that is not yet cured into honey and will ferment if harvested.
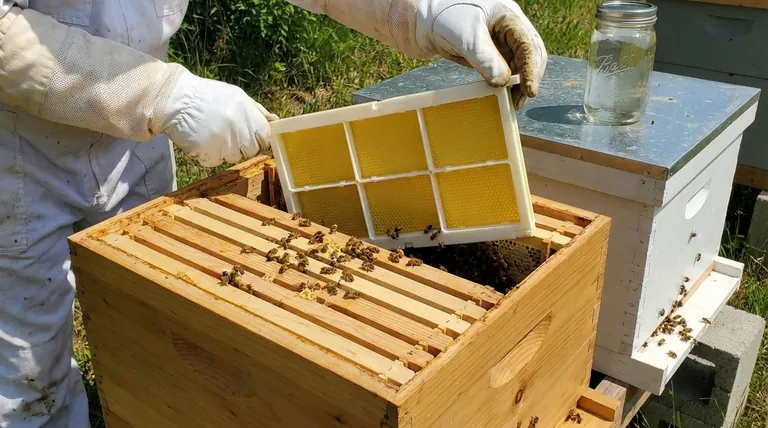
Step 6: Remove the Frame and Clear the Bees
Once the comb is capped, remove the entire frame from the hive. Gently brush the bees off the frame and back into the entrance of the hive using a soft bee brush. Work quickly but calmly to minimize disruption. An alternative is to use a bee escape board 24 hours prior to removal, which clears the super of most bees with very little disturbance.
Understanding the Common Pitfalls
Many beekeepers fail on their first attempt because they overlook a key variable. Understanding these common mistakes is crucial for success.
Pitfall: Introducing to a Weak Colony
This is the most common reason for failure. A colony that is struggling to maintain its own population will see the new comb box as irrelevant. They will ignore it completely, or even cannibalize the wax foundation for use elsewhere in the brood nest.
Pitfall: Placing the Frame in the Brood Box
While it may seem intuitive to put the frame where the most bees are, placing it in the brood nest itself is a significant risk. The queen will likely see the pristine new cells as the perfect place to lay eggs, contaminating your comb honey with brood. To prevent this, some beekeepers place a queen excluder between the brood boxes and the honey super containing the comb frame.
Pitfall: An Inconsistent Nectar Flow
If the natural nectar flow suddenly stops or if you are inconsistent with your feeding schedule, the bees will halt construction immediately. This often results in partially drawn, unfilled, and unusable comb sections. Consistency is key.
Applying This to Your Apiary
Your approach should be tailored to your specific conditions and goals.
- If your primary focus is a successful first attempt: Be patient and wait for a peak nectar flow to start, and only give the comb box to your absolute strongest hive.
- If you are working during a nectar dearth: Commit to a consistent and uninterrupted feeding schedule of heavy syrup until the combs are fully drawn and capped.
- If your goal is to guarantee pure, brood-free comb honey: Always use a queen excluder between your brood chamber and the honey super containing the comb box frame.
By understanding the bees' motivations and providing them with the right resources at the right time, you can guide them to produce perfect comb honey.
Summary Table:
| Key Factor | Requirement for Success |
|---|---|
| Colony Strength | Very strong, populous colony covering 80-90% of brood frames |
| Nectar Flow | Strong natural flow or consistent heavy syrup feeding (2:1 sugar:water) |
| Hive Placement | In a honey super above the brood box, often with a queen excluder |
| Timeline | Monitor progress weekly; harvest when 80-90% of cells are capped |
Ready to produce flawless comb honey?
As HONESTBEE, we specialize in supplying the durable, high-quality beekeeping supplies and equipment that commercial apiaries and distributors rely on for consistent success. Our wholesale-focused operations ensure you get the right tools—from robust honey supers to reliable feeders—to create the ideal conditions for comb production in your hives.
Let us help you equip your operation for maximum yield. Contact our team today to discuss your wholesale needs.
Visual Guide
Related Products
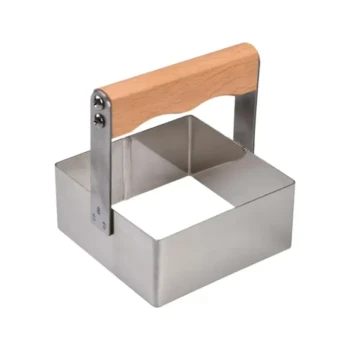
- Plastic Honey Comb Frames Cassette Box for Honey
- Heart-Shaped Comb Honey Frame and Honeycomb Cassette
- Heavy Duty Stainless Steel Honeycomb Cutter
- Professional Frame Comb Fork and Lifter for Efficient Handling
- Australian Langstroth Beehive Boxes for Beekeeping Wholesales
People Also Ask
- How is the shaking method utilized to remove bees from honey frames? Master This Cost-Effective Clearing Technique
- How can a beekeeper determine which frames are ready for honey harvesting? Master the 80% Rule for Premium Quality
- What is the significance of sampling honeycomb frames and hive bottoms? A Guide to Scientific Sanitation Monitoring
- How should honey frames be positioned in Langstroth and Warre hives for winter survival? Expert Hive Setup Tips
- How is the specialized honeycomb frame reset after honey extraction? Master Efficient Hive Management