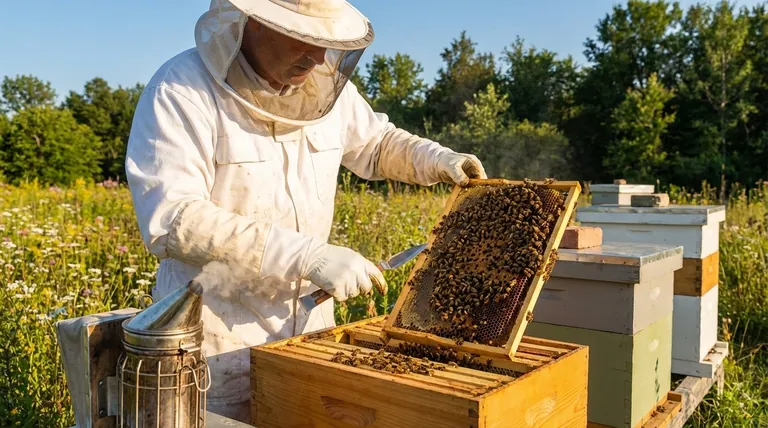
During a hive inspection, your primary goal is to assess the colony's overall health and productivity. You should systematically check for the presence and health of the queen, evaluate the brood pattern, assess the population size, check food stores like honey and pollen, and look for any signs of pests or diseases. This process is a diagnostic check-up, not just a casual look.
A hive inspection is less about a rigid checklist and more about understanding the story the colony is telling you. Your role is to interpret signs of health, stress, or growth to make informed decisions that support the hive's success.
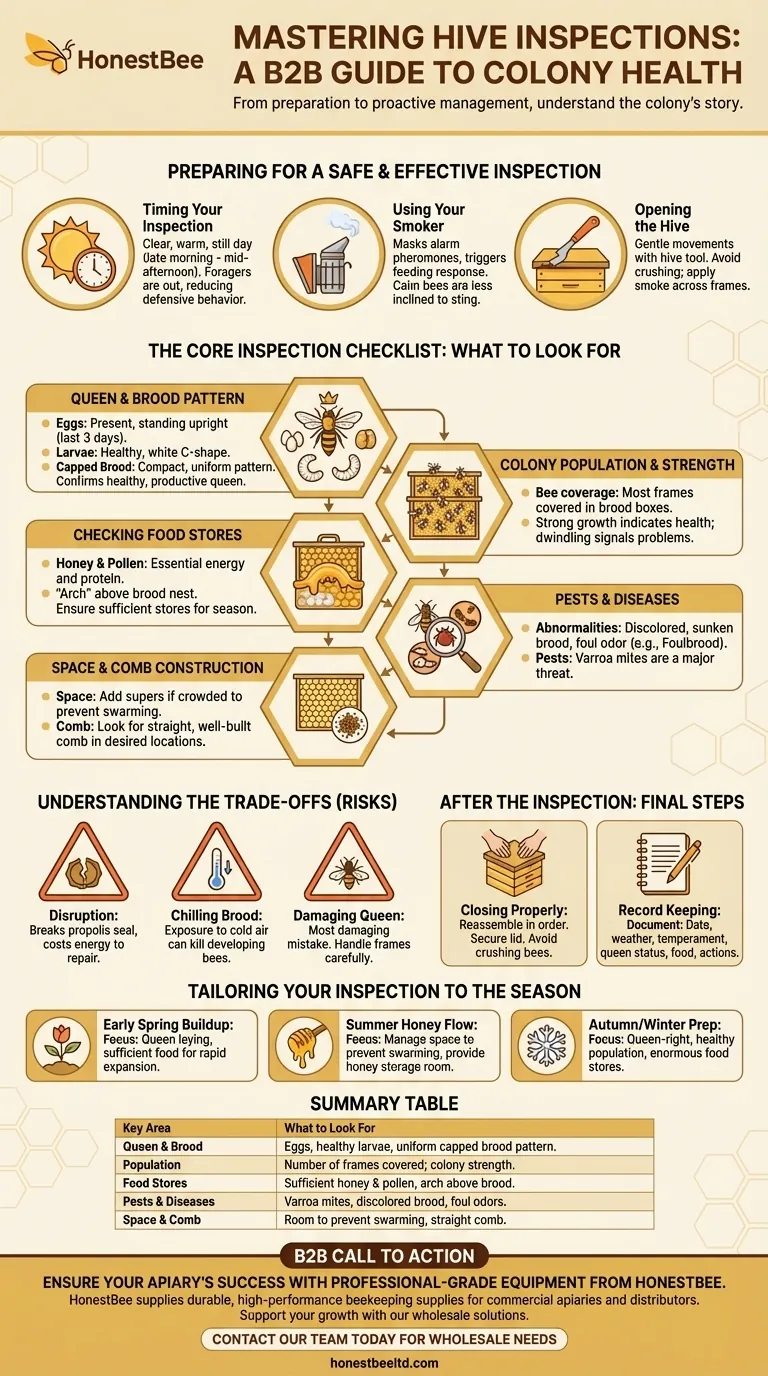
Preparing for a Safe and Effective Inspection
Before you even touch the hive, proper preparation is critical to ensure the inspection is calm and productive for both you and the bees.
Timing Your Inspection
The ideal time to inspect a hive is on a clear, warm, and still day, typically between late morning and mid-afternoon.
During this window, a large portion of the forager bees will be out of the hive, reducing traffic and defensive behavior at the entrance. The warm sun also makes it easier to see eggs and young larvae within the comb cells.
Using Your Smoker Correctly
A smoker is your most important tool for calming the colony. Puff a small amount of cool, white smoke into the hive entrance and wait a minute or two before opening.
The smoke masks the bees' alarm pheromones and triggers a feeding response, causing them to gorge on honey. A bee with a full stomach is less inclined and physically less able to sting.
Opening the Hive with Care
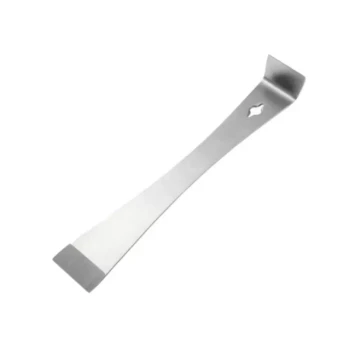
Use your hive tool to gently pry apart the hive components, such as the lid and inner cover. Avoid sudden, jarring movements that can crush bees and provoke a defensive reaction.
Once the lid is off, apply another gentle puff of smoke across the top of the frames before you begin removing them.
The Core Inspection Checklist: What to Look For
Each part of your inspection gives you a clue about the colony's condition. Your job is to piece these clues together.
Assessing the Queen and Brood Pattern
This is the most critical part of the inspection. A healthy queen is the heart of the colony.
Look for eggs, which appear as tiny white grains of rice at the bottom of a cell. Their presence confirms the queen has been laying within the last three days.
Examine the larvae (small, white, C-shaped grubs) and the capped brood. A healthy brood pattern is compact and uniform, with few empty cells. This indicates a well-mated, productive queen.
Evaluating Colony Population and Strength
A strong colony will have bees covering most of the frames in the brood boxes.
Note the number of frames with bees. A growing population is a sign of a healthy hive, while a dwindling population can signal problems with the queen, disease, or a lack of resources.
Checking Food Stores
Bees need honey for energy and pollen for protein to feed the young. You should see frames containing both.
A healthy hive will have an "arch" of honey and pollen above the brood nest. Ensure the colony has sufficient stores, especially heading into winter or during a nectar dearth.
Looking for Signs of Pests and Diseases
Carefully examine the brood and adult bees for any abnormalities. Look for discolored or sunken brood, foul odors, or deformed bees, which can be signs of diseases like Foulbrood or viruses.
Also, check for pests, particularly the Varroa mite. These small, reddish-brown parasites are a major threat to honey bee health.
Assessing Space and Comb Construction
Finally, evaluate if the bees have enough space. Bees that are running out of room may prepare to swarm, which is their natural method of reproduction.
Look for straight, well-built comb. If the bees are building comb in undesirable places or the brood boxes are becoming packed with bees and resources, it is time to add another box (super) for them to expand into.
Understanding the Trade-offs of Inspection
While necessary, every inspection disrupts the colony's delicate internal environment and carries inherent risks.
The Cost of Disruption
Opening the hive breaks the propolis seal the bees create to protect their home from weather and pests. It also forces them to spend energy and resources repairing this seal and re-establishing the hive's internal climate.
The Risk of Chilling Brood
The brood nest is kept at a precise temperature (around 95°F or 35°C). Exposing the brood frames to cool outside air for too long, especially on a cold or windy day, can chill and kill the developing bees.
The Danger of Damaging the Queen
The single most damaging mistake during an inspection is accidentally killing the queen. She is often surrounded by other bees and can be hard to spot. Always handle frames with gentle, deliberate movements to avoid crushing her between frames or dropping her.
After the Inspection: Final Steps and Record Keeping
What you do after the inspection is just as important as the inspection itself.
Closing the Hive Properly
Once your assessment is complete, reassemble the hive in the same order you took it apart. Work carefully to avoid crushing bees between the boxes. Replace the inner cover and lid securely.
The Importance of Detailed Notes
Your memory will fail you. Immediately after closing the hive, record your observations. Note the date, weather, hive temperament, queen status, brood condition, food stores, and any actions taken. These records are invaluable for tracking progress and making future management decisions.
Tailoring Your Inspection to the Season
Your focus during an inspection should change with the beekeeping calendar.
- If your primary focus is early spring buildup: Prioritize confirming the queen is laying well and that the colony has enough food to fuel its rapid expansion.
- If your primary focus is the summer honey flow: Concentrate on managing space to prevent swarming and to provide ample room for honey storage.
- If your primary focus is preparing for autumn and winter: Verify the colony is queen-right, has a healthy population, and possesses enormous food stores to survive the cold months.
Regular, methodical inspections are the foundation of proactive and successful beekeeping.
Summary Table:
| Key Inspection Area | What to Look For |
|---|---|
| Queen & Brood | Eggs, healthy larvae, uniform capped brood pattern. |
| Population | Number of frames covered by bees; strength of the colony. |
| Food Stores | Sufficient honey and pollen, especially an 'arch' above the brood nest. |
| Pests & Diseases | Signs of Varroa mites, discolored/sunken brood, foul odors, or deformed bees. |
| Space & Comb | Enough room to prevent swarming; straight, well-built comb. |
Ensure your apiary's success with professional-grade equipment from HONESTBEE.
A thorough hive inspection is fundamental, but it's only as effective as the tools you use. For commercial apiaries and beekeeping equipment distributors, reliability and efficiency are non-negotiable. HONESTBEE supplies the durable, high-performance beekeeping supplies and equipment you need to conduct inspections confidently and manage your colonies effectively.
We understand the demands of large-scale operations. Our wholesale-focused model is designed to provide you with the consistent quality and volume required to maintain a thriving, productive business.
Ready to equip your operation for peak performance? Contact our team today to discuss your wholesale needs and discover how HONESTBEE can support your growth.
Visual Guide
Related Products
- Professional Large-Format Hive Number Set for Beekeeping
- Durable Plastic Hive Number Set for Beekeeping
- Professional Engraved Round Hive Number Tags for Beekeeping
- Modern Flat-Mount Hive Number Set for Beekeeping
- Precision Stainless Steel Frame Cleaner for Hive Grooves and Corners
People Also Ask
- What are the core functions provided by professional bee hives? Enhance Urban Apiculture with Professional Solutions
- What are the structural advantages of bee hives with high-efficiency ventilation? Prevent Honeycomb Thermal Collapse
- How does the design of improved beekeeping hives contribute to maintaining honey quality and purity? Enhancing Purity
- What factors determine the necessary hive configuration for an apiary? Optimize Hive Setup for Better Colony Survival
- How do professional beekeeping hives and isolation breeding equipment contribute to the conservation of bee sub-species?