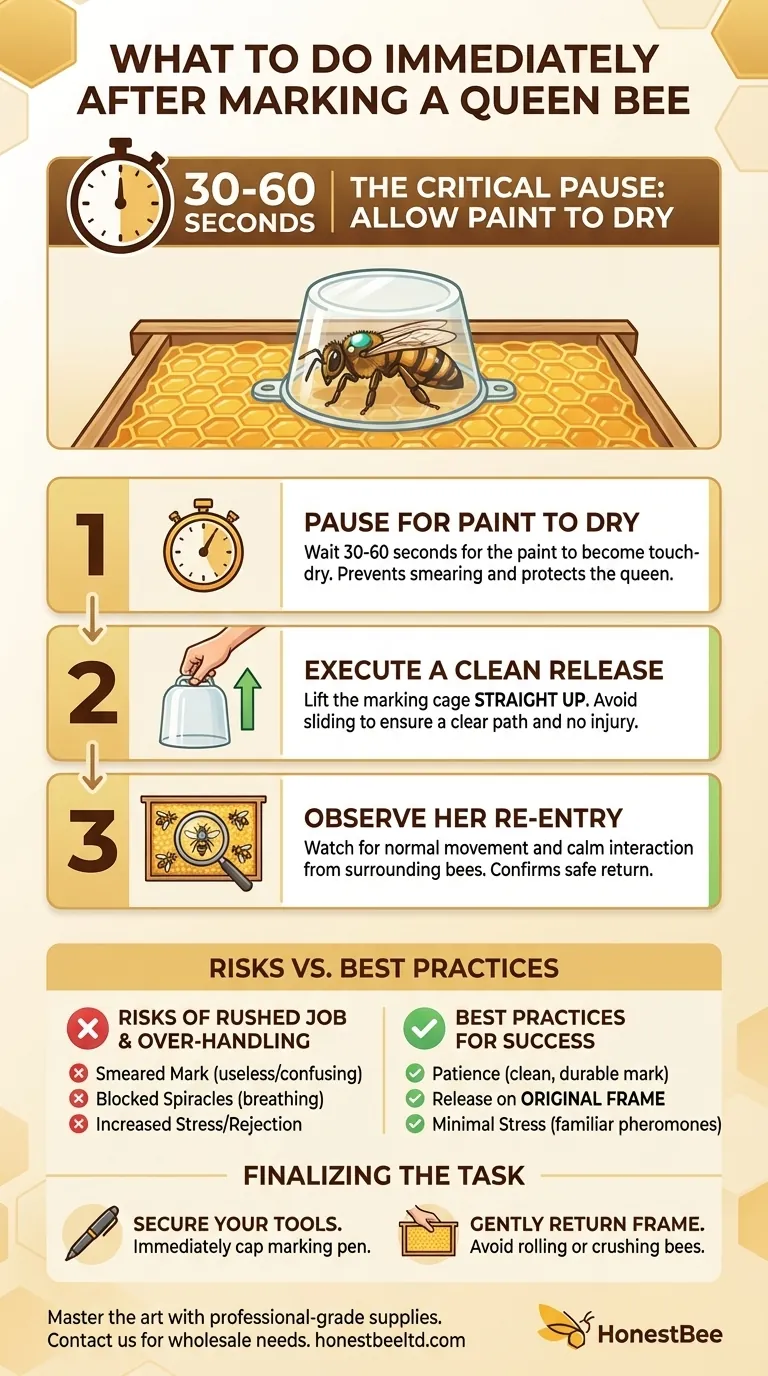
Immediately after marking a bee, you must pause for 30-60 seconds to allow the paint to become touch-dry. Once the paint is set, lift the marking cage straight up to release the queen back onto the frame she came from. Releasing her too quickly while the paint is wet will smear the mark and defeat the purpose of the task.
The most common mistake in queen marking is rushing the release. The goal is not just to apply paint, but to ensure a clean, durable mark, which requires a brief moment of patience after application to let the paint dry.
The Critical Steps Immediately After Marking
Successfully marking your queen is a process of calm, deliberate actions. What you do in the minute after applying the paint is just as important as how you held her.
Step 1: Pause and Allow the Paint to Dry
The single most important step after applying the dot of paint is to wait. Keep the queen gently contained under your marking cage for approximately 30 to 60 seconds.
This pause is non-negotiable. It allows the paint to form a skin and become touch-dry, preventing it from smearing when she moves or is touched by other bees.
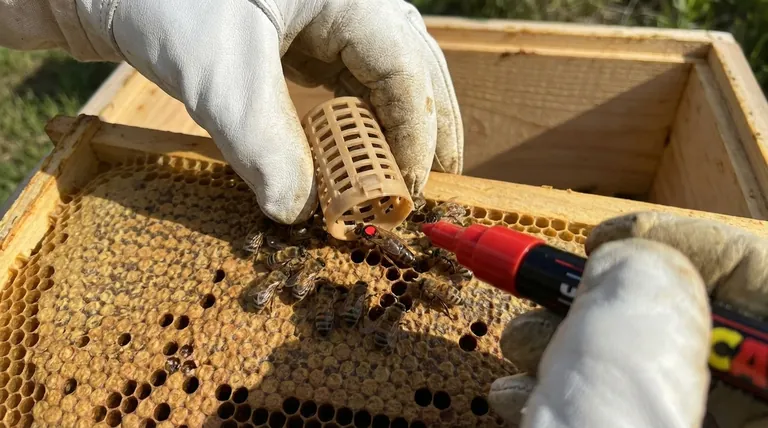
Step 2: Execute a Clean Release
Once the paint is dry, the release must be precise. Lift the marking cage straight up, away from the comb.
Avoid sliding the cage, as this can still smudge the fresh mark or injure the queen. The goal is to give her a clear path to walk away undisturbed.
Step 3: Observe Her Re-entry
Do not immediately put the frame away. Watch the queen for a few moments as she begins to move among the other worker bees on the frame.
You are looking for two things: that she is moving normally and appears uninjured, and that the surrounding bees are interacting with her calmly. This confirms she has been safely returned and is being accepted by the colony.
Understanding the Risks and Best Practices
While the process is straightforward, awareness of the risks helps ensure a successful outcome every time. The primary tension is between working efficiently and ensuring the queen’s safety.
The Pitfall of a Rushed Job
Some advice suggests releasing the queen "quickly," but this is often misinterpreted. It means the action of lifting the cage should be swift, not that you should release her while the paint is still wet.
A smeared mark is useless. It can also get on other bees, causing confusion, or block the queen's spiracles (breathing pores) if it runs. The small amount of time you save by rushing is not worth the risk of a failed marking.
The Danger of Over-Handling
The counter-risk is holding the queen for too long. Extended handling or confinement increases her stress and the chance of injury.
It also slightly increases the risk of the colony rejecting her, as she may pick up foreign scents. This is why the 30-60 second drying window is the ideal balance between a clean mark and minimal stress.
Maintaining Hive Scent and Acceptance
Always release the queen back onto the exact same frame you took her from. This ensures she is immediately surrounded by her own familiar pheromones and attendant bees, which is critical for seamless re-acceptance into the colony.
Finalizing the Task
With the queen safely marked and returned to her workers, the final steps are about closing out your work cleanly.
Secure Your Tools
Immediately place the cap back on your marking pen. These pens dry out very quickly, and forgetting this simple step can ruin a new tool.
Gently Return the Frame
When you are ready, slowly and carefully place the frame back into the hive. Be mindful to not roll or crush any bees, paying special attention to the location of your newly marked queen.
Making the Right Choice for Your Goal
Your approach to marking should be guided by the ultimate objective: a healthy, productive hive with an easily identifiable queen.
- If your primary focus is a successful, durable mark: Prioritize the 30-60 second drying time above all else before releasing the queen.
- If your primary focus is minimizing stress on the queen: Handle her gently, work calmly, and ensure the entire process from capture to release is smooth and efficient.
- If your primary focus is hive stability: Always release the queen onto her original frame and observe her for a moment to confirm she is accepted before closing up the hive.
Mastering this small but critical procedure is a cornerstone of confident and effective beekeeping.
Summary Table:
| Step | Action | Key Detail |
|---|---|---|
| 1 | Pause for Paint to Dry | Wait 30-60 seconds for paint to become touch-dry. |
| 2 | Execute a Clean Release | Lift the marking cage straight up to avoid smudging. |
| 3 | Observe Re-entry | Watch for normal movement and calm acceptance by workers. |
Master the art of queen marking with professional-grade supplies from HONESTBEE.
Whether you manage a commercial apiary or distribute beekeeping equipment, using the right tools is essential for efficiency and the health of your colonies. Our wholesale-focused operations provide durable, reliable marking cages, non-toxic paints, and other essential gear designed for beekeepers who demand precision.
Let HONESTBEE be your trusted partner. Contact our team today to discuss your wholesale needs and ensure your beekeeping operations are a success.
Visual Guide
Related Products
- Queen Bee Marking Pen POSCA Queen Marking Pens for Beekeeping Bee Markers
- Queen Bee Marking Pen UNI Medium Point for Queen and Bee Marking
- Plastic Long Marker Device for Catching and Marking Bees Queen Bee Marking Tube and Cage
- Queen Bee Marking Tube Cage Bottle Catcher Holder with Clear Plastic Plunger Marker
- One Hand Yellow Queen Marking Catcher Tube Cage Beekeeper Tool Accessory for Queen Bee
People Also Ask
- How should a new paint pen be primed before marking a queen bee? Essential Tips for Safe & Clear Markings
- What specifications are required for a high-quality queen bee marking pen? Ensure Safety and Precision for Your Colony
- Why are specialized marking pens used for stingless bee queens? Essential Tools for Large-Scale Breeding Success
- What type of markers are commonly used for marking Queen bees? Choose the Safe, Non-Toxic Standard
- How should a queen bee marking pen tip be properly primed? Master the Art of Safe Queen Marking