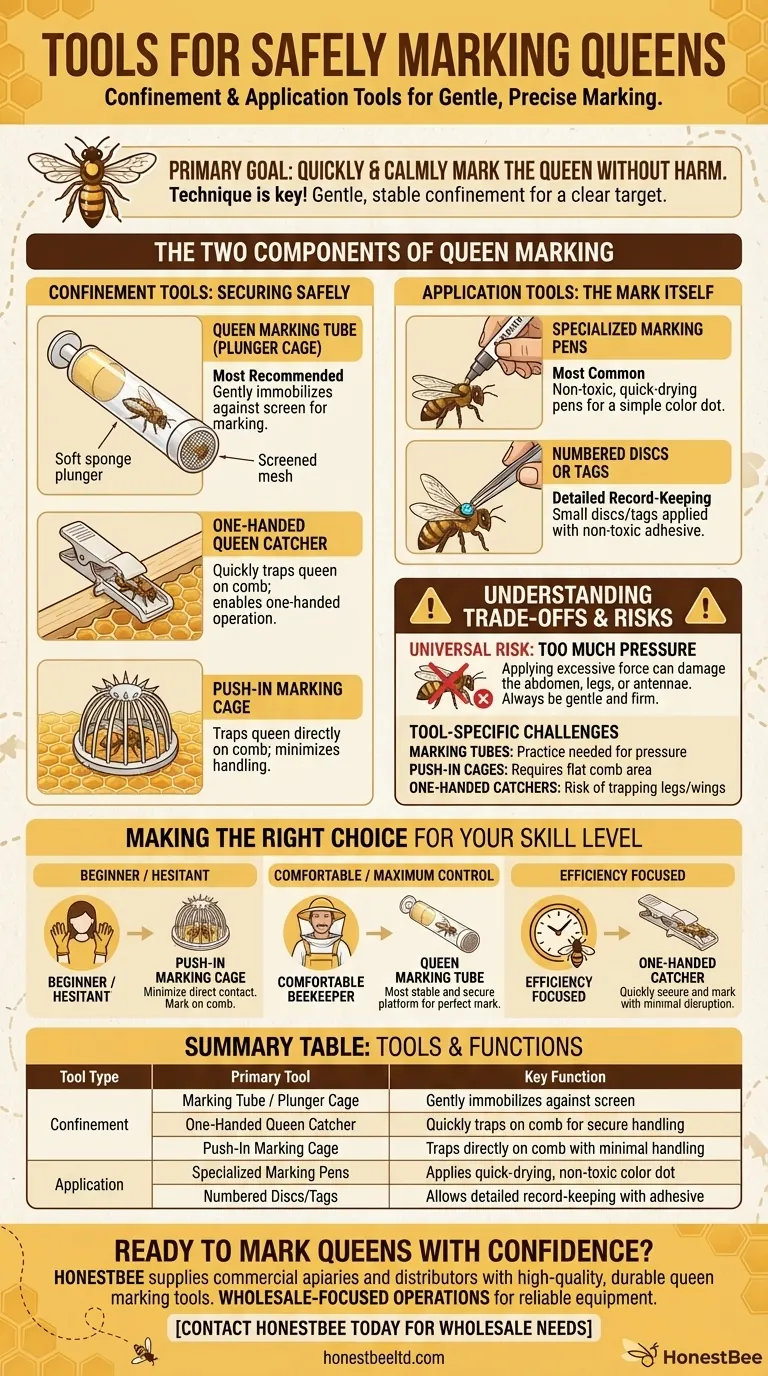
The primary tools for safely marking a queen bee fall into two categories: confinement devices and applicators. Confinement tools, such as marking tubes and cages, are designed to gently immobilize the queen, while applicators like specialized pens or numbered discs are used to apply the physical mark to her thorax. The goal of any tool combination is to perform the task quickly and calmly, preventing any harm to the queen.
The specific tool you choose is less important than the technique. A successful marking relies on gentle, stable confinement that minimizes stress on the queen and provides a clear target for a quick, precise application of the mark.
The Two Components of Queen Marking
Successfully marking a queen isn't about a single magic tool, but a combination of two: one for safely holding her and one for applying the mark.
Confinement Tools: Securing the Queen Safely
The primary challenge is to hold the queen still without causing injury or panic.
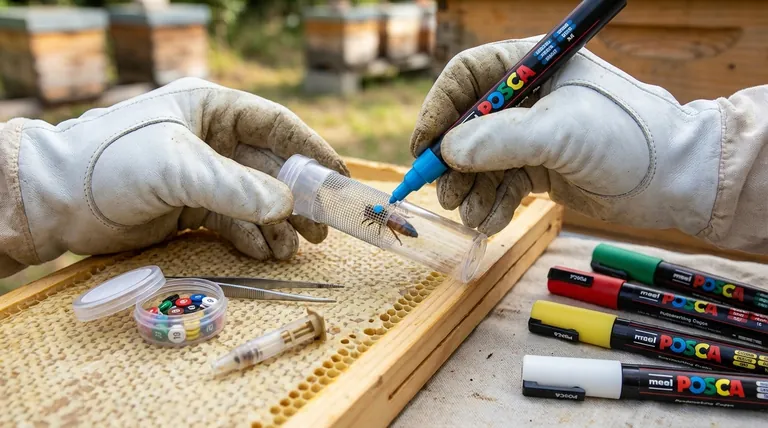
Queen Marking Tube (Plunger Cage) This is one of the most popular and recommended tools. It consists of a tube with a soft foam or sponge plunger and a screened end. The queen is guided into the tube, and the plunger is gently pushed forward until she is held softly against the screen, exposing her thorax for marking.
One-Handed Queen Catcher This tool often resembles a large clip or a small cage with a sliding gate that can be operated with one hand. It is designed to quickly and gently trap the queen directly on the surface of the comb, after which she can be marked or transferred to a plunger cage.
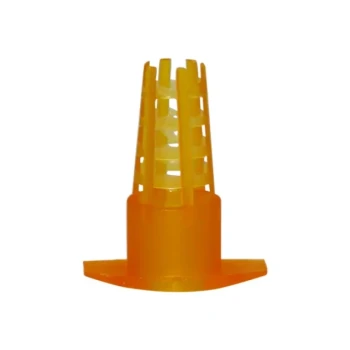
Push-In Marking Cage This is a small, round cage with points around the edge. It is placed over the queen directly on the comb and pushed gently into the wax. This traps her underneath, providing a secure area to apply the mark without ever picking her up.
Application Tools: The Mark Itself
Once the queen is immobilized, the mark must be applied quickly and safely.
Specialized Marking Pens These are the most common tools for application. They are paint-filled pens that are non-toxic to bees and dry quickly. They allow for a simple dot of color to be placed directly on the queen's thorax.
Numbered Discs or Tags For more detailed record-keeping, small, colored discs with numbers can be used. These are applied to the queen's thorax using a tiny amount of a specific, non-toxic adhesive like shellac. This method requires more precision and a steadier hand.
Understanding the Trade-offs and Risks
While these tools significantly improve safety, no method is entirely without risk. Understanding the potential pitfalls is key to preventing them.
The Universal Risk: Applying Too Much Pressure
The single biggest danger is damaging the queen by applying too much pressure. Whether using a plunger or your fingers, excessive force can crush her abdomen or damage a leg or antenna. The correct technique is always gentle and firm, but never forceful.
Tool-Specific Challenges
Marking Tubes can be intimidating for beginners, as you must first get the queen from the comb into the tube. Applying just the right amount of pressure with the plunger takes a bit of practice.
Push-In Cages are excellent for avoiding direct handling but require a flat area of comb. If the comb is uneven or covered in capped brood, it can be difficult to secure the cage without harming the queen or brood.
One-Handed Catchers are fast but require care to ensure you don't accidentally trap one of the queen's legs or wings in the mechanism as it closes.
Making the Right Choice for Your Skill Level
Your choice of tool should match your comfort level and beekeeping goals.
- If you are a beginner or hesitant to handle the queen directly: Start with a push-in marking cage, which allows you to mark her on the comb with minimal direct contact.
- If you are comfortable picking up the queen but want maximum control: Use a queen marking tube with a plunger, as it provides the most stable and secure platform for a perfect mark.
- If your primary focus is speed and efficiency during inspections: A one-handed queen catcher is an excellent tool for quickly securing and marking the queen with minimal disruption to the colony.
Ultimately, confidence and a steady hand are your most important tools for successfully marking a queen.
Summary Table:
| Tool Type | Primary Tool | Key Function |
|---|---|---|
| Confinement | Marking Tube / Plunger Cage | Gently immobilizes the queen against a screen for marking. |
| Confinement | One-Handed Queen Catcher | Quickly traps the queen on the comb for secure handling. |
| Confinement | Push-In Marking Cage | Traps the queen directly on the comb with minimal handling. |
| Application | Specialized Marking Pens | Applies a quick-drying, non-toxic dot of color to the thorax. |
| Application | Numbered Discs/Tags | Allows for detailed record-keeping with adhesive application. |
Ready to mark your queens with confidence and precision?
HONESTBEE supplies commercial apiaries and beekeeping equipment distributors with the highest-quality, durable queen marking tools. Our wholesale-focused operations ensure you get the reliable equipment you need to maintain healthy, productive hives.
Contact HONESTBEE today to discuss your wholesale needs and equip your operation for success!
Visual Guide
Related Products
- Plastic Queen Marking Tube Cage with Plunger for Beekeeping
- One Hand Yellow Queen Marking Catcher Tube Cage Beekeeper Tool Accessory for Queen Bee
- Queen Bee Marking Tube Cage Bottle Catcher Holder with Clear Plastic Plunger Marker
- Plastic Long Marker Device for Catching and Marking Bees Queen Bee Marking Tube and Cage
- Plastic Queen Bee Catcher Marker Tube Holder for Queen Marking Bottle
People Also Ask
- What tools can be used to safely secure a queen bee while marking her? Top Solutions for Professional Beekeepers
- What tool is recommended for safe and efficient queen marking? The Essential Guide for Beekeepers
- What are the three primary methods for immobilizing a queen bee for marking? Master Safe Queen Marking Techniques
- What is the function of a queen cage and queen marking? Enhance Hive Management & Tracking Efficiency
- How does a queen marking tube facilitate the marking process? Enhance Safety and Precision in Your Apiary