Using a bee frame wiring jig involves clamping the wooden frame securely into the device, driving anchor nails into the side bars, and threading wire through the pre-drilled holes and jig spools. You then systematically tighten the wire to high tension and secure it by wrapping it around the nails before driving them flush into the wood.
The primary purpose of a wiring jig is to hold the frame rigid while you apply significant tension to the horizontal wires. This ensures the wire is tight enough to "sing" when plucked—providing essential support for the wax foundation—without warping the frame or requiring three hands.
Preparing the Frame
Securing the Component
Place your wooden frame into the jig.
Engage the clamp mechanism to hold the frame firmly in place. This rigidity is essential for achieving proper wire tension later in the process.
Setting the Anchors
Locate the lower sides of the side bars.
Drive a 3/4 inch nail partially into the wood, approximately 3/8 inch from the bottom bar.
Do not drive the nail flush yet; leave about 3/8 inch of the nail head protruding. This exposed section will act as the anchor point for your wire.
Installing the Wire
Threading the Path
Feed the wire through the pre-drilled holes in the frame bars.
Route the wire over the jig's spools or wheels. These guides help prevent the wire from kinking and reduce friction during the tightening process.
Continue threading until you exit the last hole, leaving a tail of 5 to 6 inches of wire protruding.
Anchoring the Start
Take the loose 5-6 inch tail of wire you just threaded.
Twist it tightly around the nearest anchor nail for four complete revolutions.
Once the wire is wrapped, hammer the nail flush into the wood. This traps the wire securely. Pull on the excess wire tail to snap it off cleanly.
Tensioning and Finalizing
Systematically Removing Slack
This is the most critical step. Do not try to tighten the entire length at once.
Tighten the wire in stages, starting from the anchored end and moving toward the spool.
Pull each section taut by hand. Simultaneously, rotate the wire spool backward to take up any slack created in the line.
The Final Anchor
Once the wire is taut across the entire frame, maintain the tension.
Twist the wire around the second anchor nail four times.
Hammer this second nail flush into the wood to lock the tension in place. Spin the wire until it detaches cleanly.
The "Harp" Test
Verify your work before removing the frame from the jig.
Pluck the wires. They should produce a clear, high-pitched sound similar to a harp. If they sound dull or loose, the foundation may sag later.
Common Pitfalls to Avoid
Insufficient Tension
If the wire does not "sing," it is too loose.
Loose wires cannot support the weight of the wax and honey, potentially causing the comb to collapse or warp inside the hive.
Over-Tensioning Without Support
While the jig holds the frame square, extreme over-tensioning can cause the side bars to bow inward once you release the clamp.
Aim for a tight "ping" sound, but stop before the wood begins to visibly deform under the stress.
Making the Right Choice for Your Goal
The wiring jig is a specialized tool that trades a small amount of setup time for consistency and quality.
- If your primary focus is natural wax foundation: Use the jig to ensure the wires are tight enough to embed into the wax without cutting through it.
- If your primary focus is speed: Utilize the jig's spool system to streamline the threading process, which is significantly faster than managing a loose coil of wire by hand.
A properly wired frame is the invisible backbone of a healthy, productive hive.
Summary Table:
| Step | Key Action | Goal |
|---|---|---|
| Preparation | Clamp frame & set anchor nails | Ensure frame rigidity and create tie-off points |
| Threading | Feed wire through holes & jig spools | Create a frictionless path and prevent kinking |
| Initial Anchor | Wrap wire 4x around first nail | Create a secure starting point for tensioning |
| Tensioning | Pull in stages & rotate spool back | Achieve high tension (the "Harp Test" ping) |
| Final Anchor | Wrap wire around second nail & flush | Lock in tension and remove excess wire |
Elevate Your Apiary with HONESTBEE Professional Equipment
A properly wired frame is the backbone of a productive hive, but having the right tools makes all the difference. At HONESTBEE, we specialize in supporting commercial apiaries and distributors with a comprehensive range of high-quality beekeeping solutions.
Whether you need precision hive-making machinery, high-efficiency honey-filling lines, or essential wholesale consumables, our portfolio is designed to enhance your operational efficiency and output.
Ready to scale your beekeeping business? Contact us today to explore our full wholesale catalog and expert equipment solutions.
Related Products
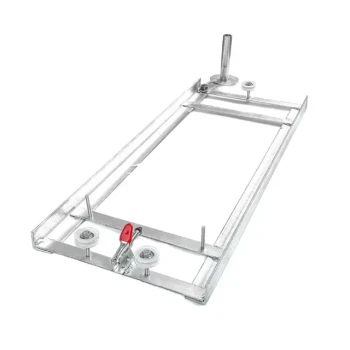
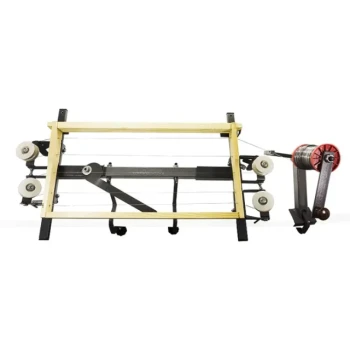
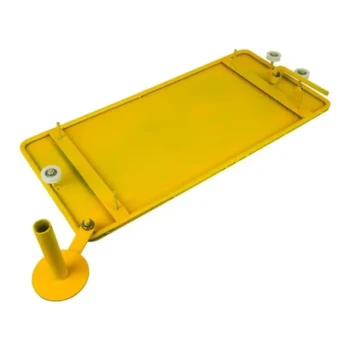
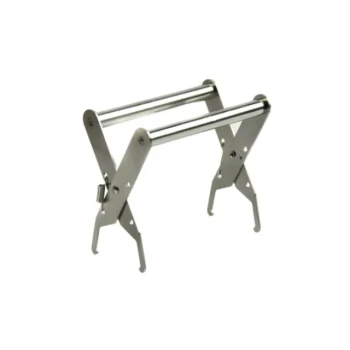
- HONESTBEE Professional Frame Wiring Board and Jig
- Professional Bee Frame Wiring Tool with Integrated Tensioning System by HONESTBEE
- HONESTBEE Durable Frame Wiring Board with Integrated Tensioner
- HONESTBEE Wired and Assembled Wooden Bee Frames Foundation for a Thriving Hive
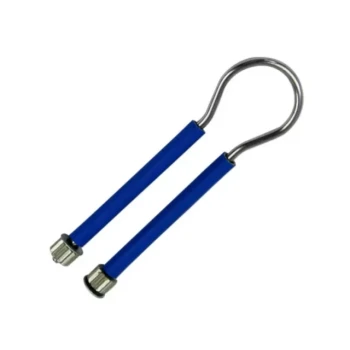
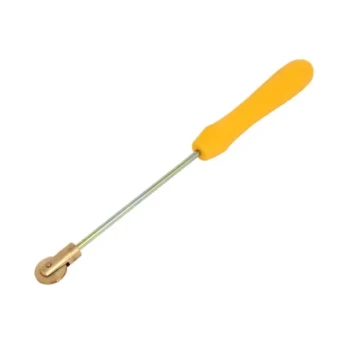
- HONESTBEE Loop Handle Frame Wire Crimper
People Also Ask
- How to wire a bee frame? A Step-by-Step Guide for Strong, Durable Honeycomb
- What is the primary purpose of a frame wiring jig? Achieve Professional Tension and Frame Structural Integrity
- What tools and materials are required for wiring a beehive frame? Essential Equipment for Stronger Honeycomb
- What are the benefits of using a bee frame wiring jig? Achieve Perfect Tension & Efficiency
- What are some alternative materials for wiring beehive frames? Comparing Fishing Line vs. Stainless Steel