Successful queen-cell transfer depends on preparation, precision, and minimal disturbance. Prepare queenless four- to five-frame mating nucleus hives with capped and emerging brood, honey, pollen, and abundant nurse bees. Around day 10 after queen-cell initiation—typically during the delicate day 9–14 pupal period—harvest ripe cells with a sharp, wet knife or scalpel, preserving a wide wax handle and never squeezing, tilting, or jarring the cell.
The central rule is simple: prepare a strong, queenless receiving nuc first, then move each ripe queen cell with its natural orientation and wax support intact. Give one cell per nuc, place it securely on the central brood comb, and avoid disturbing the hive for several days.
Prepare the Mating Nucleus Hives
Use the correct nuc configuration
Set up four- to five-frame mating nucleus hives with enough space for the developing queen, brood, stores, and worker population. Double-nucleus equipment that accepts standard brood frames can improve repeatability and simplify commercial handling.
Each nuc should contain:
- Capped and emerging brood
- Honey and pollen stores
- Abundant nurse bees
- At least one suitable central brood frame
- No laying queen
Nurse bees can be added by shaking bees from open-brood frames, provided the colony is kept adequately populated and supplied.
Make the nuc queenless
The receiving nuc must be queenless before the cell is introduced. If an established colony is being used instead, remove the old queen approximately one day before introduction.
Inspect the nuc and destroy any emergency queen cells the workers may already have started. Leaving them in place can reduce acceptance of the introduced cell or create competing queens.
Prepare the frame and working space
Remove a side comb temporarily if necessary to create safe working space around the central brood frame. Press a small depression into the face of that central comb so the queen-cell base can be secured without forcing or deforming the cell.
For a ripe cell, position the attachment point approximately 2 inches (5 cm) below the top bar. Adjust adjacent frame spacing so the cell cannot be crushed or dislodged when the frames are returned.
Assemble the essential equipment
Before opening colonies, have all equipment ready:
- Protective clothing, including a full bee suit and veil
- Smoker and fuel
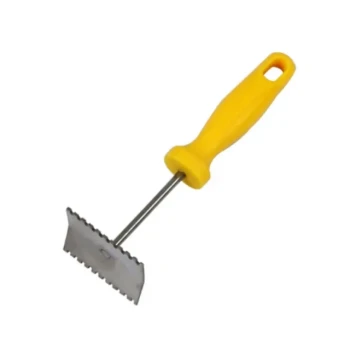
- Sharp scalpel, knife, or specialized cell-cutting tool
- Water for wetting the cutting blade
- Stable frame-handling equipment
- Prepared queenless mating nucs
- A suitable feeder and feed, if stores or forage are limited
Commercial operations benefit from standardized nuc boxes, compatible frames, reliable cutting tools, and organized staging procedures. This reduces handling time and supports consistent fulfillment when many cells must be transferred in one operation.
Harvest the Queen Cells Safely
Select cells at the correct development stage
Harvest ripe, ready-to-emerge cells approximately 10 days after initiation, while recognizing that capped queen pupae remain extremely sensitive during roughly days 9 through 14 of development.
Plan the transfer so cells spend as little time as possible outside the colony. Avoid harvesting cells in advance unless appropriate controlled handling and transport conditions are available.
Cut around the cell, not against it
Use a sharp, wet knife or scalpel to make a clean cut through the surrounding comb. Leave a substantial wax base or “handle” around the cell so it can be attached without touching or compressing the cell wall.
Keep the blade well away from the cell itself. Do not cut through the cell base, press on the cap, or attempt to detach the cell by twisting it from the foundation.
Maintain the natural orientation
The queen cell should remain upright with the tip pointing downward, matching its natural orientation in the colony. Never invert, tip, dent, or jostle the cell, because the developing pupa can be damaged even when external damage is not visible.
Handle the wax base rather than the cell body. The cell should be moved smoothly and supported continuously from harvest through placement.
Insert the Cell into the Mating Nuc
Give each nuc only one cell
Introduce one queen cell per mating nucleus hive. This avoids competition between emerging queens and makes later mating and queen-performance assessment easier to manage.
Confirm the nuc is queenless immediately before insertion, particularly when several people are working through a large batch of colonies.
Secure the cell to the central brood comb
Press the wax handle gently into the prepared depression in the center of the brood frame. The cell should be firmly supported but not forced into the comb or squeezed at its base.
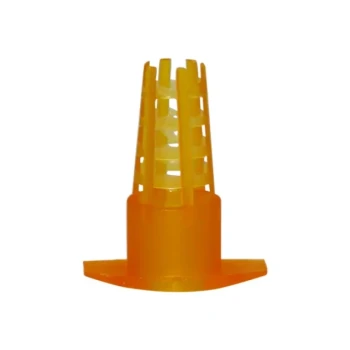
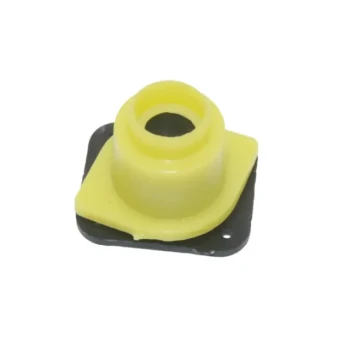
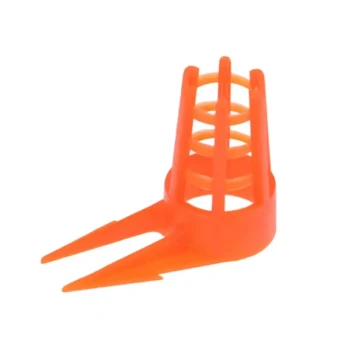
The attachment should hold the cell in a stable, vertical, downward-facing position. If a plastic cell base is used, gently push the base into the depression rather than pressing on the cell wall.
Prevent frame contact and crushing
Check the spacing on both sides of the receiving frame before closing the nuc. Adjacent frames must not rub against, lean on, or crush the queen cell when the frames are returned or shifted by the bees.
Use smooth, controlled frame movements. Avoid sudden impacts, scraping, or unnecessary repositioning after the cell is installed.
Close the nuc without disturbance
Once the cell is secure, close the mating nuc calmly and leave it undisturbed for several days. Repeated inspections can provoke worker agitation and may damage or dislodge the fragile cell.
A practical inspection should be scheduled only when necessary to confirm emergence, colony condition, or other operational requirements.
Control Bee Drift and Early Colony Conditions
Relocate newly formed mating nucs
Place newly established mating nucs in a separate apiary site when possible. Alternatively, distribute them strategically around the source colony so returning foragers are less likely to drift back to their original hive.
This is particularly important when nucs are made using bees from the same apiary. Excessive drift can leave some mating units underpopulated and weaken their ability to care for the queen cell.
Maintain adequate food and nurse bees
The nuc needs enough workers to cover brood and care for the developing queen. Capped brood, emerging brood, honey, and pollen provide the workforce and resources required during the vulnerable introduction period.
If natural forage is inadequate, provide an immediate feed source, such as a hive-top or pail feeder. Feed availability should support the nuc without requiring repeated opening and disturbance.
Use stable apiary and transport procedures
Keep frames upright and secure during movement between the cell-rearing and mating sites. Stable frame-handling equipment and organized staging are especially important for distributors, commercial breeders, and high-volume operations.
Fast delivery is valuable only when cells remain correctly oriented, protected from impact, and transferred promptly into prepared receiving units.
Understanding the Trade-offs
Stronger nucs improve care but consume more resources
Adding more brood, stores, and nurse bees generally improves the nuc’s ability to care for the cell. However, building stronger nucs requires more frames and bees from production colonies, potentially reducing honey-producing capacity.
The practical target is a well-populated, adequately provisioned nuc, not simply the largest possible colony.
Relocation reduces drift but increases logistics
Moving nucs to a separate apiary helps retain workers and equalize colony strength. It also adds transport, site-management, and biosecurity requirements.
For smaller operations, strategic placement may be sufficient; for commercial programs, a dedicated mating yard often provides more consistent control.
Earlier handling saves time but increases risk
Harvesting and transferring cells promptly supports efficient scheduling. However, haste with a blunt tool, unstable frame, or poorly prepared nuc is more damaging than a slower, controlled process.
The correct priority is minimal handling time after complete preparation, rather than speed during the cutting or insertion itself.
Repeated inspections can undermine the transfer
Checking too soon may disturb workers, shift the cell, or damage the developing queen. A disciplined inspection schedule is safer than frequent opening driven by uncertainty.
Making the Right Choice for Your Goal
Choose the preparation and handling standard that matches your operational priority:
- If your primary focus is queen-cell survival: Use sharp cutting tools, leave a wide wax handle, preserve vertical orientation, and prevent all contact with the fragile cell wall.
- If your primary focus is acceptance: Prepare genuinely queenless nucs with capped brood, stores, nurse bees, and no emergency cells before introducing one cell.
- If your primary focus is mating-nuc consistency: Standardize four- to five-frame equipment, frame positions, cell placement, feeding, and post-transfer inspection timing.
- If your primary focus is commercial throughput: Stage compatible equipment and prepared nucs in advance, use stable frame-handling systems, and coordinate rapid transfer without compromising cell protection.
- If your primary focus is reducing bee drift: Relocate mating nucs to a separate apiary or distribute them strategically around the source colony.
With disciplined preparation and gentle, orientation-preserving handling, queen-cell transfers become a repeatable process rather than a fragile improvisation.
Summary Table:
| Step | Key Action | Critical Detail |
|---|---|---|
| 1. Prepare Nuc | Set up 4-5 frame queenless nuc with brood, stores, nurse bees | Ensure no queen or emergency queen cells |
| 2. Prepare Frame | Press depression in central comb | Position 2 inches below top bar |
| 3. Harvest Cell | Cut with sharp wet knife | Leave wide wax handle, maintain orientation |
| 4. Insert Cell | Secure in depression | One cell per nuc, upright position |
| 5. Close & Leave | Close calmly, disturb minimally | Check only when necessary |
Ready to streamline your queen rearing? At HONESTBEE, we supply commercial apiaries and distributors with a full range of beekeeping equipment, including mating nucs, cell cutters, and frame handling tools. Our wholesale solutions offer competitive margins, OEM/ODM support, and fast delivery to keep your operation thriving. Contact us today for a tailored quote and experience the HONESTBEE advantage.
Related Products
- Black 2 Pack Beekeeper Queen Grafting Tool for Bee Queen Larva Transferring Needle
- Plastic Chinese Queen Grafting Tool for Bee Queen Rearing
- Stainless Steel Queen Grafting Tool for Beekeeping and Bee Queen Grafting
- Plastic Beekeeping Honey Bee Larvae Grafting Tools for Queen Rearing and Chinese Grafting
- JZBZ Style Shipping Cell Protector for Queen Rearing Kit
People Also Ask
- What is the primary function of a queen grafting tool? Master Precise Larval Transfer for High Queen Acceptance
- What is the step-by-step process for using a queen grafting tool? Master Larva Transfer for Better Queen Rearing
- What are the benefits of using a queen grafting tool for queen rearing? Master Precision for Superior Bee Genetics
- What is grafting in queen rearing? Take Control of Your Apiary's Genetics
- What are the steps involved in using a queen grafting tool? A Guide to Successful Queen Rearing