To effectively use a queen grafting tool, you must prioritize delicacy and moisture control to ensure the survival of the larva. The process begins by cleaning and moistening the tool, then sliding the flexible tip underneath a specific larva—ideally less than 24 hours old—to scoop it gently from the comb. Finally, you transfer the larva to a prepared queen cup, using a subtle rolling motion to release it without flipping the larva upside down.
Core Takeaway: Success in grafting relies less on force and more on finessing the tool underneath the royal jelly bed. The goal is to transfer the larva and its surrounding food in one smooth motion without inverting the larva, which prevents it from drowning in its own fluids.
Preparation and Selection
Before touching the comb, you must ensure your equipment and selection criteria are aligned for success.
Prepare the Instrument
Start by ensuring the grafting tool is thoroughly clean. It is highly recommended to moisten the tip of the tool before use. This lubrication prevents the delicate larva from sticking to the instrument during the release phase.
Identify the Correct Larva
Select a larva from a strong colony known for desirable traits, such as high honey production or gentleness. The larva must be extremely young—specifically less than 24 hours old. These freshly hatched larvae are critical for rearing high-quality queens.
The Transfer Technique
This phase requires a steady hand and precise positioning to mimic the natural shape of the larva.
Approaching the Cell
Insert the grafting tool into the worker cell. Gently guide the flexible tip down the side of the cell wall until you reach the bottom where the larva rests.
Lifting the Larva
Slide the tip carefully underneath the larva, aiming to scoop up the bed of royal jelly along with it. The tool's design mimics the curve of the larva, allowing you to lift it out without causing physical damage.
Depositing into the Queen Cup
Move the larva to the prepared queen cell cup. To release the larva, use a delicate rolling motion. The larva should slide off the tool and settle onto the bottom of the cup.
Common Pitfalls to Avoid
Even with the correct steps, specific errors can lead to grafting failure. Understanding these risks is essential.
The Danger of Flipping
The most critical error is flipping the larva over during the transfer. If a larva is inverted, it may drown in its own fluid or undergo stress that halts development. Ensure it remains in the same orientation it had in the original cell.
Dry Equipment
Attempting to graft with a dry tool often results in the larva adhering to the tip. This forces you to use jerky movements to dislodge it, which frequently damages the larva's fragile body.
Delay in Transfer
Once extracted, the larvae are vulnerable. They must be moved quickly to a cell starter or queenless hive. Delays can cause the larvae to dry out or become chilled, reducing the acceptance rate by the worker bees.
Making the Right Choice for Your Goal
To maximize your results, tailor your focus based on your specific objective for the hive.
- If your primary focus is High Acceptance Rates: Prioritize the selection of larvae under 24 hours old and ensure the tool is constantly moistened to prevent handling damage.
- If your primary focus is Queen Quality: Focus strictly on sourcing larvae from your strongest colonies with the most desirable genetic traits, regardless of how difficult they are to access.
Mastering the grafting tool transforms queen rearing from a game of chance into a precise, predictable science.
Summary Table:
| Stage | Key Action | Critical Detail |
|---|---|---|
| Preparation | Moisten Tool Tip | Prevents larva from sticking to the instrument. |
| Selection | Identify 24hr Larva | Ensures the highest quality queen development. |
| Extraction | Slide Under Royal Jelly | Scoops the larva and food in one smooth motion. |
| Transfer | Delicate Rolling Motion | Prevents the larva from being flipped or inverted. |
| Post-Graft | Immediate Relocation | Avoids chilling or drying out the fragile larvae. |
Elevate Your Queen Rearing with HONESTBEE Professional Equipment
To produce high-quality queens, your apiary needs tools as precise as your technique. HONESTBEE specializes in serving commercial apiaries and distributors with a comprehensive range of professional beekeeping machinery and essential consumables.
From ergonomic grafting tools and high-acceptance queen cups to advanced honey-filling machines, we provide the hardware you need to scale your operations efficiently. Let us help you improve your hive genetics and production yields with our premium wholesale offerings.
Ready to upgrade your apiary’s performance?
Contact Us Today for Wholesale Pricing and Expert Support
Related Products
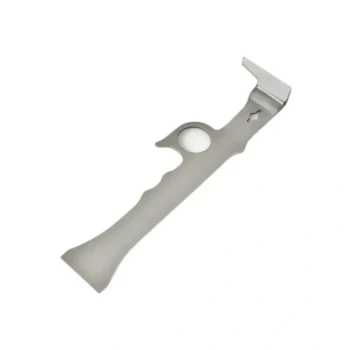
- Stainless Steel Queen Grafting Tool for Beekeeping and Bee Queen Grafting
- Stainless Steel Beekeeping Queen Grafting Tool for Honey Bee Rearing
- Plastic Chinese Queen Grafting Tool for Bee Queen Rearing
- Black 2 Pack Beekeeper Queen Grafting Tool for Bee Queen Larva Transferring Needle
- Retractable Chinese Queen Rearing Grafting Tools Equipment
People Also Ask
- What is the primary function of a queen grafting tool? Master Precise Larval Transfer for High Queen Acceptance
- What is the purpose of a queen grafting tool in beekeeping? Master Larva Transfer for Selective Breeding
- What are the steps involved in using a queen grafting tool? A Guide to Successful Queen Rearing
- What are the benefits of using a queen grafting tool for queen rearing? Master Precision for Superior Bee Genetics
- What is grafting in queen rearing? Take Control of Your Apiary's Genetics