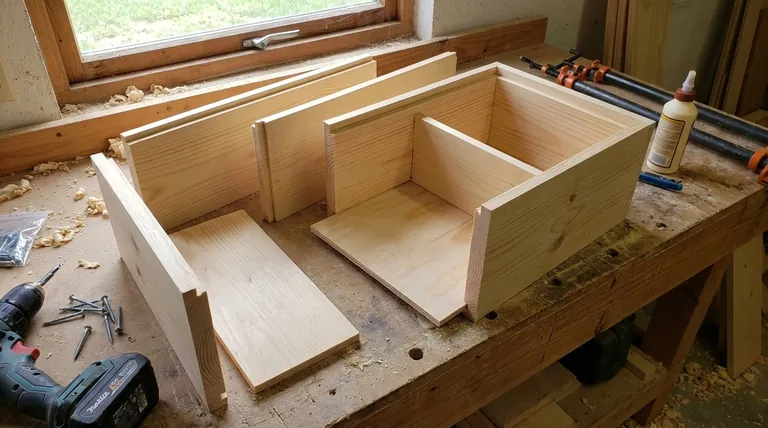
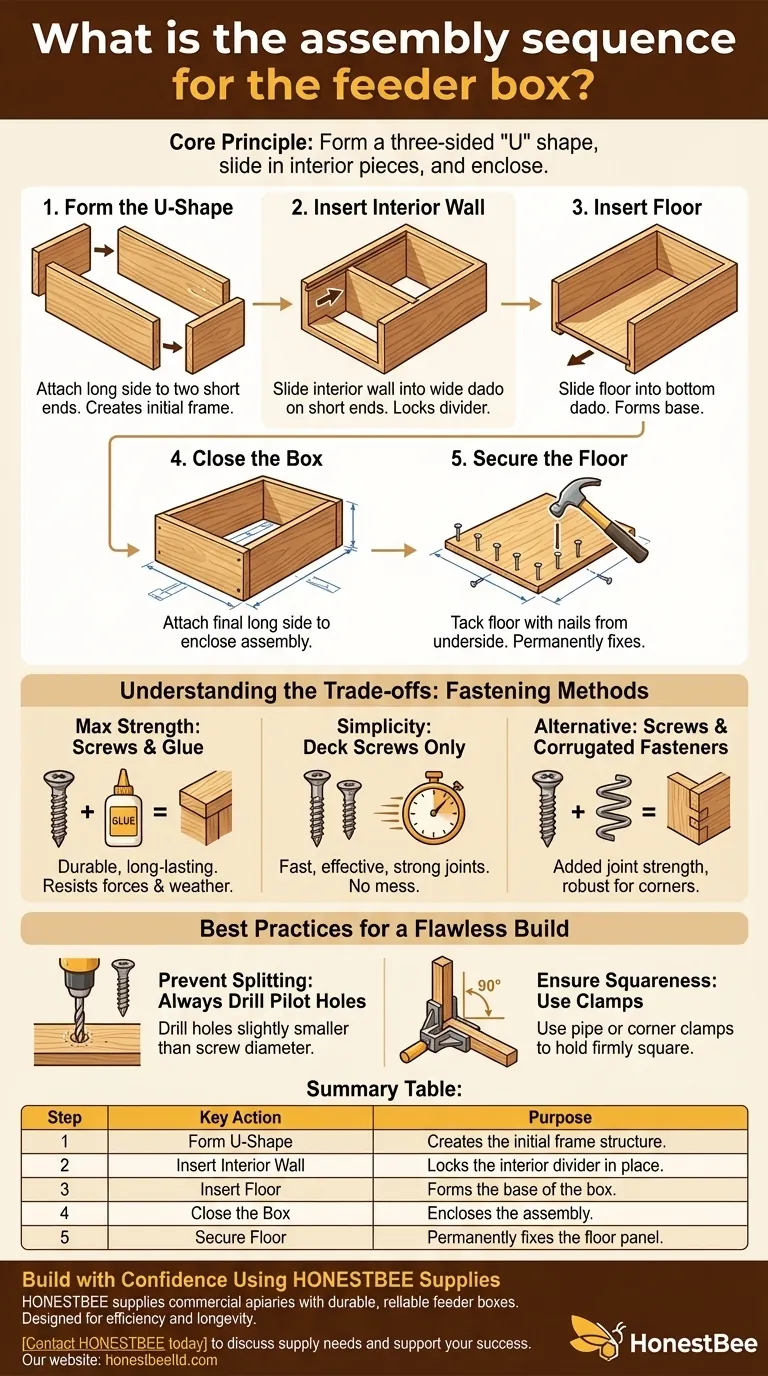
The assembly sequence for the feeder box is a specific, logical process designed to ensure all parts fit together correctly using pre-cut grooves, or dadoes. You will first form a three-sided "U" shape, slide the interior pieces into their respective dadoes, and then attach the final side to complete the box.
The core principle of this assembly is to use the dadoes as guides. The sequence ensures that the interior wall and floor are locked into place before the box is fully enclosed, making the process self-aligning and straightforward.
A Step-by-Step Assembly Guide
This process assumes you have all five wooden pieces: two long sides, two short ends, one interior wall, and one floor.
Step 1: Form the U-Shape
Attach one long side to the two exterior short ends. This creates a three-sided, open-topped frame that forms the initial structure of the box.
Step 2: Insert the Interior Wall
Slide the interior wall into the wide dado (groove) cut into the inside faces of the short ends. The wall should slide smoothly into position within the U-shaped frame.
Step 3: Insert the Floor
With the interior wall in place, slide the floor panel into the narrow dado that runs along the bottom edge of the side and end pieces.
Step 4: Close the Box
Fit the second long side into place, enclosing the interior wall and floor. The grooves on this final piece should align perfectly with the tongues of the other components.
Step 5: Secure the Floor
After the box is fully assembled, tack the floor in place using small finish nails. Drive these nails from the underside of the box upwards into the floor panel.
Understanding the Trade-offs: Choosing Your Fastening Method
How you join the pieces is as important as the sequence. Your choice affects the box's final strength, appearance, and assembly time.
For Maximum Strength: Screws and Glue
Applying wood glue to the joints before securing them with deck screws provides the most durable and long-lasting bond. This combination resists both pulling forces and weathering over time.
For Simplicity: Deck Screws Only
Using only screws is a fast and effective method. It offers strong joints with less mess and no need for glue drying time. However, it places all the stress directly on the fasteners and the wood around them.
Alternative Fasteners
You can also use a combination of screws and corrugated fasteners for added joint strength, particularly at the corners. This is a robust but less common approach for this type of project.
Best Practices for a Flawless Build
Avoiding common mistakes is simple if you follow two critical best practices during assembly.
Prevent Splitting: Always Drill Pilot Holes
Wood, especially near the ends, can easily split when a screw is driven into it. To prevent this, always drill pilot holes that are slightly smaller than the diameter of your screws before driving them in.
Ensure Squareness: Use Clamps
As you fasten the joints, the box can easily be pulled out of square. Use pipe clamps or corner clamps to hold the assembly firmly together and ensure all corners are at a perfect 90-degree angle while you drive screws or the glue sets.
Making the Right Choice for Your Goal
Select your assembly method based on your primary objective for the project.
- If your primary focus is speed and simplicity: Use deck screws without glue, but be certain to drill pilot holes to prevent splitting the wood.
- If your primary focus is maximum durability: Use a combination of wood glue and screws, and use clamps to hold the box square while it dries.
- If your primary focus is a clean appearance: Use glue and discreet finish nails, taking extra care to wipe away any excess glue before it dries.
By following the correct sequence and choosing the right fastening method, you can ensure a successful and sturdy build.
Summary Table:
| Step | Key Action | Purpose |
|---|---|---|
| 1. Form U-Shape | Attach long side to short ends. | Creates the initial frame structure. |
| 2. Insert Interior Wall | Slide wall into dadoes on short ends. | Locks the interior divider in place. |
| 3. Insert Floor | Slide floor into bottom dado. | Forms the base of the box. |
| 4. Close the Box | Attach the final long side. | Encloses the assembly. |
| 5. Secure Floor | Nail the floor from underneath. | Permanently fixes the floor panel. |
Build with Confidence Using HONESTBEE Supplies
Following the right assembly sequence is crucial, but so is using high-quality, precision-cut components. HONESTBEE supplies commercial apiaries and beekeeping equipment distributors with durable, reliable feeder boxes and other essential beekeeping supplies through our wholesale-focused operations. Our products are designed for efficiency and longevity, helping you maintain healthy hives and streamline your operations.
Contact HONESTBEE today to discuss your supply needs and discover how our equipment can support your success.
Visual Guide
Related Products
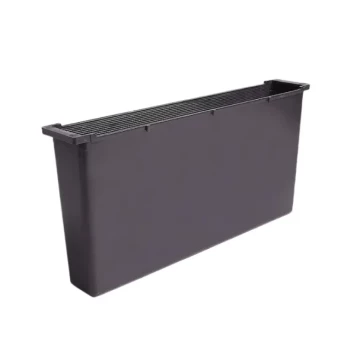
- Styrofoam Mini Mating Nuc Box with Frames Feeder Styrofoam Bee Hives 3 Frame Nuc Box
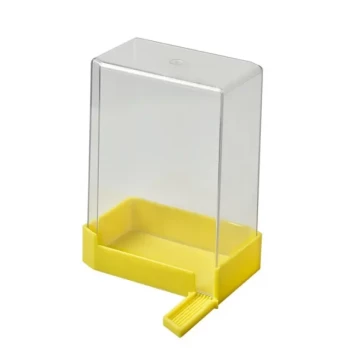
- Rapid Bee Feeder White Plastic 2L Round Top Feeder for 8 or 10-Frame Bee Hives
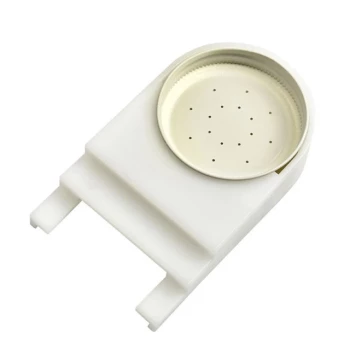
- HONESTBEE Entrance Bee Feeder Efficient Hive Front Liquid Feeding Solution for Beekeeping
- White Plastic 0.5L Beekeeping Entrance Feeder for Bees
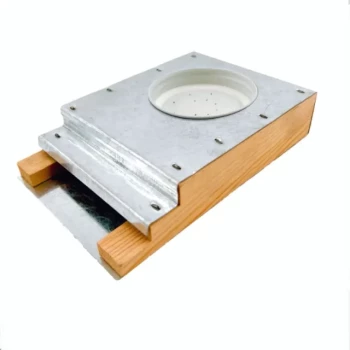
- Boardman Entrance Bee Feeder Durable Galvanized Steel and Wood Construction for Beekeeping
People Also Ask
- How are nuc boxes used in queen rearing? The Essential Tool for Reliable Queen Mating
- What are the common sizes and types of nuc boxes? A Guide to the Perfect Fit for Your Apiary
- What are the practical uses for an empty nuc box? Essential Tools for Swarm Control and Apiary Management
- How should a beekeeper relocate a new colony in a nuc box? Master the 5-5 Rule for Success
- What is the primary advantage of mini mating nucs? Maximize Queen Production with Minimal Bee Resources