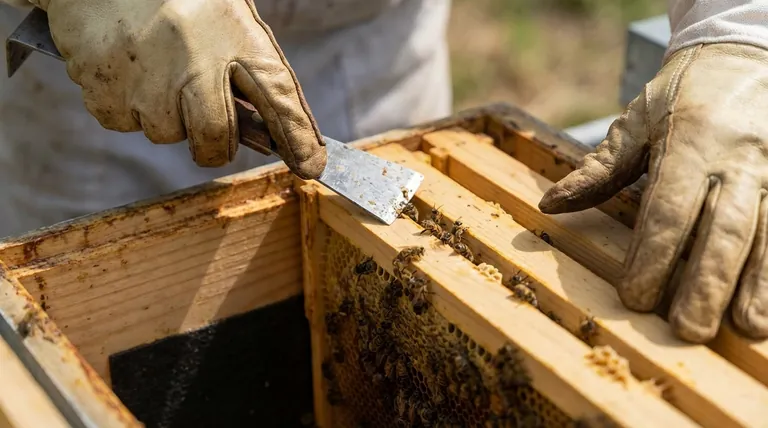
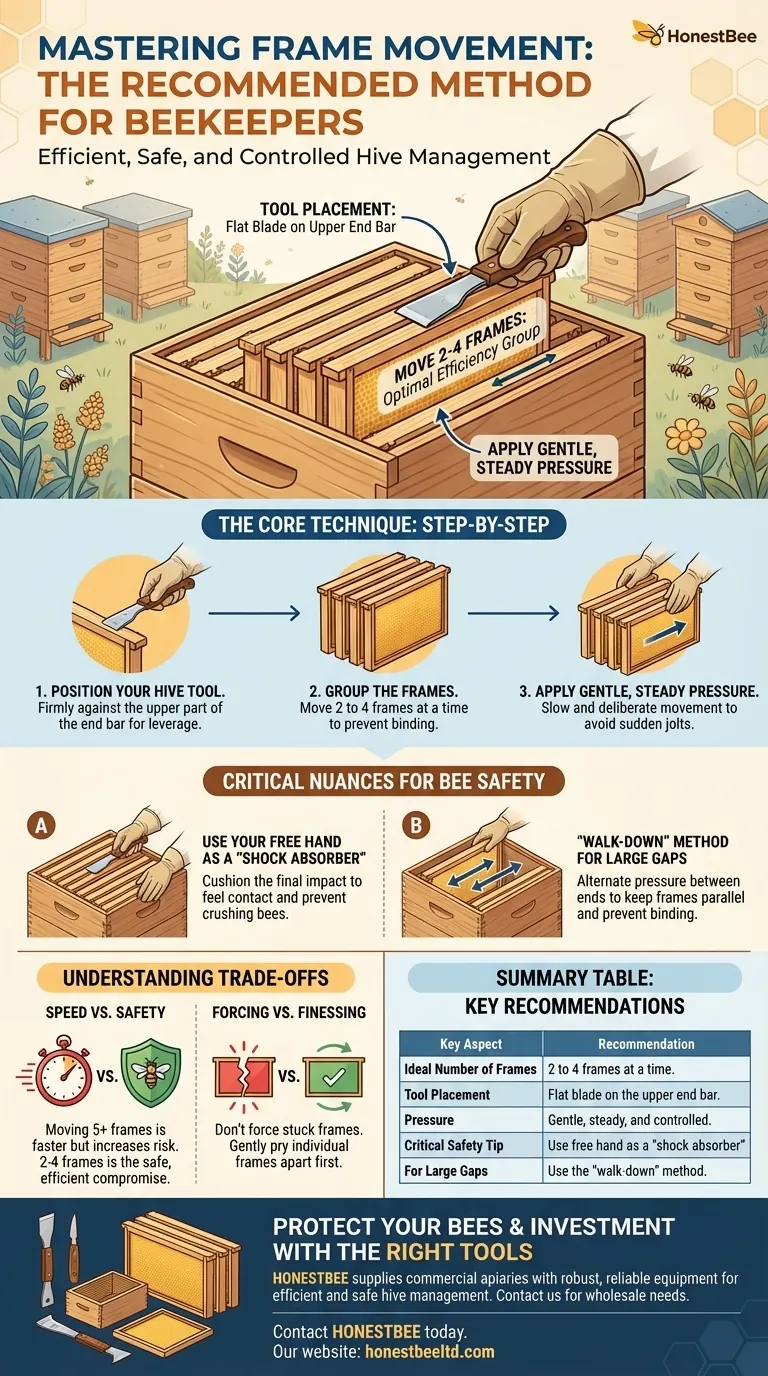
The recommended method is to use the flat blade of your hive tool to move a small group of 2-4 frames at once. Apply pressure against the upper part of the end bars, not the top bars, to slide the frames together smoothly. This technique provides the best balance between efficiency and the safety of your bees.
The goal is not simply to close a gap, but to do so with controlled, gentle force. Mastering this protects your bees from being crushed and maintains the hive's structural integrity, making you a more effective and responsible beekeeper.
The Core Technique: A Step-by-Step Guide
Moving frames seems simple, but the right technique minimizes bee casualties and hive disruption. It's a foundational skill for smooth inspections.
1. Position Your Hive Tool
Place the flat blade of your hive tool firmly against the end bar of the frame you intend to push. Targeting the upper part of the end bar gives you the most leverage on the frame's strongest point.
2. Group the Frames for the Push
You can efficiently move a block of 2 to 4 frames at a time. This is the sweet spot. Moving more can cause the frames to bind, while moving them one by one is inefficient and agitates the bees unnecessarily.
3. Apply Gentle, Steady Pressure
Push the frames slowly and deliberately. Avoid sudden jolts or quick movements, which are the primary cause of crushed bees between the end bars.
Critical Nuances for Bee Safety and Hive Integrity
Beyond the basic push, a few small adjustments transform this from a clumsy action into a precise and safe maneuver.
Use Your Free Hand as a "Shock Absorber"
As you push the frames with your hive tool, place your free hand on the opposite side of the block of frames you are moving. This hand acts as a cushion, absorbing the final impact and allowing you to feel when the frames make contact. This simple step drastically reduces the chance of crushing bees.
The "Walk-Down" Method for Large Gaps
If you need to move frames across a significant distance, do not push from only one end. This can cause the frames to skew and get stuck.
Instead, push one end part-way, then move your hive tool to the other end of the box and push that side. Alternate between ends, "walking" the frames across the gap to keep them parallel and prevent binding.
Why Target the End Bars?
Pushing on the top bars is a common mistake. The top bars are less rigid and are often connected by fragile propolis seals. Pushing them can cause them to twist or break, damaging comb and agitating the colony. The end bars provide a solid, stable surface for applying force.
Understanding the Trade-offs
Every action in beekeeping involves balancing competing priorities. Moving frames is no different.
Speed vs. Safety
While moving a large block of 5+ frames might seem faster, it significantly increases the risk. The frames are more likely to bind, and you have less control over the final closure, making it very easy to crush dozens of bees. The 2-4 frame method is the accepted compromise for efficient yet safe inspections.
Forcing vs. Finessing
If frames are stuck together with a large amount of propolis or burr comb, do not try to force them with a single push. This can break frames and enrage the bees. First, use your hive tool to gently pry each frame apart individually before attempting to slide them as a group.
Applying This on Your Next Inspection
Your approach should adapt to the specific situation within the hive.
- If your primary focus is maximum bee safety: Always use your free hand as a cushion and move smaller groups of frames (2-3) very slowly.
- If your primary focus is efficiency during a quick check: You can confidently move up to 4 frames, but maintain awareness of your free hand to prevent a sudden impact.
- If you're closing a large gap after an inspection: Always use the "walk-down" method, moving each side incrementally to ensure the frames remain parallel and do not bind.
Mastering this controlled movement is a mark of a skilled and conscientious beekeeper.
Summary Table:
| Key Aspect | Recommendation |
|---|---|
| Ideal Number of Frames | 2 to 4 frames at a time |
| Tool Placement | Flat blade on the upper end bar |
| Pressure | Gentle, steady, and controlled |
| Critical Safety Tip | Use free hand as a "shock absorber" |
| For Large Gaps | Use the "walk-down" method |
Protect Your Bees and Your Investment with the Right Tools
Mastering frame movement is essential, but it starts with high-quality, durable equipment. Crushed bees and damaged frames are often the result of using substandard tools.
HONESTBEE supplies commercial apiaries and beekeeping equipment distributors with the robust, reliable supplies needed for efficient and safe hive management. From professional-grade hive tools to durable frames and foundations, our wholesale-focused operations ensure you get the gear that stands up to daily use.
Ready to equip your operation with tools that enhance both efficiency and bee safety?
Contact HONESTBEE today to discuss your wholesale needs and see how our equipment can support your beekeeping success.
Visual Guide
Related Products
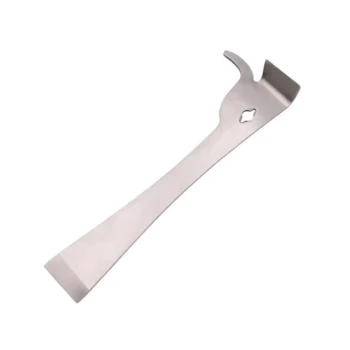
- Professional Multi-Function Stainless Steel Hive Tool
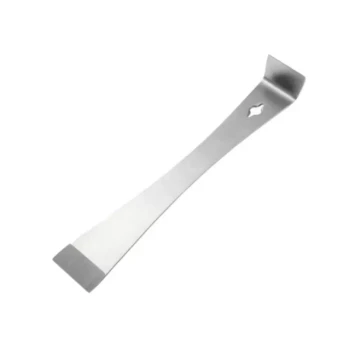
- Professional Stainless Steel Pry-Bar Hive Tool
- HONESTBEE Professional Long Handled Hive Tool with Precision Cutting Blade
- HONESTBEE Premium Italian Style Hive Tool with Hardwood Handle
- Ergonomic Plastic Frame Spacer Tool for Rapid Hive Management Beekeeping
People Also Ask
- What is the function of a professional stainless steel hive tool in IFB? Optimize Your Colony Strength Assessment
- Why are professional hive tools considered indispensable? Master Beekeeping Maintenance with Precision Leverage
- Why are professional hive tools & observation equipment necessary for queen rearing evaluation? Master Your Quality
- What is the role of professional hive tools in routine apiary maintenance? Expert Tips for Hive Health and Longevity
- What are the different types of hive tools available? Choose the Right Tool for Your Apiary