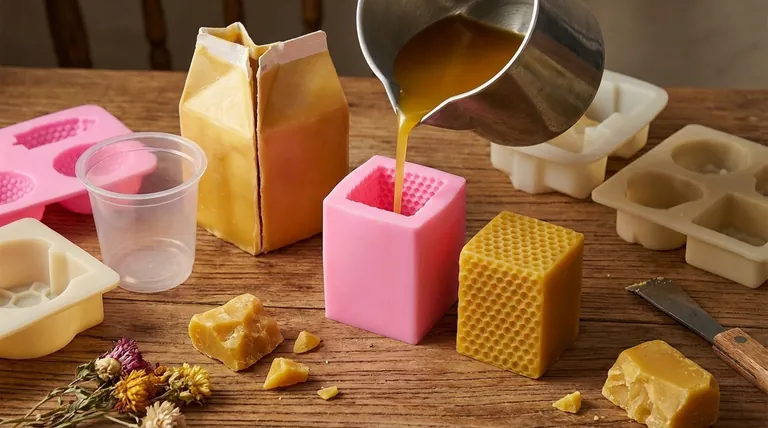
The best molds for pouring melted beeswax are those made from flexible materials. While you can technically use almost any heat-resistant container, materials like silicone or pliable plastics are highly recommended. This is because beeswax shrinks as it cools, and a flexible mold allows you to easily peel it away or pop the solidified wax out without damaging your final product.
The central challenge in molding beeswax isn't pouring it in, but getting the solid piece out intact. The ideal mold material works with the natural shrinkage of cooling wax, making release effortless. Flexibility is the most important characteristic for a reliable mold.
The Core Principle: Why Shrinkage Matters
To choose the right mold, you must first understand how beeswax behaves. The material itself gives you a significant advantage.
How Beeswax Behaves When Cooling
When you pour hot, liquid beeswax, it fills every crevice of the mold. As it cools and solidifies, its volume decreases slightly.
This process, known as shrinkage or contraction, causes the wax to pull away from the walls of the mold. This creates a small gap that is critical for easy removal.
Working With Natural Release
A good mold leverages this natural shrinkage. Flexible materials can be bent or twisted to break any remaining seal, allowing the wax block or candle to slide out cleanly.
In contrast, a rigid mold with zero flexibility relies entirely on this shrinkage. If the mold has any imperfections, texture, or vertical walls, the wax can remain stuck despite the contraction.
Recommended Mold Materials
Based on the principle of easy release, some materials are far superior to others.
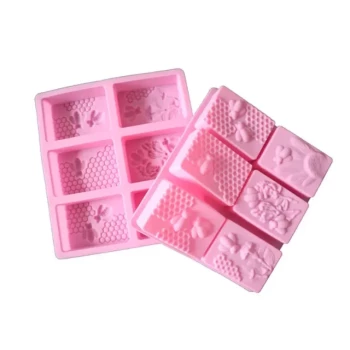
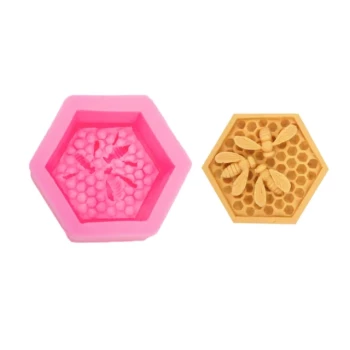
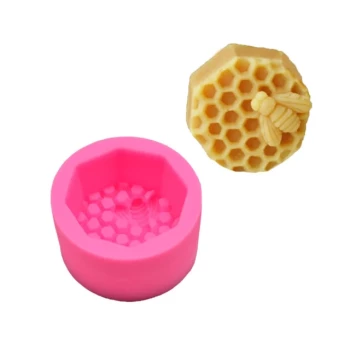
Silicone Molds (The Professional Standard)
Silicone is the ideal material for most beeswax projects. It is extremely flexible, durable, and can handle the heat of melted beeswax without issue.
Because they are so pliable, silicone molds are perfect for creating intricate shapes with fine details, as you can carefully peel the mold away from the finished piece.
Flexible Plastics (The DIY Solution)
For simple blocks or basic shapes, everyday plastic containers are an excellent and cost-effective choice. Think of yogurt cups, plastic takeout containers, or other thin-walled tubs.
Their flexibility allows you to press on the bottom or squeeze the sides to easily pop the cooled wax block out.
Paper and Coated Cardboard (The Disposable Option)
Sturdy, wax-coated paper cups or empty milk cartons are another great option. These are single-use molds that you can simply tear away from the solidified beeswax.
This method completely eliminates the risk of the wax getting stuck, making it a foolproof choice for beginners or for creating simple pucks and blocks for storage.
Understanding the Trade-offs: Flexibility vs. Rigidity
While the references suggest any mold can work, it's crucial to understand the risks associated with rigid materials.
The High Risk of Rigid Molds
Rigid molds made of glass, ceramic, or hard plastic are generally not recommended. Because they have no give, removal can be very difficult.
The wax can get locked in if the mold's sides are perfectly straight (no draft angle) or if the surface isn't perfectly smooth. Attempting to force the wax out can result in a broken piece of wax or even a shattered glass mold.
The Forgiveness of Flexible Molds
Flexible molds provide a significant margin for error. Even if the wax doesn't release perfectly on its own, you can manually flex the container to break the seal. This makes the process faster, more reliable, and far less frustrating.
A Note on Heat Resistance
Always ensure your mold can withstand the temperature of melted beeswax, which is typically poured around 150-175°F (65-80°C). Most silicone and common food-grade plastics (like polypropylene, marked with a #5) are perfectly safe at these temperatures. Avoid very thin, flimsy plastics that could warp from the heat.
Making the Right Choice for Your Project
Your choice of mold should be guided by your end goal.
- If your primary focus is creating detailed, reusable shapes: Invest in high-quality silicone molds designed for candle or soap making.
- If your primary focus is processing bulk wax into manageable blocks: Use simple and inexpensive flexible containers like recycled plastic tubs or sturdy paper cups.
- If your primary focus is experimenting with on-hand materials: Prioritize smooth-sided, flexible plastic or paper containers and avoid rigid materials like glass to ensure success.
Ultimately, success with beeswax molding comes from choosing a material that allows for a clean, easy release once the wax has cooled and shrunk.
Summary Table:
| Mold Material | Best For | Key Advantage |
|---|---|---|
| Silicone | Detailed, reusable shapes (e.g., candles) | Excellent flexibility for intricate details |
| Flexible Plastics | Simple blocks & DIY projects | Cost-effective and easy to find |
| Paper/Cardboard | Disposable blocks for storage | Foolproof, tear-away release |
| Rigid (Glass/Ceramic) | Not Recommended | High risk of wax getting stuck |
Ready to scale your beeswax production with the right supplies?
As a leading wholesale supplier to commercial apiaries and distributors, HONESTBEE provides the durable, high-quality molds and equipment you need for efficient, large-scale operations. Let us help you streamline your process and improve your output.
Contact our expert team today to discuss your specific needs and explore our product catalog!
Visual Guide

Related Products
- Colorful Silicone Beeswax Foundation Mold Mould for Beekeeping
- Notebook Style Beeswax Foundation Mould Wax Foundation Mold
- High-Efficiency 20-Cell Silicone Mold for Beeswax Bee Queen Cup Production
- 3D Square Honeycomb Pillar Silicone Candle Molds for Making Beeswax Candles
- 10-Cell Silicone Beeswax Bee Queen Cups Forming Mold
People Also Ask
- How can you make medium or shallow foundation sheets with a deep foundation mold? Maximize Your Beekeeping Mold Utility
- What is the third tip for working with beeswax in a silicone mold? Master the Critical Demolding Stage
- How do beeswax foundation molds facilitate the construction of standardized honeycombs? Optimize Your Apiary Efficiency
- What is the purpose of the Foundation Mold? A Guide to Sustainable, Pure Wax Foundation
- How can beeswax value-addition processes be utilized to increase beekeeping revenue? Boost Your Apiary Profitability