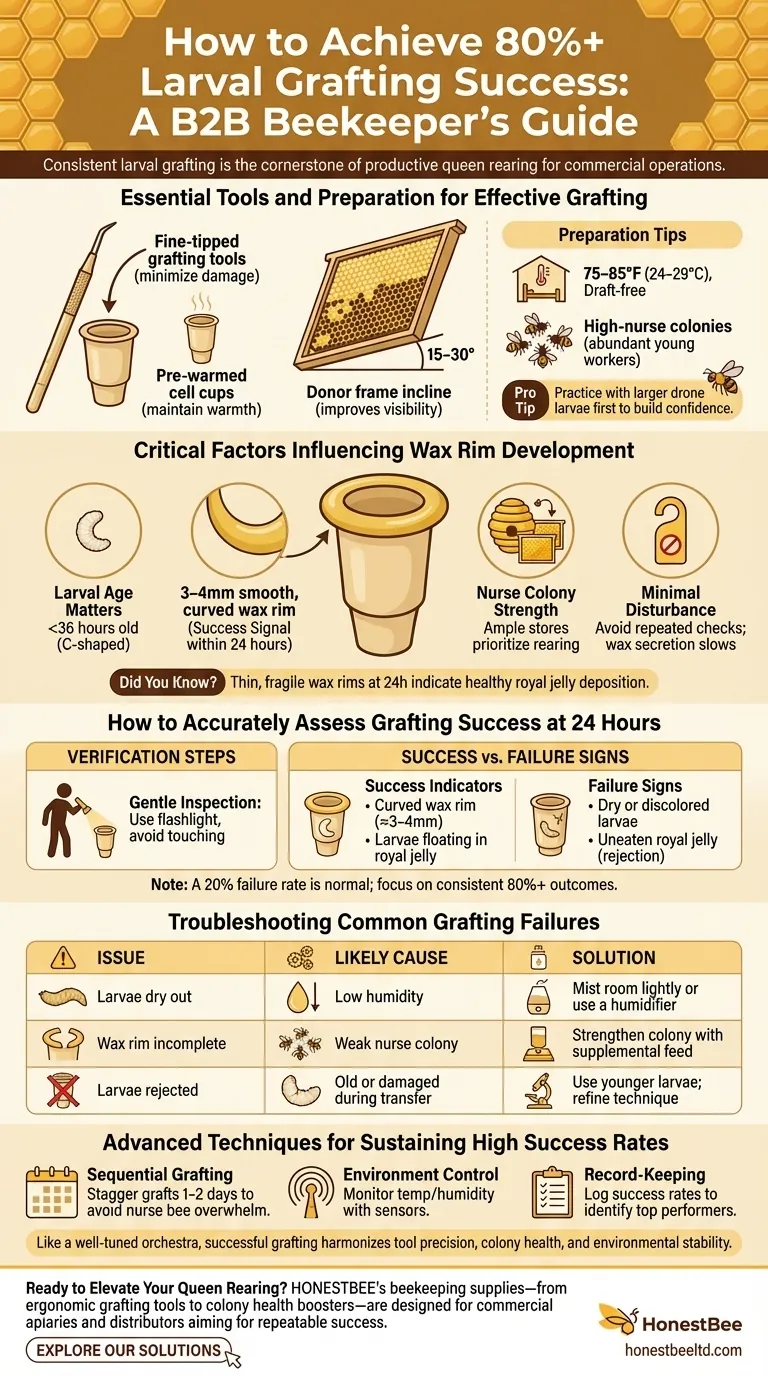
Consistent larval grafting success is the cornerstone of productive queen rearing. Whether you're a commercial beekeeper or a distributor supplying apiaries, mastering this technique ensures reliable queen production. This guide breaks down the tools, environmental factors, and verification methods needed to achieve—and sustain—an 80%+ success rate.
Essential Tools and Preparation for Effective Grafting
Start with the right equipment:
- Fine-tipped grafting tools: Minimize larval damage during transfer.
- Pre-warmed cell cups: Maintain larval warmth and reduce shock.
- Donor frame incline: Improves visibility and precision (research shows a 15–30° angle is ideal).
Preparation tips:
- Work in a draft-free, warm room (approximate range: 75–85°F or 24–29°C).
- Use high-nurse colonies with abundant young worker bees to foster grafted larvae.
Pro tip: Practice grafting with drone larvae first—their larger size builds confidence before handling delicate worker larvae.
Critical Factors Influencing Wax Rim Development
A 3–4mm smooth, curved wax rim around the cell cup within 24 hours signals grafting success. To achieve this:
- Larval age matters: Ideal grafts use larvae under 36 hours old (still curled in a "C" shape).
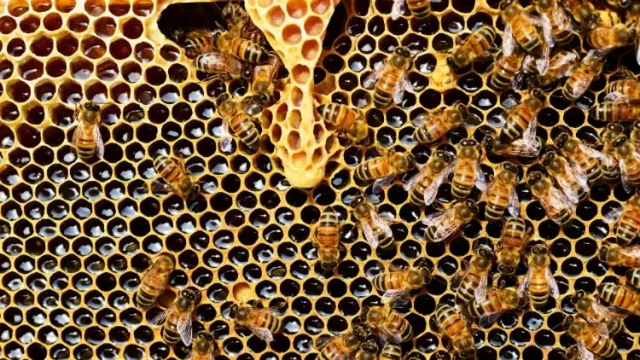
- Nurse colony strength: Colonies with ample pollen/honey stores prioritize queen rearing.
- Minimal disturbance: Avoid checking grafts repeatedly; wax secretion slows if nurse bees detect disruptions.
Did you know? Thin, fragile wax rims at the 24-hour mark indicate healthy royal jelly deposition.
How to Accurately Assess Grafting Success at 24 Hours
Verification steps:
- Gentle inspection: Use a flashlight to spot wax rims without touching cells.
- Success indicators:
- Curved wax rim (≈3–4mm).
- Larvae floating in royal jelly.
- Failure signs:
- Dry or discolored larvae.
- Uneaten royal jelly (suggests rejection).
Note: A 20% failure rate is normal; focus on consistent 80%+ outcomes through adjustments.
Troubleshooting Common Grafting Failures
| Issue | Likely Cause | Solution |
|---|---|---|
| Larvae dry out | Low humidity | Mist room lightly or use a humidifier. |
| Wax rim incomplete | Weak nurse colony | Strengthen colony with supplemental feed. |
| Larvae rejected | Old or damaged during transfer | Use younger larvae; refine grafting technique. |
Advanced Techniques for Sustaining High Success Rates
- Sequential grafting: Stagger grafts by 1–2 days to ensure nurse bees aren’t overwhelmed.
- Environment control: Monitor temperature/humidity with sensors.
- Record-keeping: Log success rates per colony to identify top performers.
Final insight: Like a well-tuned orchestra, successful grafting harmonizes tool precision, colony health, and environmental stability.
Ready to Elevate Your Queen Rearing?
HONESTBEE’s beekeeping supplies—from ergonomic grafting tools to colony health boosters—are designed for commercial apiaries and distributors aiming for repeatable success. Explore our solutions to build a grafting process that scales.
Visual Guide
Related Products
- Plastic Beekeeping Honey Bee Larvae Grafting Tools for Queen Rearing and Chinese Grafting
- Black 2 Pack Beekeeper Queen Grafting Tool for Bee Queen Larva Transferring Needle
- Stainless Steel Beekeeping Queen Grafting Tool for Honey Bee Rearing
- Retractable Chinese Queen Rearing Grafting Tools Equipment
- Plastic Chinese Queen Grafting Tool for Bee Queen Rearing
Related Articles
- How to Improve Queen-Rearing Success: Biologically Optimized Grafting Techniques
- Microsurgery in the Apiary: The Unseen Power of the Queen Grafting Tool
- How to Master Queen Rearing with Precision Grafting Tools
- Precision at Scale: The Operator's Guide to Queen Rearing Grafting Tools
- The Grafting Tool Dilemma: A Micro-Decision with Macro-Impact for Commercial Apiaries


