Filling a sachet bag is a straightforward process of channeling your chosen filling into the bag and tying it securely. For a standard sachet, you will use a funnel to guide approximately a half-cup of your aromatic mixture into the bag, then gather the top and tie it firmly with a ribbon, cord, or twine.
The true goal of filling a sachet is not just to contain herbs, but to create an object that is both fragrant and aesthetically pleasing. Success depends on achieving the optimal fill level—enough to provide a lasting scent, but not so much that the bag becomes lumpy or difficult to close.
The Core Filling Technique
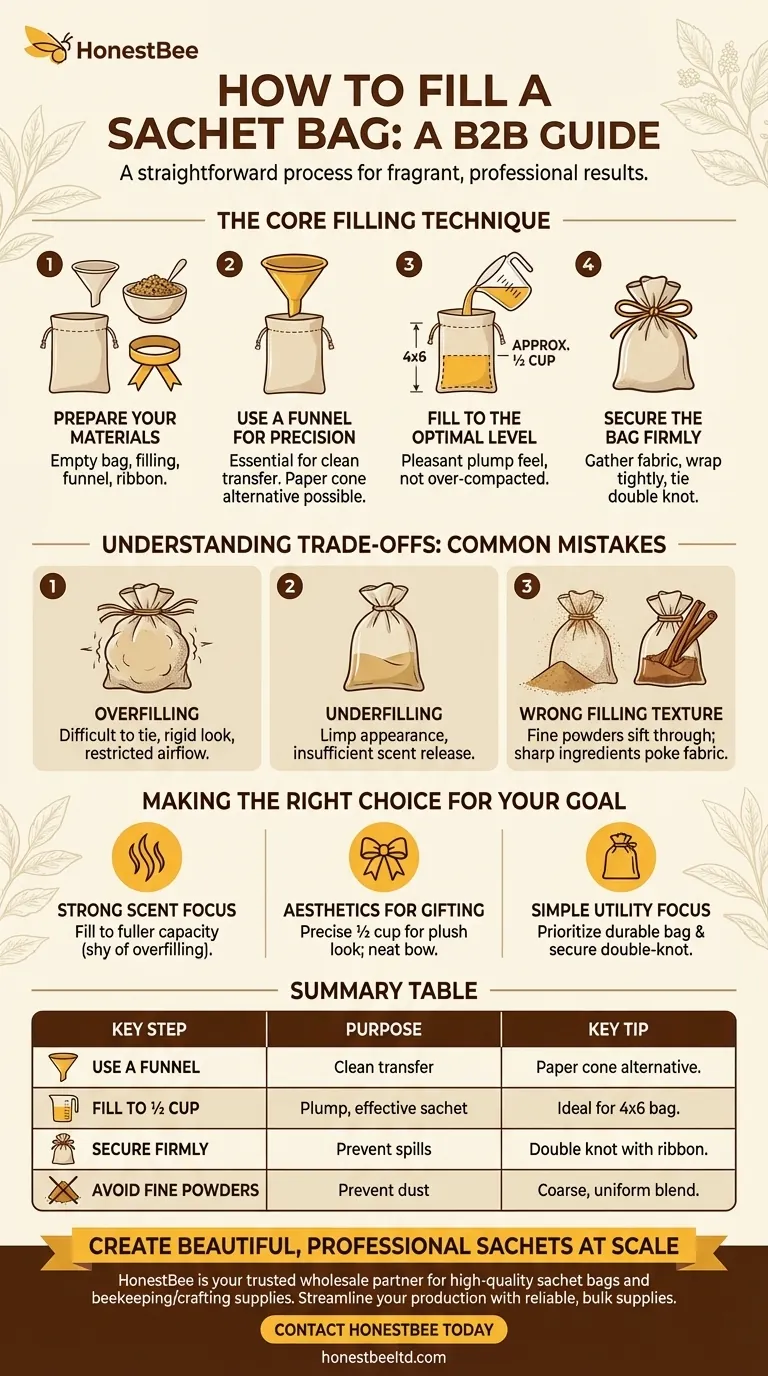
Executing the fill properly ensures a professional-looking result without mess or waste. The process can be broken down into four simple steps.
Step 1: Prepare Your Materials
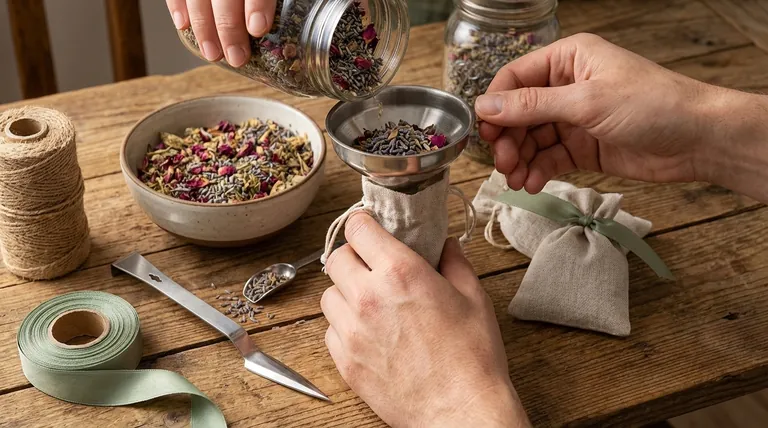
Before you begin, have all your items ready. You will need your empty sachet bag, your pre-mixed filling in a small bowl, a funnel, and a cut piece of ribbon or twine for tying.
Step 2: Use a Funnel for Precision
Place the narrow end of a funnel into the opening of the sachet bag. This is the single most important tool for a clean transfer, preventing your fragrant blend from spilling. If you do not have a funnel, you can create a temporary one by rolling a stiff piece of paper or cardstock into a cone.
Step 3: Fill to the Optimal Level
Carefully pour your filling through the funnel. The standard guideline is approximately ½ cup for a typical 4x6 inch bag. This volume gives the sachet a pleasant, plump feel without over-compacting the contents.
Step 4: Secure the Bag Firmly
Once filled, remove the funnel and gently shake the bag to settle the contents. Gather the fabric at the top, cinching it tightly. Wrap your ribbon or cord around the gathered "neck" several times before tying a firm double knot to ensure it will not come loose.
Understanding the Trade-offs: Common Mistakes
The difference between a functional, beautiful sachet and a disappointing one often comes down to avoiding a few common pitfalls related to the filling.
The Pitfall of Overfilling
It is tempting to add more filling for more scent, but overfilling is counterproductive. An overstuffed bag is difficult to tie securely, places stress on the seams, and can create a rigid, lumpy appearance. It can also restrict airflow around the botanicals, hindering scent diffusion.
The Problem with Underfilling
A sachet with too little filling will appear limp and sad. More importantly, it may not contain a sufficient volume of aromatic material to effectively release fragrance into a drawer, closet, or room.
Choosing the Wrong Filling Texture
The texture of your filling matters. Extremely fine powders can easily sift through the weave of common sachet fabrics like cotton or linen, creating a dusty mess. Conversely, large or sharp ingredients like whole cinnamon sticks can poke the fabric and create an awkward, uneven shape. A coarse, uniform blend is ideal.
Making the Right Choice for Your Goal
Adjust your technique slightly depending on the intended purpose of your sachet.
- If your primary focus is a strong, lasting scent: Lean towards filling the bag to its fuller capacity (just shy of overfilling) to maximize the aromatic material.
- If your primary focus is aesthetics for gifting: Be precise with the ½ cup measurement to achieve a soft, plush look and finish with a high-quality ribbon tied in a neat bow.
- If your primary focus is simple utility: Prioritize a durable bag material and a tight, secure double-knot closure; the exact fill volume is less critical than ensuring it stays sealed.
By controlling the volume and securing the bag properly, you can consistently create effective and elegant sachets for any purpose.
Summary Table:
| Key Step | Purpose | Key Tip |
|---|---|---|
| Use a Funnel | Clean, spill-free transfer of filling. | Roll stiff paper into a cone if you don't have a funnel. |
| Fill to ½ Cup | Achieve a plump, effective sachet without overstuffing. | This is the ideal volume for a standard 4x6 inch bag. |
| Secure Firmly | Prevent the filling from spilling out. | Use a double knot with ribbon or twine for a secure closure. |
| Avoid Fine Powders | Prevent dust from sifting through the fabric. | Opt for a coarse, uniform blend of botanicals. |
Create Beautiful, Professional Sachets at Scale
Are you a commercial apiary, beekeeping equipment distributor, or artisan crafter looking for high-quality supplies to create your own line of herbal sachets or other bee-related products? HONESTBEE is your trusted wholesale partner.
We supply durable, breathable sachet bags and other essential beekeeping and crafting materials perfect for creating products your customers will love. Let us help you streamline your production with reliable, bulk supplies.
Contact HONESTBEE today to discuss your wholesale needs and elevate your product line!
Visual Guide
Related Products
People Also Ask
- Why are specialized beekeeping tools essential for executing colony health monitoring processes? Enhance Hive Precision
- What are the approximate costs of basic beekeeping tools? Start Your Apiary for Under $85
- Why is hygiene management for migratory beekeeping equipment emphasized in fungal disease prevention?
- How does a favorable microclimate interact with beekeeping tools? Boost Overwintering Success and Equipment Longevity
- Why is the durability of beekeeping tools critical for production? Ensure Continuity in Orchard Management