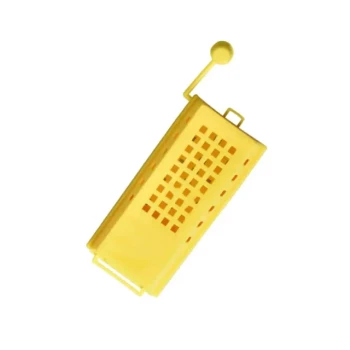
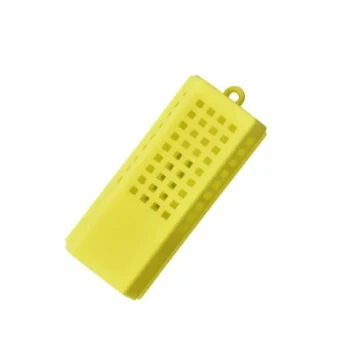
To use a handheld queen marking cage, you must first manually lift the queen by her wings and carefully drop her into the device's cylinder. Once she is inside, you insert the plunger and gently advance it to press her against the top mesh, immobilizing her with her thorax facing upward to allow for precise paint application.
Core Takeaway The handheld marking cage is designed to isolate the queen from the colony and restrict her movement without causing harm. Its primary function is to safely expose the queen's thorax through a protective mesh, allowing you to apply an identification mark (typically indicating her age) while preventing her from escaping or being injured.
The Mechanics of the Procedure
Capturing the Queen
The process begins on the hive frame. You must locate the queen and pick her up by her wings using your thumb and forefinger. This is the only safe way to handle her manually to avoid damaging her abdomen or legs.
Transferring to the Cylinder
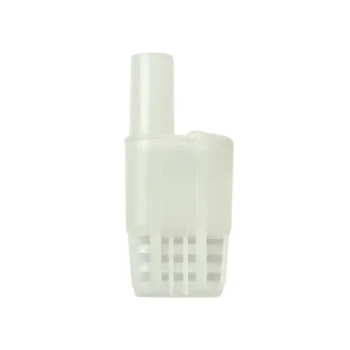
Once you have a secure hold on her wings, place her into the open end of the plastic cylinder. You should guide her deep enough so that she does not immediately fly out before the next step.
Immobilizing with the Plunger
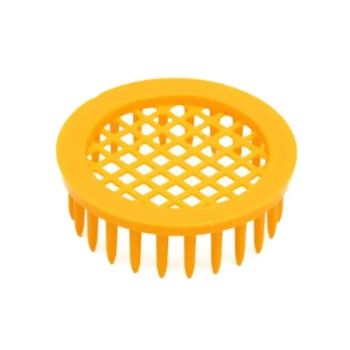
Insert the soft foam plunger into the cylinder. Slowly and gently push the plunger upward. This action forces the queen toward the top of the tube, which is covered by a plastic mesh or screen.
Positioning for the Mark
As the queen nears the top, manipulate the cage so that her thorax (the middle section) is facing the mesh. Continue pushing the plunger until she is held firmly—but not tightly—against the screen. She should be unable to walk around, but not crushed.
Applying the Paint
With the queen immobilized and her thorax exposed through the gaps in the mesh, use your free hand to apply a small dot of water-based, colorfast paint. Wait briefly for the paint to dry before reversing the plunger to release her back onto the frame.
Understanding the Trade-offs
Risk of Compression Injury
The most critical aspect of using this tool is tactile sensitivity. The plunger is often made of soft foam, but over-tightening can easily crush the queen or damage her legs against the mesh. You must apply only enough pressure to stop her movement, never more.
Maintenance and Airflow
These cages are prone to wax and propolis buildup. A dirty cage can stick, making the plunger jerky rather than smooth, which endangers the queen. Furthermore, blocked mesh restricts airflow. Regular cleaning with a soft brush and mild soap every 2-3 weeks is necessary to ensure the tool remains safe to use.
Making the Right Choice for Your Goal
If your primary focus is Safety for Beginners:
- Use this handheld plunger cage, as it eliminates the need to hold the queen between your fingers while painting, significantly reducing the risk of squeezing her too hard.
If your primary focus is Speed and Efficiency:
- Practice the "pick and drop" technique to quickly transfer the queen into the tube, minimizing the time she spends off the comb and reducing stress on the colony.
If your primary focus is Long-Term Colony Management:
- Ensure you use the standard color code for the current year when marking, as this simple dot will tell you the exact age of the queen during future inspections.
Mastering the handheld cage turns a nerve-wracking delicate operation into a routine, controlled task.
Summary Table:
| Step | Action | Key Safety Tip |
|---|---|---|
| Capture | Lift queen by her wings | Never grab the abdomen or legs |
| Transfer | Place her into the cylinder | Guide her deep to prevent escape |
| Immobilize | Advance foam plunger gently | Apply just enough pressure to stop movement |
| Position | Align thorax against the mesh | Ensure thorax is accessible through gaps |
| Mark | Apply water-based paint dot | Allow paint to dry before release |
Elevate Your Beekeeping Operations with HONESTBEE
Efficient queen management is the backbone of a productive apiary. At HONESTBEE, we specialize in supporting commercial apiaries and distributors with high-quality, professional-grade tools. From precision beekeeping instruments to large-scale honey-filling machinery and essential consumables, our comprehensive wholesale offerings are designed to streamline your workflow.
Whether you are scaling your colony management or stocking your distribution shelves, we provide the specialized hardware and industry expertise you need to succeed. Contact us today to explore our full range of wholesale solutions and see how our tools can bring superior value to your business.
Related Products
- One Hand Yellow Queen Marking Catcher Tube Cage Beekeeper Tool Accessory for Queen Bee
- Queen Bee Marking Tube Cage Bottle Catcher Holder with Clear Plastic Plunger Marker
- Plastic Queen Marking Tube Cage with Plunger for Beekeeping
- Plastic Long Marker Device for Catching and Marking Bees Queen Bee Marking Tube and Cage
- Plastic Queen Bee Catcher Marker Tube Holder for Queen Marking Bottle
People Also Ask
- What physical risks are involved in marking a queen bee? Expert Safety Tips for Successful Hive Management
- Why are high-quality queen bee marking tools essential for pedigree tracking? Master Honey Bee Genetic Integrity
- What is the significance of using queen marking tools in apiary performance monitoring? Optimize Your Hive Productivity
- What are the specific advantages of using international standard marking tools in queen bee production and management?
- What tools are available to assist in safely marking a queen bee? Essential Gear for Professional Beekeepers