The safe release of a marked queen relies on drying time and a gentle re-entry method. After applying the mark, you must hold the queen for a few minutes to allow the paint to dry completely. Once dry, release her by allowing her to walk calmly onto the top bars or the face of a frame; never drop her suddenly into the hive.
The primary goal when releasing a marked queen is to avoid triggering a defensive response from the workers. By ensuring the paint is dry and the release is gradual, you minimize foreign scents and sudden movements that could cause the colony to reject or "ball" their queen.
Preparing the Queen for Release
The Importance of Drying Time
Before returning the queen to the hive, the paint must be fully dry. Wet paint emits a strong odor that can mask the queen's pheromones or confuse the colony.
Holding her for a few minutes allows the volatile compounds in the marker to evaporate. This simple pause significantly reduces the risk of the workers perceiving her as a foreign intruder.
Handling the Cage
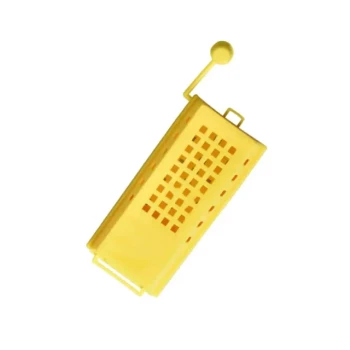
If you used a handheld cage for marking, do not force the queen out. Place the cage gently on the top bars or near the frame. Open the mechanism and allow her to exit the device on her own timeline.
Methods for Safe Re-entry
The Top Bar Approach
One effective method is to offer the queen a gap between the top bars of the frames. Position her (or the cage) so she can step directly onto the wood or wax.
By letting her walk down into the dark "seams" of the hive herself, she enters calmly. This appears natural to the nearby workers, whereas a queen falling from above can trigger an alarm response.
The Frame Face Approach
Alternatively, you can release her directly onto the face of a brood frame. Guide her gently toward an area of open comb or capped brood.
This method ensures she is immediately back in her natural environment. It is often safer than the top bar method if the hive is windy or if the queen seems skittish.
The Press-In Cage Advantage
If you marked the queen using a press-in cage directly on the comb, the release is often the simplest. Because she is already on the frame and surrounded by her own bees, the transition is seamless. Simply lift the cage and allow her to resume her duties.
Common Pitfalls and Risks
Avoiding the "Drop"
Never drop a queen suddenly into the colony. The primary reference explicitly warns that a sudden drop can startle the workers. This shock can lead them to "ball" the queen—a behavior where workers surround and overheat her, resulting in her death.
Distinguishing New vs. Established Queens
It is vital to distinguish between releasing a queen you just marked (an established queen) and introducing a new queen.
The immediate release methods described above apply to a queen that belongs to that specific colony. If you are introducing a new replacement queen, you must use a slow-release method (often involving a candy plug and days of acclimation) as described in standard introduction protocols. Do not simply release a foreign queen, even if marked, directly onto the frames.
Making the Right Choice for Your Goal
To ensure the highest success rate, select the method that minimizes disturbance:
- If you used a handheld plunger or tube: Ensure the paint is touch-dry, then place the device on the top bars and let the queen walk out into a gap between frames.
- If you held the queen by hand: Gently guide her onto the face of a frame with brood, letting her grip the comb before letting go.
- If you are dealing with a new (foreign) queen: Do not use the direct release method; utilize a slow-release cage with a candy plug to allow for pheromone acclimation over several days.
A patient release is the best insurance policy for your colony's most valuable asset.
Summary Table:
| Release Method | Best For... | Key Action |
|---|---|---|
| Top Bar Approach | Handheld marking cages | Let her walk into the dark seams between frames. |
| Frame Face Approach | Hand-held release | Guide her onto brood comb so she can grip immediately. |
| Press-in Cage | On-comb marking | Simply lift the cage; she is already integrated. |
| Slow Release | New/Foreign Queens | Use a candy plug for 2-3 days of pheromone acclimation. |
Maximize Your Apiary's Success with HONESTBEE
Protecting your queen is the first step toward a thriving colony. At HONESTBEE, we empower commercial apiaries and distributors with the high-quality tools needed for precision beekeeping. From professional-grade marking equipment to advanced honey-filling machines and hive-making hardware, we provide the full spectrum of essential supplies to scale your operations.
Ready to upgrade your beekeeping inventory?
Contact us today to explore our comprehensive wholesale offerings and discover how our expertise in machinery and industry consumables can drive your business forward.
Related Products
- Durable Galvanized Steel Spring Queen Bee Cage
- Portable Queen Bee Incubator with 12V Car Adapter for Safe Transport
- Professional Queen Bee Introduction and Transport Cage
- Heavy Duty Stainless Steel Queen Bee Catcher Clip
- Queen Bee Catcher Plastic Bee Marker Bottle with Piston Marking Tube
People Also Ask
- How long does it typically take for bees to adjust to a new queen? Master the 2-7 Day Requeening Window
- What should be done if the queen is still inside her cage when the hive is inspected? Master Queen Introduction Safety
- What is the step-by-step process for installing a queen bee's cage onto a frame? Ensure Hive Acceptance Safely
- What is the optimal placement for a queen bee cage? Essential Strategies for Successful Re-queening
- What are the advantages and disadvantages of introducing a queen bee by embedding the cage? Boost Your Queen Acceptance