To properly prepare your honey press for safe use, you must manually sand down any sharp manufacturing edges with fine-grit sandpaper. This initial deburring is followed by a crucial two-step cleaning process: first with oil to capture metal dust, and then with soap and water to create a truly food-safe surface.
A new honey press isn't ready for use straight out of the box. The goal is not just to smooth its edges to prevent cuts, but to perform a specific cleaning procedure that removes microscopic metal particles, ensuring your honey remains pure and uncontaminated.
Why Deburring Your New Press is a Critical First Step
Many new stainless steel tools, including honey presses, have small imperfections left over from the cutting and forming process. Addressing these is non-negotiable for both safety and quality.
The Problem: Manufacturing Burrs
When metal is cut, stamped, or drilled, it can leave behind tiny, sharp fragments and rough edges known as burrs. These are often found along seams, holes, and the top rim of the press cage.
The Risk to Operator Safety
The most immediate risk is personal injury. These edges can be razor-sharp and can easily cause deep cuts during assembly, operation, or—most commonly—cleaning.
The Risk to Food Hygiene
From a food safety perspective, these burrs are more insidious. The microscopic crevices they create are impossible to clean effectively. This allows bacteria to colonize these areas, potentially contaminating your honey and wax.
The Step-by-Step Deburring and Cleaning Process
Follow this procedure precisely to ensure your press is safe and sanitary. Always perform these steps before the press ever comes into contact with honey or wax.
Step 1: Gather Your Materials
You will need:
- Heavy-duty gloves (e.g., leather or mechanics gloves)
- 400 to 600-grit sandpaper
- 1200-grit sandpaper (optional, for a finer finish)
- Vegetable oil or food-grade mineral oil
- Clean rags and paper towels
- Dish soap and warm water
Step 2: Sand the Edges (The Deburring)
Put on your gloves. Tear off a small piece of the 400 or 600-grit sandpaper and carefully sand all sharp edges you can find. Apply firm, even pressure and focus on any area that feels rough or sharp to the touch. The goal is to knock down the burr, not to reshape the metal.
Step 3: Refine the Finish (Optional Polishing)
For an even smoother and easier-to-clean surface, follow up with the 1200-grit sandpaper. This step polishes the areas you just sanded, removing the finer scratches left by the previous grit and leaving a smoother finish.
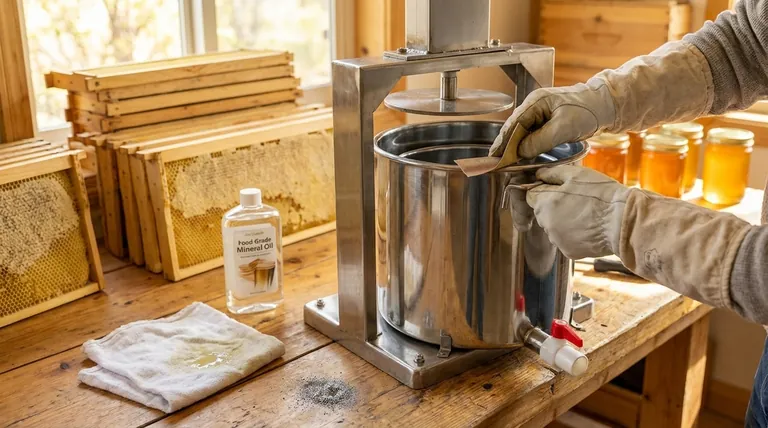
Step 4: The Critical Oil Wipe-Down
This is the most important step for hygiene. Dampen a clean rag with vegetable oil and thoroughly wipe down the entire press, paying special attention to the areas you sanded.
The oil acts as a carrier fluid, lifting and trapping the fine metal dust (known as swarf) that you created during sanding. Water alone cannot do this effectively, as it will simply bead over the metal particles.
Step 5: The Final Sanitary Wash
After wiping with oil, use a dry paper towel to wipe off the excess oil and the trapped metal dust. You should see a gray or black residue on the towel.
Finally, wash the entire press thoroughly with soap and warm water. The soap will break down and remove the remaining oil, ensuring the press is completely clean and food-safe. Dry it completely before assembly.
Understanding the Trade-offs and Best Practices
Making the right choices during this process ensures you solve the problem without creating new ones.
Why Not Use Coarser Sandpaper?
Using a coarse sandpaper (like 100-grit) is a common mistake. While it removes burrs quickly, it creates deep scratches in the stainless steel. These new scratches become another area where bacteria can hide, defeating the purpose of the process.
Is This Process Always Necessary?
While premium, high-cost presses may have a better finish out of the box, it is always a best practice to inspect any new piece of food-grade equipment. Run a gloved finger along the edges; if you feel any sharpness, this process is essential.
The Importance of a Food-Safe Oil
While the oil will be washed off, using a food-safe vegetable or mineral oil is a mandatory precaution. Never use industrial lubricants like WD-40 or machine oil, as trace amounts could remain and contaminate your honey.
Making the Right Choice for Your Goal
After you have completed the deburring and cleaning, a final check confirms the press is ready for use.
- If your primary focus is operator safety: Run a gloved finger over all seams, rims, and handle edges. Ensure no sharp points remain that could cause injury during operation.
- If your primary focus is food hygiene: After the final wash, hold the components up to a bright light. Inspect the sanded areas to confirm there is no metallic sheen from dust and no oily residue.
This one-time preparation ensures your honey press will be a safe, hygienic, and reliable tool for many seasons to come.
Summary Table:
| Step | Purpose | Key Materials |
|---|---|---|
| 1. Sand Edges | Remove sharp burrs and prevent cuts. | 400-600 grit sandpaper, gloves. |
| 2. Oil Wipe-Down | Trap and remove microscopic metal dust (swarf). | Food-safe oil (e.g., vegetable oil), rag. |
| 3. Sanitary Wash | Remove oil and residual particles for a food-safe surface. | Dish soap, warm water. |
Ready to equip your apiary with reliable, food-grade tools?
At HONESTBEE, we supply commercial apiaries and beekeeping equipment distributors with high-quality, durable honey presses and other essential beekeeping supplies. Our wholesale-focused operations ensure you get the professional-grade equipment you need to maintain the highest standards of safety and honey purity.
Contact our team today to discuss your wholesale needs and ensure your operation is built on a foundation of quality and safety.
Visual Guide

Related Products
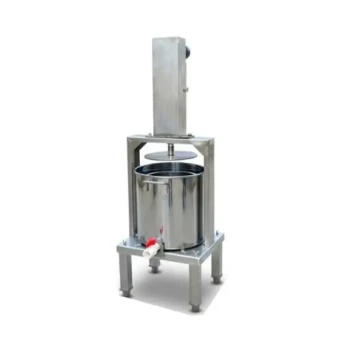
- Stainless Steel Manual Honey Press with Guard for Pressing Honey and Wax
- Stainless Steel Honey Press Wax Press with Tank
- Easy Use Manual Stainless Steel Honey Press for Honey Comb
- Electric Honey Press Machine for Squeezing Honey Comb Press Equipment
- 10L Stainless Steel Electric Honey Press Machine
People Also Ask
- What is a honey press and what is it used for? A Guide to Simple Honey Extraction
- What is the purpose of the raised frame on the honey press? Simplify Logistics and Improve Extraction Workflow
- What other functions can a honey press serve besides honey extraction? Discover Versatile Multi-Purpose Uses
- What are the potential drawbacks of honey produced using a honey press? Navigate Quality & Market Challenges
- For which type of beekeeping operations is this honey press most suitable? Efficient Solutions for High-Volume Apiaries