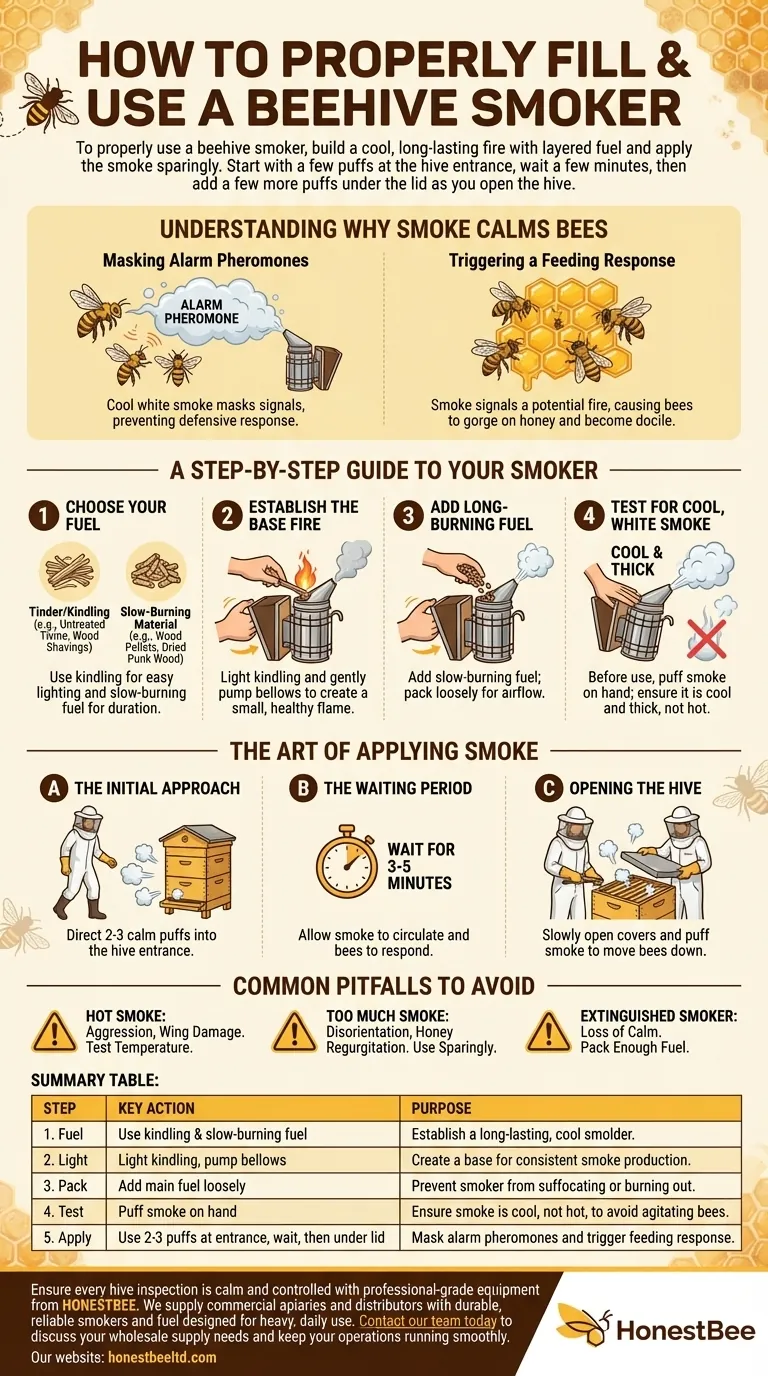
To properly use a beehive smoker, you must first build a cool, long-lasting fire with layered fuel, and then apply the smoke sparingly. Start with a few puffs at the hive entrance, wait a few minutes for it to take effect, and then add a few more puffs under the lid as you open the hive to begin your inspection.
Using a smoker is not about overwhelming the bees, but about gently interrupting their natural defense system. The true goal is to produce cool, white smoke that masks alarm pheromones, encouraging the bees to focus on consuming honey rather than defending the hive.
Understanding Why Smoke Calms Bees
Before using the tool, it's critical to understand the principles behind it. Smoke doesn't sedate bees; it leverages their ancient instincts in two specific ways.
Masking Alarm Pheromones
When a bee feels threatened or stings, it releases an alarm pheromone. This chemical signal instantly alerts other guard bees in the colony to a potential threat, triggering a coordinated defensive attack.
Cool, white smoke effectively masks these pheromones. It scrambles the bees' primary method of communication for danger, preventing a small disturbance from escalating into a full-blown defensive response.
Triggering a Feeding Response
On a deeper, instinctual level, smoke signals a potential forest fire. A honey bee colony's primary response to this threat is not to fight, but to prepare to abandon the hive.
To do this, they gorge themselves on honey, loading up on resources for the journey. A bee with a full belly is physically less able to flex its abdomen to sting and is generally more docile and preoccupied.
A Step-by-Step Guide to Your Smoker
Proper technique begins with building the right kind of fire. The goal is a smoldering fire that produces consistent, cool smoke, not a hot, roaring flame.
Step 1: Choose Your Fuel
You need two types of fuel. Start with a tinder or kindling that lights easily, such as untreated twine, wood shavings, or pine needles.
Your main fuel should be a slow-burning material like wood pellets, dried punk wood, or commercially available smoker fuels. This is what will keep the smoker going for your entire inspection.
Step 2: Establish the Base Fire
Light your kindling and drop it into the bottom of the smoker's burn chamber.
Gently pump the bellows a few times to provide oxygen and establish a small, healthy flame. You should see a steady stream of smoke emerging from the spout.
Step 3: Add Long-Burning Fuel
Once the base fire is established, add your slow-burning fuel on top. Continue pumping the bellows as you add this fuel.
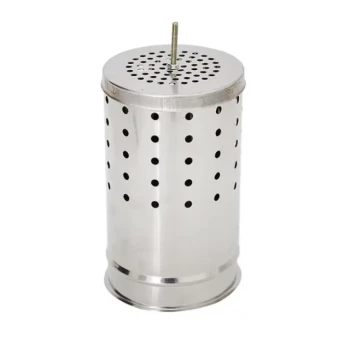
Pack the chamber fully but do not pack it too tightly. The fire needs airflow to smolder correctly. A loosely packed smoker will burn out too quickly, while a tightly packed one will suffocate.
Step 4: Test for Cool, White Smoke
This is a critical safety step. Before approaching the hive, puff some smoke onto the back of your hand from a few inches away.
The smoke should be cool and thick. If it feels hot or you see sparks, your fire is too hot. Wait a few minutes for it to die down into a smolder.
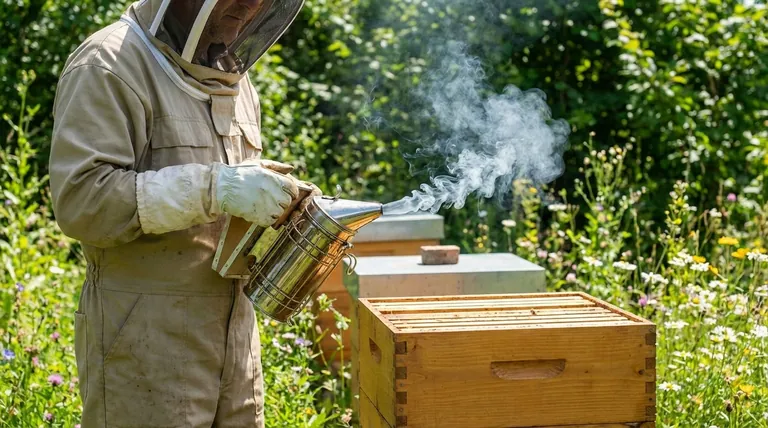
The Art of Applying Smoke
How you apply the smoke is just as important as how you light the smoker. The key is to be gentle, deliberate, and minimalist.
The Initial Approach
Gently approach the hive and direct two or three calm puffs of smoke into the entrance. This serves as your initial announcement that you are there.
The Waiting Period
After smoking the entrance, wait for 3 to 5 minutes. This gives the smoke time to circulate through the hive and for the bees' behavioral response to kick in. Rushing this step is a common beginner mistake.
Opening the Hive
After waiting, slowly crack open the outer and inner covers. Direct a few more gentle puffs of smoke across the tops of the frames. This moves the bees down and away from the top bars, preventing them from flying out as you begin work.
During the Inspection
Set your smoker aside in a safe spot where it won't tip over. You should only need to use it again if you notice the bees becoming agitated or "boiling up" over the frames. A single, gentle puff is often enough to calm them back down.
Common Pitfalls to Avoid
Correctly using a smoker also means understanding what not to do. These common mistakes can agitate a colony instead of calming it.
The Danger of Hot Smoke
Never apply hot smoke or embers to a hive. This will be interpreted as a direct attack, burn the bees' delicate wings, and make the colony extremely aggressive. Always test the temperature first.
The Problem with Too Much Smoke
Over-smoking is counterproductive. It can disorient the colony, interrupt brood rearing, and in extreme cases, cause the bees to consume so much honey they begin to regurgitate it. Use just enough to keep them calm.
The Issue of an Extinguished Smoker
Running out of smoke mid-inspection is a major problem. You lose your primary tool for keeping the colony calm at a critical moment. Always pack enough fuel to last longer than you expect the inspection to take.
Responding to a Sting
If you are stung, your first move should be to smoke the area where you were stung. This masks the alarm pheromone released by the sting, preventing other bees from being drawn to the same spot to attack.
How to Apply This to Your Hive
Your use of smoke should be adapted to the specific situation and temperament of your colony.
- If your primary focus is a quick, routine inspection: A few puffs at the entrance and under the lid are likely all you will need for a calm colony.
- If you are working with a known aggressive colony: Be prepared with a well-lit smoker and apply smoke calmly but deliberately to maintain control throughout the process.
- If you are performing a complex task like a split or requeening: Ensure your smoker is well-packed to last the entire duration, preventing it from going out at a critical moment.
Mastering the smoker is a foundational skill for becoming a calm, confident, and effective beekeeper.
Summary Table:
| Step | Key Action | Purpose |
|---|---|---|
| 1. Fuel | Use kindling & slow-burning fuel (e.g., wood pellets) | Establish a long-lasting, cool smolder |
| 2. Light | Light kindling, pump bellows to start fire | Create a base for consistent smoke production |
| 3. Pack | Add main fuel loosely for airflow | Prevent smoker from suffocating or burning out |
| 4. Test | Puff smoke on your hand to check temperature | Ensure smoke is cool, not hot, to avoid agitating bees |
| 5. Apply | Use 2-3 puffs at entrance, wait, then puff under lid | Mask alarm pheromones and trigger feeding response |
Ensure every hive inspection is calm and controlled with professional-grade equipment from HONESTBEE.
We supply commercial apiaries and beekeeping equipment distributors with durable, reliable smokers and fuel designed for heavy, daily use. Our wholesale-focused operations mean you get the quality tools you need to work efficiently and safely, season after season.
Contact our team today to discuss your wholesale supply needs and keep your operations running smoothly.
Visual Guide
Related Products
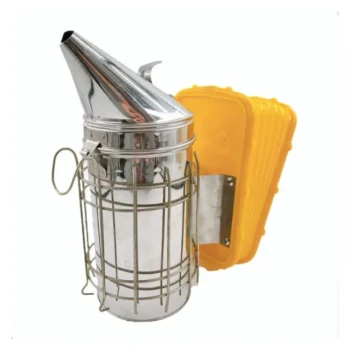
- European Stainless Steel Bee Smoker for Honey Bee Hive
- Stainless Steel Bee Hive Smoker Beekeeping Smoker for Wholesale
- Stainless Steel Honey Bee Smoker Hive and Honeycomb Smoker for Beekeeping
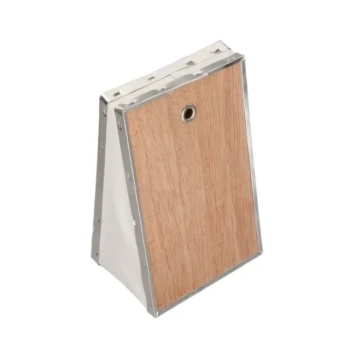
- Electric Bee Smoker European Style Bee Hive Smoker for Beekeeping
- Stainless Steel Electric Beehive Smoker for Beekeeping and Bee Keeper Use
People Also Ask
- What types of fuel are suitable for use in a bee smoker to ensure bee safety? Guide to Natural, Non-Toxic Fuel Selection
- What are the typical design features of a bee smoker? Explore Professional Tools for Hive Management
- What is the history of the modern bee smoker? Evolution from Moses Quinby to Tracy F. Bingham's Designs
- What is the primary objective when lighting a bee smoker for apiary management? Achieve Cool Smoke for Calm Bees
- What type of bee smoker is recommended for a beginner? Top Picks for Easy Hive Management