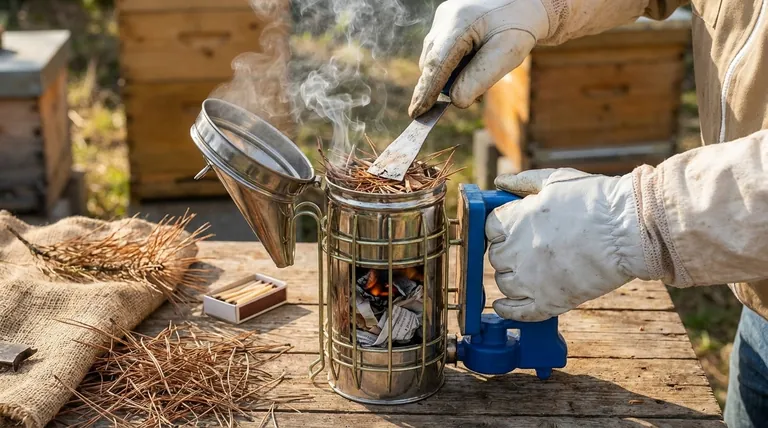
To start a fire in a beehive smoker, you must create a layered fire that smolders rather than burns with an open flame. Begin by lighting a fast-burning starter material like crumpled newspaper or cardboard, place it in the bottom of the smoker, and pump the bellows to establish embers. Add kindling like pine needles or wood chips on top, and once that is burning well, pack in your main, slow-burning fuel to produce a cool, dense smoke.
The goal is not simply to start a fire, but to create a slow, smoldering burn. This is achieved by layering fuel correctly—from a quick-lighting starter to a long-lasting core—and using the bellows to control airflow, ensuring the smoke is cool and effective for calming bees.
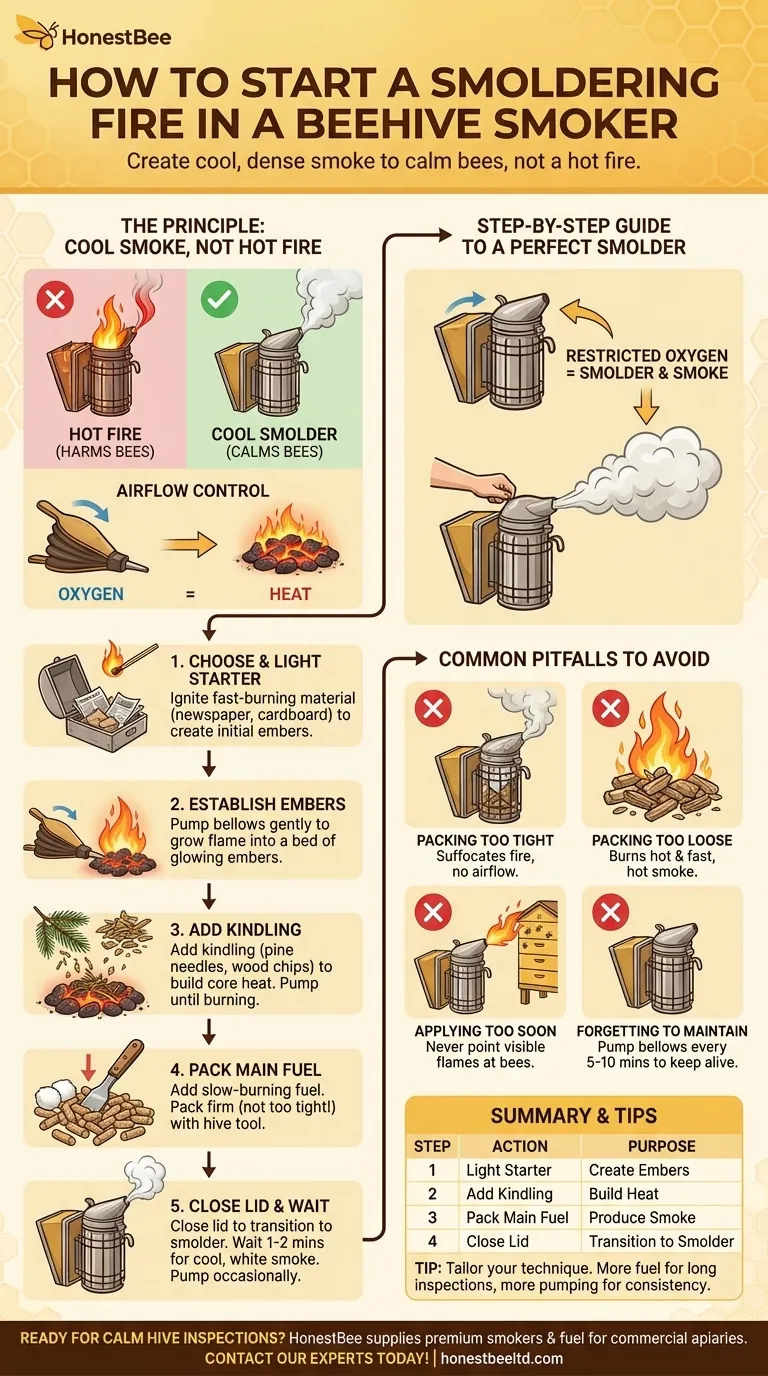
The Principle: Cool Smoke, Not Hot Fire
A common mistake is producing hot smoke or open flames, which can harm bees and agitate the colony. Your objective is to create a cool, white, and dense smoke that effectively masks the bees' alarm pheromones without causing them distress.
Why a Smoldering Fire is Essential
A fire with an open flame is too hot. Hot smoke can burn the bees' delicate wings and cause them to become defensive.
A smoldering fire, created by restricting airflow with the smoker's lid, burns fuel slowly and incompletely. This process is what generates the characteristic thick, white smoke that is ideal for beekeeping.
The Critical Role of Airflow
The bellows are your tool for managing the fire. Pumping the bellows introduces oxygen, which feeds the embers and increases heat.
Once you have a good bed of embers, closing the lid and reducing how often you pump the bellows restricts oxygen. This forces the fuel to smolder and produce smoke instead of burning away in an open flame.
A Step-by-Step Guide to a Perfect Smolder
Follow these steps to build a reliable, long-lasting smoker fire.
Step 1: Choose a Starter
Your starter material needs to catch fire easily. Its only job is to create the initial embers.
Good starters include crumpled newspaper, cardboard egg cartons, untreated burlap, or even natural cotton and dryer lint.
Step 2: Light the Starter and Establish Embers
Using a long match or a stove lighter, ignite your starter material. Let it burn for a few moments until it's well-lit.
Place the lit starter in the bottom of the smoker's burn chamber. Lean the smoker slightly and gently pump the bellows a few times to help the flame grow into a small bed of glowing embers.
Step 3: Add Kindling
Once your starter is creating embers, add a layer of kindling. This material catches fire more slowly than the starter but burns hotter, building the core heat of your fire.
Excellent kindling options include dry pine needles, small pinecones, or small wood chips. Add a handful on top of the embers and pump the bellows until the kindling starts to burn.
Step 4: Add and Pack the Main Fuel
This is the most important layer, as it will produce the majority of the smoke. Add your slow-burning fuel on top of the burning kindling.
Use a hive tool to gently pack the fuel down. You want it firm enough to smolder slowly but not so tight that it cuts off all airflow. Good main fuels include larger wood chips, wood pellets, or baled cotton smoker fuel.
Step 5: Close the Lid and Wait
Once you see the main fuel begin to catch and produce smoke, close the lid. This is the crucial step that transitions the fire from burning to smoldering.
Wait a minute or two, pumping the bellows occasionally, until you see thick, cool, white smoke coming from the nozzle. The outside of the smoker will be hot, but the smoke itself should not be.
Common Pitfalls to Avoid
Mastering the smoker often means understanding what not to do. Avoiding these common errors will ensure a better experience for you and your bees.
Mistake #1: Packing Too Tightly
If you compact the fuel too much, oxygen cannot circulate and the fire will suffocate and go out. The fuel should be firm but not rock-solid.
Mistake #2: Packing Too Loosely
If the fuel is too loose, it will get too much oxygen. This causes it to burn hot and fast, producing thin, hot smoke or even open flames instead of a useful smolder.
Mistake #3: Applying Smoke Too Soon
Never point a smoker with visible flames into a hive. Always wait until the fire has transitioned to a smolder and is producing the desired cool, white smoke.
Mistake #4: Forgetting to Maintain the Fire
A smoker will go out if left unattended. Give the bellows a gentle puff or two every 5-10 minutes while you work to keep the embers alive and the smoke flowing.
How to Ensure a Calm and Safe Inspection
Using your smoker correctly is the foundation of a stress-free hive inspection. Tailor your technique to the task at hand.
- If your primary focus is a long-lasting fire for multiple hives: Build a very strong ember base with plenty of kindling before packing in a generous amount of slow-burning main fuel.
- If your primary focus is preventing the smoker from going out: Ensure you have enough starter fuel, and remember to pump the bellows gently but consistently every few minutes during your inspection.
- If your primary focus is creating cool, gentle smoke: After closing the lid, give the fire a full minute to begin smoldering before you even approach the hive.
Mastering your smoker is a fundamental skill that transforms beekeeping from a nervous task into a confident and calm interaction with your colonies.
Summary Table:
| Step | Key Action | Purpose |
|---|---|---|
| 1 | Light a starter (e.g., newspaper) | Create initial embers |
| 2 | Add kindling (e.g., pine needles) | Build core heat |
| 3 | Pack main fuel (e.g., wood pellets) | Produce long-lasting, cool smoke |
| 4 | Close lid and manage airflow | Transition fire to a smolder |
Ready to perfect your beekeeping technique? A reliable smoker is key to a calm hive inspection. At HONESTBEE, we supply commercial apiaries and beekeeping equipment distributors with high-quality, durable smokers and fuel designed for optimal performance. Ensure your bees stay calm and your inspections go smoothly—contact our experts today to find the right equipment for your operation!
Visual Guide
Related Products
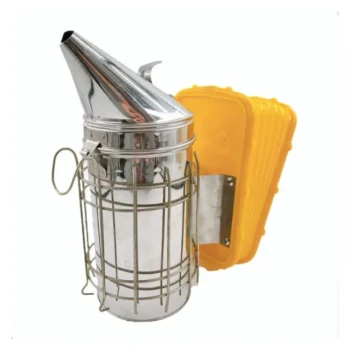
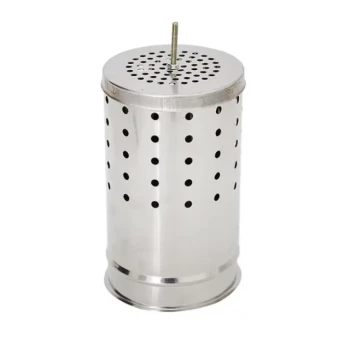
- European Stainless Steel Bee Smoker for Honey Bee Hive
- Stainless Steel Bee Hive Smoker Beekeeping Smoker for Wholesale
- Stainless Steel Honey Bee Smoker Hive and Honeycomb Smoker for Beekeeping
- Electric Bee Smoker European Style Bee Hive Smoker for Beekeeping
- Stainless Steel Electric Beehive Smoker for Beekeeping and Bee Keeper Use
People Also Ask
- What types of fuel are suitable for use in a bee smoker to ensure bee safety? Guide to Natural, Non-Toxic Fuel Selection
- What is the history of the modern bee smoker? Evolution from Moses Quinby to Tracy F. Bingham's Designs
- Why is a stainless steel bee smoker considered indispensable? Master Hive Management with Cool Smoke Technology
- What are the typical design features of a bee smoker? Explore Professional Tools for Hive Management
- What are bee smokers made out of? Choose the Right Material for Your Apiary