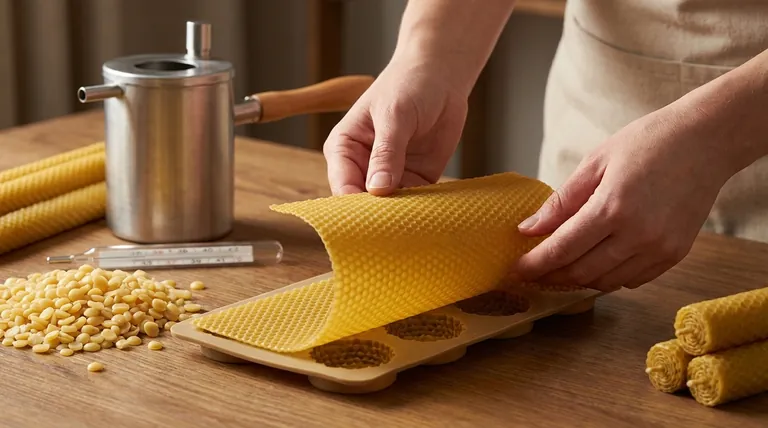
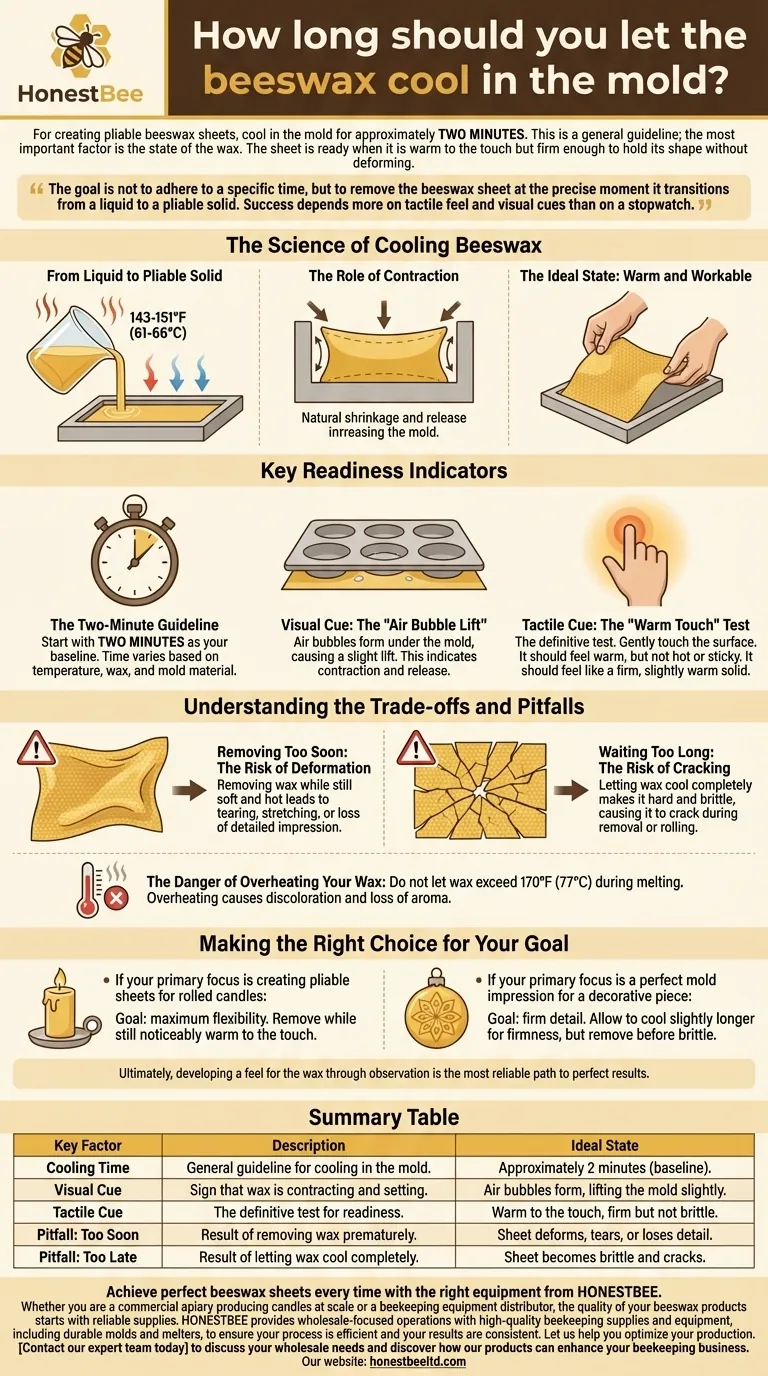
For creating pliable beeswax sheets, you should let the wax cool in the mold for approximately two minutes. This is a general guideline; the most important factor is the state of the wax itself. The sheet is ready when it is warm to the touch but firm enough to hold its shape without deforming when handled.
The goal is not to adhere to a specific time, but to remove the beeswax sheet at the precise moment it transitions from a liquid to a pliable solid. Success depends more on tactile feel and visual cues than on a stopwatch.
The Science of Cooling Beeswax
To master the process, you need to understand what is happening to the wax as it cools. Beeswax melts between 143-151°F (61-66°C) and undergoes a significant change in properties as it returns to a solid state.
From Liquid to Pliable Solid
When you pour hot liquid beeswax into a mold, it immediately begins to release heat into the mold and the surrounding air. The objective is to let it cool just enough to become solid, but not so much that it becomes brittle.
The Role of Contraction
As beeswax cools, it contracts and shrinks slightly. This natural shrinkage is what helps the sheet release from the mold. It is a fundamental part of the process and provides a key visual indicator that the wax is setting properly.
The Ideal State: Warm and Workable
The perfect beeswax sheet is one that you can remove from the mold and roll or shape without it cracking. This requires the wax to be solid but still contain enough residual warmth to be flexible. This state is fleeting, making observation critical.
Key Readiness Indicators
Instead of relying solely on a timer, use these physical indicators to determine the perfect moment to remove your beeswax sheet.
The Two-Minute Guideline
Start with two minutes as your baseline. The exact time will vary based on the ambient temperature of your room, the temperature of your wax, and the material of your mold (silicone cools differently than metal).
Visual Cue: The "Air Bubble Lift"
A primary sign of readiness is seeing air bubbles forming under the mold, often causing the center of a flexible silicone mold to lift slightly. This indicates the wax is contracting, pulling away from the mold's surface, and trapping air underneath. This is a very reliable sign that the sheet is setting.
Tactile Cue: The "Warm Touch" Test
This is the definitive test. Gently touch the surface of the wax sheet. It should feel warm, but not hot or sticky. If your finger leaves an indent or picks up soft wax, it is too early. It should feel like a firm, slightly warm solid.
Understanding the Trade-offs and Pitfalls
Small variations in timing can lead to very different outcomes. Understanding these potential failures will help you fine-tune your process.
Removing Too Soon: The Risk of Deformation
If you attempt to remove the sheet while the wax is still too soft and hot, it will likely tear, stretch, or lose the detailed impression from the mold. The sheet will not be strong enough to support its own weight.
Waiting Too Long: The Risk of Cracking
This is the most common mistake. If you let the beeswax cool completely in the mold, it will become hard and brittle. When you try to remove it from the mold or roll it into a candle, it will crack and break.
The Danger of Overheating Your Wax
The process starts before you even pour. Do not let your wax exceed 170°F (77°C) during the melting phase. Overheating can permanently discolor the beeswax and destroy its natural, subtle aroma, compromising the quality of your final product.
Making the Right Choice for Your Goal
Your timing should be guided by your end product. Use these principles to guide your judgment.
- If your primary focus is creating pliable sheets for rolled candles: Your goal is maximum flexibility, so err on the side of removing the sheet while it is still noticeably warm to the touch.
- If your primary focus is a perfect mold impression for a decorative piece: Allow it to cool a few moments longer to become firmer, ensuring every detail is set, but remove it before it becomes brittle.
Ultimately, developing a feel for the wax through observation is the most reliable path to perfect results.
Summary Table:
| Key Factor | Description | Ideal State |
|---|---|---|
| Cooling Time | General guideline for cooling in the mold. | Approximately 2 minutes (baseline). |
| Visual Cue | Sign that wax is contracting and setting. | Air bubbles form, lifting the mold slightly. |
| Tactile Cue | The definitive test for readiness. | Warm to the touch, firm but not brittle. |
| Pitfall: Too Soon | Result of removing wax prematurely. | Sheet deforms, tears, or loses detail. |
| Pitfall: Too Late | Result of letting wax cool completely. | Sheet becomes brittle and cracks. |
Achieve perfect beeswax sheets every time with the right equipment from HONESTBEE.
Whether you are a commercial apiary producing candles at scale or a beekeeping equipment distributor, the quality of your beeswax products starts with reliable supplies. HONESTBEE provides wholesale-focused operations with high-quality beekeeping supplies and equipment, including durable molds and melters, to ensure your process is efficient and your results are consistent.
Let us help you optimize your production. Contact our expert team today to discuss your wholesale needs and discover how our products can enhance your beekeeping business.
Visual Guide
Related Products
- Beeswax Foundation Sheets Beehive Foundation for Wholesale
- Electric Beeswax Flat Sheet Machine with Operating Tray for Wax Processing
- Manual Beeswax Flat Sheet Machine for Beeswax Processing
- Beeswax Machine Press Embosser Wax Foundation Mold Printer Bee Hive Equipment Making Sheet
- Notebook Style Beeswax Foundation Mould Wax Foundation Mold
People Also Ask
- What are the negative consequences of using old or contaminated beeswax in foundations? Protect Your Hive Today
- How do beeswax foundation sheets benefit modern hives? Boost Honey Yield and Optimize Colony Efficiency
- What are the specific advantages of regular comb replacement? Boost Hive Health with New Beeswax Foundations
- What are the characteristics of the beeswax sheets made for beekeeping? Boost Hive Efficiency with Precision Wax Foundation
- Why is the regular exchange and replacement of beeswax foundations encouraged? Boost Honey Yield & Hive Biosafety


