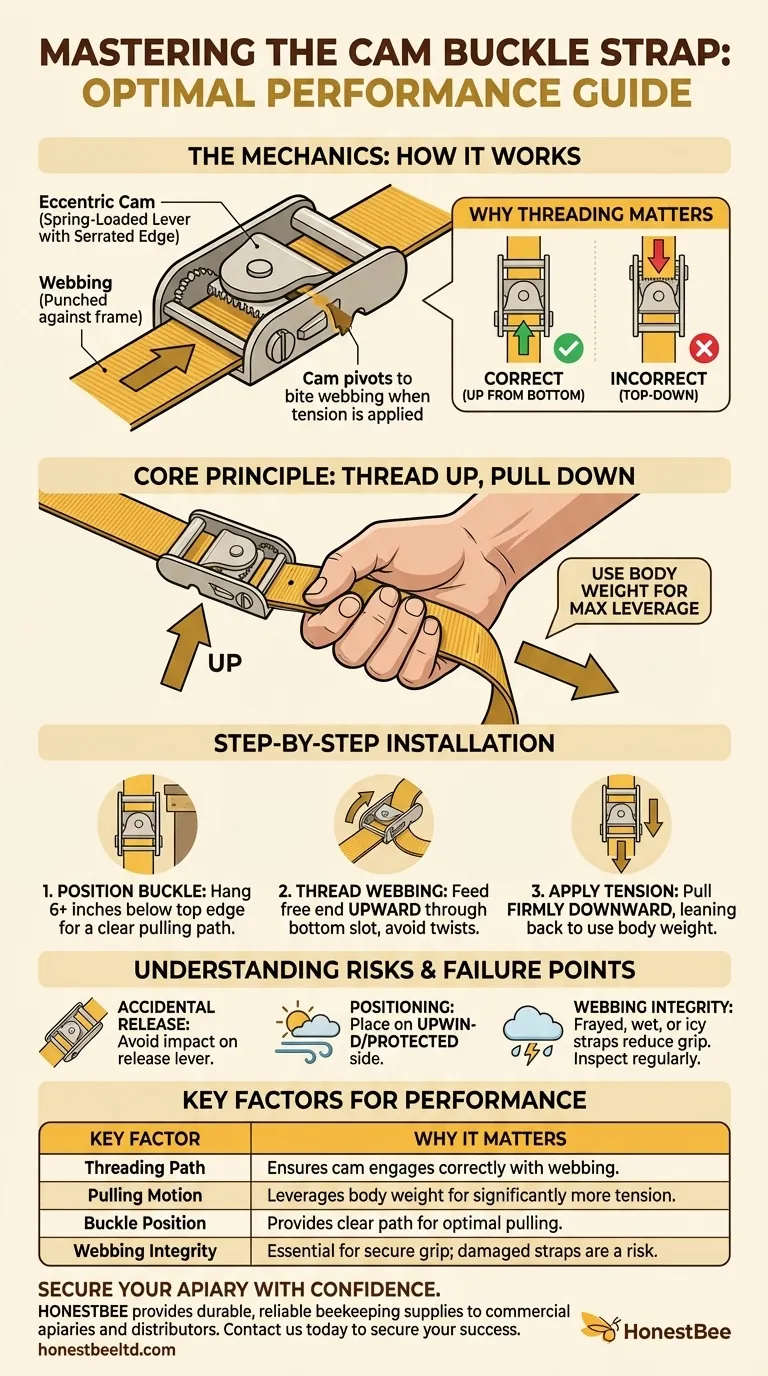
To correctly install a cam buckle strap, you must thread the loose end of the webbing up through the bottom of the buckle and pull it downward. This orientation is critical because it engages the cam's locking teeth and allows you to use your body weight as leverage, creating significantly more tension than pulling horizontally.
The key to a cam buckle's strength is not just pulling the strap tight, but using the correct threading path and downward pulling motion to maximize leverage and ensure the locking mechanism is properly engaged.
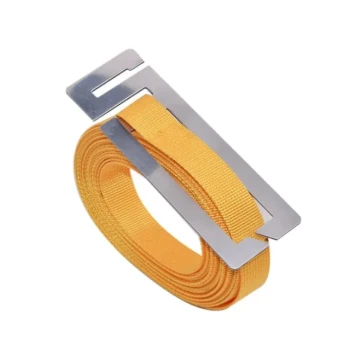
How a Cam Buckle Achieves Its Grip
A cam buckle is a simple but effective device that relies on a specific mechanical principle. Understanding this principle is the first step toward using it correctly.
The Role of the Eccentric Cam
The "cam" is the spring-loaded metal lever with a serrated or textured edge. It is not a perfect circle; its axle is off-center.
When you pull the strap, it pivots the cam slightly, causing the textured edge to bite down and pinch the webbing against the buckle's frame. The more tension on the strap, the harder the cam bites down.
Why Threading Direction is Non-Negotiable
Threading the strap up from the bottom of the buckle is the only correct method.
This path ensures that when you pull the loose end down, the force travels in a straight line that properly engages the cam's teeth. Attempting to thread it from the top will work against the mechanism and it will not lock.
Step-by-Step Installation for Maximum Security
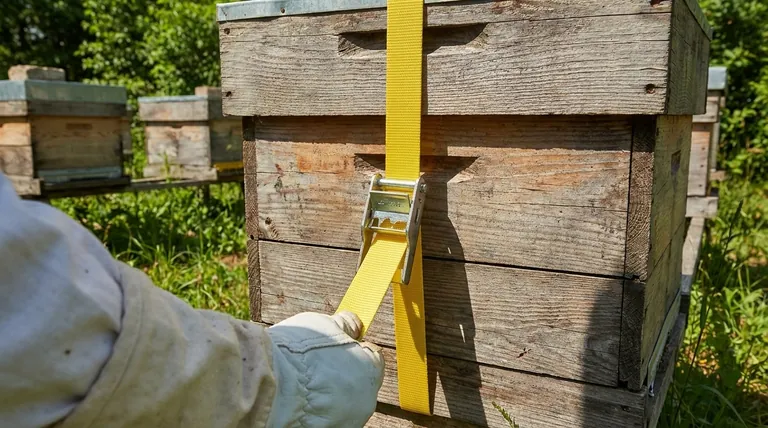
Follow this process to ensure your strap is as tight and secure as possible, especially when securing valuable items like beehives.
Step 1: Position the Buckle
Place the buckle so it hangs at least six inches below the top edge of your object. This provides enough slack and a clear path to pull the strap straight down, which is essential for maximizing tension.
Step 2: Thread the Webbing
Take the free end of the strap, wrap it around your object, and feed it upward through the slot in the bottom of the cam buckle. Ensure the strap is not twisted anywhere along its path.
Step 3: Apply Tension Using Leverage
Grip the free end of the strap and pull it firmly downward. This motion allows you to lean back and use your body weight, not just your arm strength, to cinch the strap as tightly as possible. You will feel the cam engage and lock the strap in place.
Understanding the Trade-offs and Failure Points
While highly reliable, a cam buckle's security depends on proper use and awareness of its limitations.
The Risk of Accidental Release
The primary failure point is an accidental press of the release lever. A sharp impact directly on the cam's thumb-release can instantly disengage the tension.
Positioning for Environmental Factors
In areas with strong winds or potential for impact, always position the buckle on the upwind side or in a protected location. This minimizes the chance of debris or a sudden gust jarring the release mechanism loose.
The Importance of Webbing Integrity
The cam's teeth need a firm surface to grip. A strap that is old, frayed, wet, or icy will not lock as securely. Regularly inspect your straps for wear and tear, as damaged webbing is a significant safety risk.
Making the Right Choice for Your Goal
To release the strap, simply press the thumb lever to disengage the cam's teeth and pull the webbing back through the buckle.
- If your primary focus is maximum tension: Always thread the strap up from the bottom and pull straight down to use your body weight for leverage.
- If your primary focus is reliability in harsh conditions: Position the buckle on the upwind or most protected side of the object and regularly inspect the webbing for damage.
By understanding its simple mechanics, you transform a cam buckle from a basic strap into a precise and reliable securing tool.
Summary Table:
| Key Factor | Why It Matters |
|---|---|
| Threading Path | Threading up from the bottom ensures the cam's teeth engage correctly with the webbing. |
| Pulling Motion | Pulling straight down uses your body weight as leverage for significantly more tension. |
| Buckle Position | Placing the buckle 6+ inches below the top edge provides a clear path for optimal pulling. |
| Webbing Integrity | Frayed, wet, or damaged straps prevent the cam from getting a secure grip, creating a safety risk. |
Secure your apiary with confidence. Just as proper technique is key to a cam buckle's performance, using high-quality beekeeping supplies is essential for a successful operation. HONESTBEE supplies durable, reliable beekeeping equipment and supplies to commercial apiaries and distributors through our wholesale-focused operations. Let us help you secure your success. Contact HONESTBEE today to discuss your needs.
Visual Guide
Related Products
- Professional Galvanized Hive Strap with Secure Locking Buckle for Beekeeping
- Heavy-Duty Nylon Beehive Hive Strap with Stainless Steel Cinch Buckle
- High Security Emlock Strap System
- Versatile Ratchet Hive Strap with S-Hooks for Secure Fastening
- Heavy Duty Ratchet Hive Strap
People Also Ask
- How should hive straps be stored? Prevent Tangles & Extend Strap Life
- What is a common length for hive straps and how should the excess be managed? Master Hive Stability and Bee Health
- What is the best choice for hive straps? Ratchet vs. Cam Buckle for Your Apiary
- What role do standardized beehive fastening and protective consumables play? Secure Colonies Against Natural Disasters
- Why do beekeepers use hive straps? Essential Security for Hive Integrity and Winter Protection