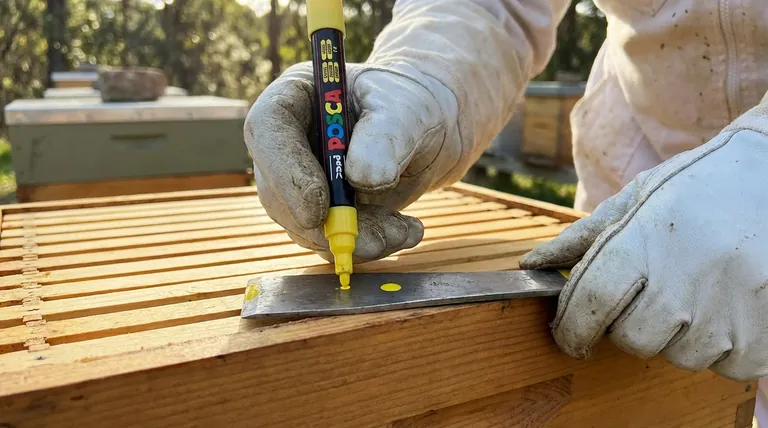
Preparing a Posca pen for queen marking is a simple but critical process of priming. You must first shake the pen vigorously, then press the spring-loaded nib down several times on a clean, hard surface—such as your thumbnail or a hive tool—until the paint begins to flow. The final, most important step is to test-draw a small dot to ensure the pen delivers a controlled amount of paint with a single, light touch.
The goal isn't just to start the paint flow, but to prime the pen for a single, quick, and light application. Over-saturating the nib risks smearing too much paint on the queen, which can interfere with her health and acceptance by the colony.
Why Proper Preparation is Critical
Marking a queen is a delicate operation. The way you prepare the pen directly impacts the safety of the queen and the success of the mark.
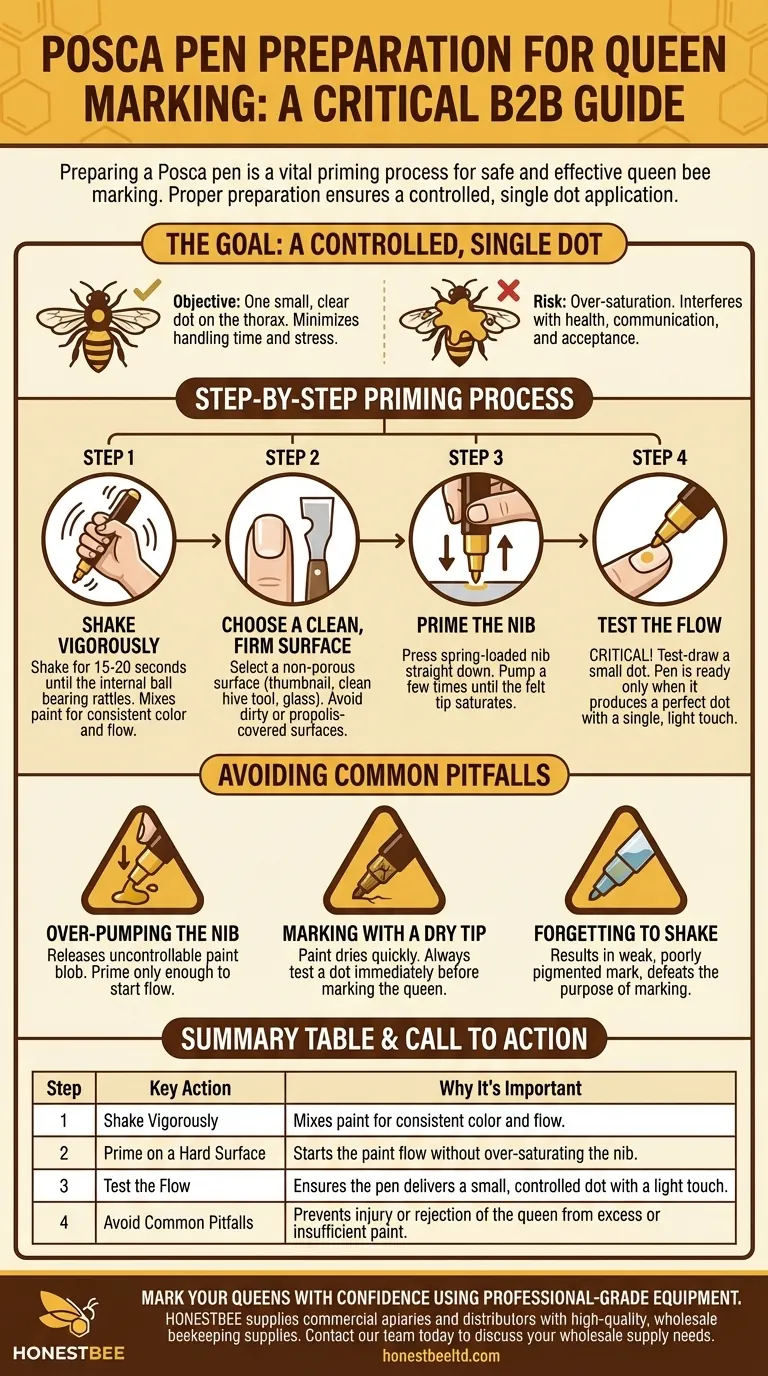
The Goal: A Controlled, Single Dot
The objective is to place one small, clear dot of paint on the center of the queen's thorax (the middle section of her body).
A perfectly primed pen allows you to achieve this with a quick, decisive touch, minimizing the time the queen is handled and reducing her stress.
The Risk of an Unprepared Pen
If the pen is not primed, the paint will not flow. This might cause you to press harder on the queen's thorax in an attempt to make a mark, which can easily cause a fatal injury.
The Danger of Excess Paint
Conversely, an over-primed pen will release a large blob of paint. This excess paint can smear onto the queen's wings, head, or antennae.
This can block her spiracles (breathing pores), glue her wings together, or cover the crucial pheromones she uses to communicate, leading the colony to reject or kill her.
The Step-by-Step Priming Process
Follow these steps precisely every time you mark a queen to ensure a safe and effective outcome.
Step 1: Shake Vigorously
Posca pens contain water-based paint pigment that settles over time. Shake the pen for 15-20 seconds until you can clearly hear the internal ball bearing rattling. This ensures the paint is evenly mixed for consistent color and flow.
Step 2: Choose a Clean, Firm Surface
Select a non-porous surface for priming. Your thumbnail is ideal as it gives you a good feel for the pressure needed. A clean hive tool, a piece of glass, or plastic will also work.
Avoid using dirty or propolis-covered surfaces, as this can contaminate or clog the pen's fine tip.
Step 3: Prime the Nib
With the cap off, press the spring-loaded nib straight down onto your chosen surface. You will see the nib retract into the pen body. Pump it a few times until you see the felt tip become saturated with paint.
Step 4: Test the Flow
This is the most critical step for queen safety. After priming, gently touch the pen to your test surface to create a small dot.
The pen is ready only when it produces a perfect, round dot with a very light touch. If it creates a smear or a large blob, wipe the tip with a paper towel and test again.
Understanding the Common Pitfalls
Avoiding common mistakes is as important as following the correct procedure. Be aware of these potential issues.
Pitfall: Over-Pumping the Nib
Pressing the nib too many times will over-saturate the felt tip. This is the primary cause of releasing a large, uncontrollable blob of paint onto the queen. Prime it just enough to start the flow.
Pitfall: Marking with a Dry Tip
If you wait too long after priming, the paint on the felt tip can begin to dry. Always perform a quick test dot on your thumbnail immediately before you touch the pen to the queen.
Pitfall: Forgetting to Shake
An unshaken pen will release thin, watery, and poorly pigmented paint. This results in a weak mark that may not be visible or durable, defeating the purpose of marking the queen in the first place.
Executing the Perfect Mark
Your preparation directly translates to the quality and safety of the final mark. Use this guidance to inform your approach.
- If your primary focus is safety: Practice making dozens of small dots on a hard surface to develop the muscle memory for the light, quick touch required.
- If you are working with a valuable queen: Be extra diligent in testing the flow to ensure you can apply the mark in less than a second, minimizing handling time and stress.
- If your pen is not brand new: Spend more time shaking and testing, as older or frequently used pens can have a less predictable paint flow.
A well-prepared pen transforms a potentially stressful task into a confident, controlled, and safe procedure.
Summary Table:
| Step | Key Action | Why It's Important |
|---|---|---|
| 1 | Shake Vigorously | Mixes paint for consistent color and flow. |
| 2 | Prime on a Hard Surface | Starts the paint flow without over-saturating the nib. |
| 3 | Test the Flow | Ensures the pen delivers a small, controlled dot with a light touch. |
| 4 | Avoid Common Pitfalls | Prevents injury or rejection of the queen from excess or insufficient paint. |
Mark Your Queens with Confidence Using Professional-Grade Equipment
A perfectly prepared pen is your first step, but using durable, reliable marking tools is just as critical for the safety of your valuable queens and the efficiency of your operation.
HONESTBEE supplies commercial apiaries and beekeeping equipment distributors with high-quality, wholesale beekeeping supplies designed for precision and dependability. Let us equip you with the tools you need for successful hive management.
Contact our team today to discuss your wholesale supply needs and ensure every mark is a safe one.
Visual Guide
Related Products
- Queen Bee Marking Pen POSCA Queen Marking Pens for Beekeeping Bee Markers
- Queen Bee Marking Pen UNI Medium Point for Queen and Bee Marking
- One Hand Yellow Queen Marking Catcher Tube Cage Beekeeper Tool Accessory for Queen Bee
- Queen Bee Catcher Plastic Bee Marker Bottle with Piston Marking Tube
- Plastic Long Marker Device for Catching and Marking Bees Queen Bee Marking Tube and Cage
People Also Ask
- What are the primary benefits of marking a queen bee in a commercial apiary? Boost Efficiency & Management
- Why are Posca pens commonly used for marking queen bees? The Safest, Most Durable Method for Beekeepers
- What is the purpose of using a queen marking pen? Enhance Hive Management and Age Tracking
- Why are specialized marking pens used for stingless bee queens? Essential Tools for Large-Scale Breeding Success
- What type of markers are commonly used for marking Queen bees? Choose the Safe, Non-Toxic Standard


