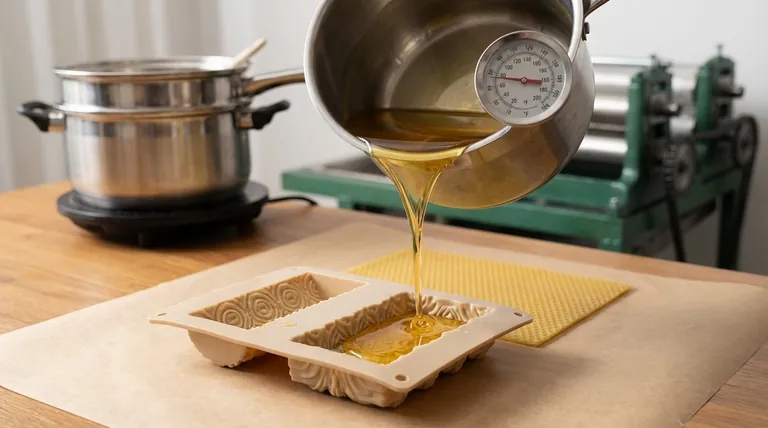
To properly pour beeswax into a silicone mold, you should first ensure the wax is melted to the correct temperature, between 144°F and 185°F. Place the mold on a level surface and pour the melted wax in a slow, continuous stream to fill it completely. If using a two-part mold, pour into the bottom half before gently placing the top half on, allowing the pressure to spread the wax evenly.
The key to a flawless beeswax casting is not just the pouring motion itself, but a holistic process. Success depends on precise temperature control, proper mold preparation, and a steady technique to prevent common defects like sticking, air pockets, and cracking.
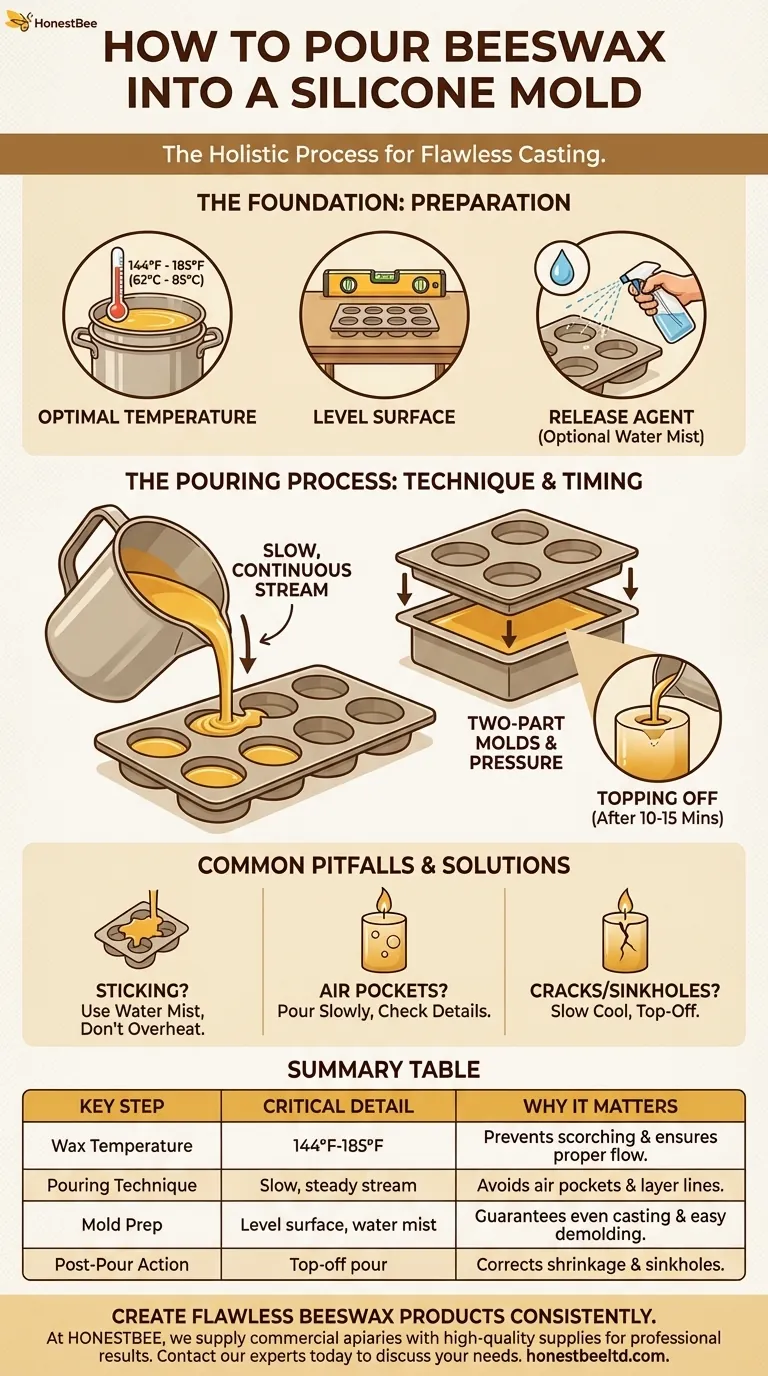
The Foundation: Preparing for a Perfect Pour
Before you ever lift your pouring pot, a few preparatory steps will dictate the quality of your final product. Skipping these can lead to frustration and wasted material.
Temperature is Everything
Beeswax has a low melting point, around 144°F (62°C). It is critical to use a double boiler to melt it gently and avoid direct heat.
Do not let the temperature exceed 185°F (85°C). Overheating can scorch the beeswax, altering its color, scent, and structural integrity.
Preparing the Mold
For most high-quality, modern silicone molds, no preparation is needed. The silicone itself acts as a release agent.
However, as an insurance policy against sticking, especially with older or very intricate molds, you can lightly spray the inside of the mold with water just before pouring. The water creates a micro-thin barrier that helps the cooled wax release cleanly.
Securing Your Workspace
Always place your silicone mold on a perfectly level surface. Any tilt will result in an uneven casting.
Covering your work area with parchment paper or a silicone mat is highly recommended. Spilled beeswax is much easier to clean up once it hardens on a protected surface.
The Pouring Process: Technique and Timing
The physical act of pouring requires a steady hand and an understanding of how beeswax behaves as it transitions from liquid to solid.
The Initial Pour
Hold your pouring pot close to the mold to minimize splashing. Pour the wax in a slow, steady, and continuous stream.
Avoid stopping and starting, as this can create visible layer lines in the finished product. Fill the mold to the very top.
Handling Two-Part Molds
For molds designed to make thin foundation sheets, pour the melted wax evenly into the bottom half.
Immediately place the top half of the mold onto the bottom, fitting it from one side to the other. Use gentle hand pressure to push the hot wax into all the crevices, ensuring a thin, even sheet.
Topping Off the Wax
Beeswax shrinks as it cools. This often creates a depression or sinkhole in the center of the casting, especially around a candle wick.
Let the candle cool for 10-15 minutes until it is partially set. You will likely see a well form. Re-melt a small amount of wax and "top off" the mold to fill this depression and create a flat, professional-looking base.
Common Pitfalls and How to Avoid Them
Understanding why problems occur is the fastest way to prevent them. Most issues with beeswax pouring are easily solved with minor adjustments to your technique.
Problem: The Wax Sticks to the Mold
This is most often caused by an older mold that has lost some of its non-stick properties or skipping a release agent on a complex design.
Solution: Lightly mist the mold interior with water before your next pour. Ensure you are not overheating the wax, as this can also contribute to sticking.
Problem: Incomplete or Uneven Castings
This usually happens when the wax cools too quickly during the pour or when air gets trapped. Pouring too slowly can allow the wax to solidify before it fills every detail.
Solution: Make sure your wax is within the optimal temperature range (144°F - 185°F) and pour in a confident, continuous stream. For two-part molds, check for empty spots and gently push hot wax into them before it sets.
Problem: Cracks or Sinkholes
This is a natural result of wax shrinkage. Rapid or uneven cooling exaggerates the effect, causing stress fractures.
Solution: Allow the mold to cool gradually at room temperature, away from drafts or cold surfaces. Always perform a "top-off" pour to correct the central sinkhole that forms as the wax solidifies.
Making the Right Choice for Your Goal
Your specific objective dictates which part of the process to focus on. Use these guidelines to ensure a successful outcome every time.
- If your primary focus is creating solid pillar candles: Master the top-off pour to correct the inevitable sinkhole that forms around the wick.
- If your primary focus is making thin beeswax foundation sheets: Perfect the technique of placing the top mold half on and applying even pressure to distribute the wax.
- If your primary focus is minimizing all defects: Prioritize precise wax temperature control and using a light water spray as a release agent for guaranteed clean results.
By mastering these fundamental techniques, you move from simply filling a mold to consistently creating professional-quality beeswax products.
Summary Table:
| Key Step | Critical Detail | Why It Matters |
|---|---|---|
| Wax Temperature | 144°F - 185°F (62°C - 85°C) | Prevents scorching and ensures proper flow. |
| Pouring Technique | Slow, steady, continuous stream | Avoids air pockets and layer lines for a smooth finish. |
| Mold Preparation | Level surface; light water mist for release | Guarantees even casting and easy, clean demolding. |
| Post-Pour Action | Top-off pour after 10-15 minutes | Corrects shrinkage and sinkholes for a professional base. |
Ready to create flawless beeswax products consistently?
At HONESTBEE, we supply commercial apiaries and beekeeping equipment distributors with the high-quality, wholesale-focused supplies needed for professional results. From durable silicone molds to precise temperature control equipment, we provide the tools for success.
Contact our experts today to discuss your beekeeping supply needs and elevate your production.
Visual Guide
Related Products
- Beeswax Machine Press Embosser Wax Foundation Mold Printer Bee Hive Equipment Making Sheet
- Beeswax Foundation Sheets Beehive Foundation for Wholesale
- Colorful Silicone Beeswax Foundation Mold Mould for Beekeeping
- Economy Manual Beeswax Embossing Mill Wax Foundation Machine Roller
- Electric Beeswax Flat Sheet Machine with Operating Tray for Wax Processing
People Also Ask
- What equipment is needed to make beeswax foundation? A Guide to DIY Wax Sheet Production
- What are the primary technical challenges faced by beeswax foundation production machinery? Tackling Lipophilic Residues
- What is the purpose of a beeswax foundation sheet machine? Maximize Hive Health and Honey Production
- What specific equipment is required for making beeswax foundation? Essential Tools for High-Quality Production
- What is the recommended temperature for melting beeswax to make foundation sheets? Master the 70°C-80°C Ideal Range


