To successfully mold cleaned beeswax, the process requires a steady hand and patience. You must slowly pour the filtered, liquid wax into your chosen containers—such as silicone pans or flexible plastic molds—and allow it to cool undisturbed, typically overnight, until it has completely hardened into a solid form.
The success of your final wax block depends on matching the mold size to your future needs and allowing sufficient cooling time to ensure the wax hardens uniformly without cracking.
Choosing Your Mold Strategy
The container you choose dictates how easily you can access your wax later.
Optimal Mold Materials
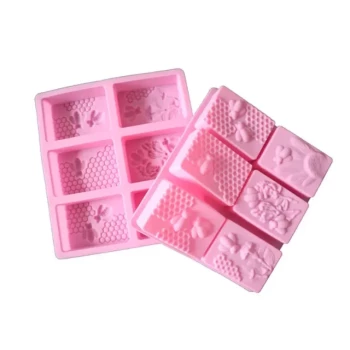
For the easiest release, flexible molds are superior. Silicone cake pans and muffin tins are ideal because the hardened wax "pucks" can be easily popped out once cool.
If silicone is unavailable, simple household items work well. A rinsed cardboard milk container or flexible plastic cups (like Styrofoam) are effective alternatives.
Sizing for Purpose
Select the size of your mold based on how you intend to use the wax.
If you plan to use small amounts periodically, use smaller molds like muffin tins or plastic cups. For bulk storage, larger containers or milk cartons create substantial blocks that are easy to stack.
The Pouring and Setting Technique
Once your beeswax is filtered and in a liquid state, the physical transfer to the mold begins.
The Pour
Pour the cleaned wax slowly into the mold. A slow pour helps prevent splashes and minimizes the introduction of air bubbles, resulting in a smoother solid block.
The Cooling Phase
This is the most critical step for structural integrity.
The wax should generally be left to cool overnight. While thin sheets may cool in minutes, solid blocks require significant time to release all internal heat and harden completely.
Understanding the Trade-offs
While the process is straightforward, rushing the steps or neglecting storage can compromise the quality of your wax.
Patience vs. Speed
It is tempting to disturb the wax to check if it is solid. Do not move the molds while the wax is cooling.
Moving a cooling block can cause ripples on the surface or internal cracks. For thinner applications, the wax is ready when the mold feels cool to the touch and the wax separates slightly from the edges.
Storage Considerations
Once the wax is removed from the mold, it requires protection.
Although beeswax can be kept indefinitely, it attracts particulate matter. Store your finished blocks in a sealed container or box to protect them from dust and debris, ensuring they remain clean for future projects.
Making the Right Choice for Your Goal
- If your primary focus is ease of use: Choose silicone muffin tins, as the flexibility allows for the quickest and cleanest removal of the hardened wax.
- If your primary focus is bulk storage: Utilize cardboard milk containers, which allow you to create large, brick-like blocks that are efficient to stack and store.
- If your primary focus is long-term preservation: Ensure your fully cooled blocks are immediately placed in sealed boxes to prevent environmental contamination.
Match the mold to the project, pour slowly, and let time do the rest.
Summary Table:
| Molding Factor | Recommendation | Benefit |
|---|---|---|
| Best Material | Silicone or Flexible Plastic | Easy release and pop-out removal |
| Pouring Speed | Slow and Steady | Prevents air bubbles and splashing |
| Cooling Time | Overnight (Uninterrupted) | Ensures uniform hardening without cracks |
| Bulk Storage | Cardboard Milk Cartons | Creates stackable, large-format bricks |
| Small Batches | Muffin Tins / Small Cups | Convenient for small, measured usage |
| Post-Molding | Sealed Containers | Protects wax from dust and contaminants |
Elevate Your Wax Processing with HONESTBEE
At HONESTBEE, we understand that high-quality beeswax processing requires the right tools. Whether you are a commercial apiary looking to scale or a distributor seeking professional-grade equipment, we provide everything you need to succeed. Our comprehensive wholesale catalog includes:
- Industrial Machinery: Advanced honey-filling and hive-making machines.
- Beekeeping Essentials: A full spectrum of professional tools and hardware.
- Consumables & Merchandise: Industry-standard consumables and honey-themed cultural goods.
Ready to optimize your production and supply chain? Contact us today to discover how our wholesale solutions can grow your business!
Related Products
- Beeswax Machine Press Embosser Wax Foundation Mold Printer Bee Hive Equipment Making Sheet
- Electric Flatting and Embossing Machine with Tray for Beekeeping
- Fully Automatic Beeswax Embossing Machine Foundation Mill
- Manual Beeswax Comb Foundation Machine Wax Foundation Mill Embossing Machine
- Economy Manual Beeswax Embossing Mill Wax Foundation Machine Roller
People Also Ask
- What are the advantages of implementing a pulley and belt drive system in beeswax foundation machinery? Master Quality.
- How is a beeswax foundation sheet machine constructed? Build High-Precision Honeycomb Foundations
- What are the primary technical challenges faced by beeswax foundation production machinery? Tackling Lipophilic Residues
- What types of beeswax foundation sheet machines are available? Find the Right Machine for Your Apiary Scale
- What miscellaneous equipment is needed for making foundation? A Guide to the Essential Tools