The proper installation sequence begins in May, strictly after all spring mite treatments have been removed from the hive. You must place the queen excluder directly on top of the brood box to confine the queen, and then stack your honey supers immediately above the excluder to provide dedicated storage space for the incoming nectar flow.
Core Takeaway By placing a barrier between the brood nest and the honey supers, you force a division of labor that keeps your honey harvest free of eggs and larvae. This configuration simultaneously relieves hive congestion to prevent swarming while maximizing the purity and volume of your surplus honey.
Establishing the Foundation
The Critical Pre-Requisite
Before adding any equipment for honey collection, you must complete and remove all spring Varroa mite treatments.
This step is non-negotiable and typically occurs in May. Failing to remove these treatments before adding supers can lead to chemical contamination of your honey harvest.
Timing the Installation
The ideal window for installation is late spring, coinciding with the start of the peak nectar flow.
Installing the equipment at this stage ensures the colony has a robust population ready to forage. It capitalizes on the colony’s most productive moment, shifting focus from population growth to resource storage.
Step-by-Step Installation
Positioning the Queen Excluder
If you have existing boxes on the hive that are intended for honey, remove them temporarily.
Place the queen excluder directly onto the top of the brood chamber. Ensure the excluder lies completely flat and sits tightly against the box edges.
Ensuring a Secure Seal
The fit of the excluder is paramount. Any gaps between the excluder and the brood box will render the device useless, as the queen will find a way to bypass it.
The goal is to physically compress the brood area below while opening up the storage area above.
Placing the Honey Supers
Once the excluder is secure, place your honey supers on top of it.
These supers act as vertical extensions of the hive. By isolating them above the excluder, you establish a "honey-only" zone where workers can store nectar without the queen laying eggs in the comb.
Managing the Flow
Weekly Inspections
Throughout June, you must inspect the hive weekly.
Use these inspections to monitor the queen's location and ensure she remains below the excluder. You should also check for general colony health and verify the queen's egg-laying rate in the brood box.
Expanding Storage Space
As the bees fill the existing supers, you must add additional supers to the stack.
Providing this extra volume is critical for maintaining foraging motivation. If the bees run out of storage space, their efficiency drops, and the likelihood of swarming increases significantly.
Understanding the Trade-offs
Risk of Blockages
While excluders optimize honey purity, they can restrict worker movement if not maintained.
You must regularly check the excluder for blockages, such as burr comb or propolis buildup. Workers need free passage to move nectar from the brood nest to the supers; a clogged excluder will throttle production.
Swarm Management
While supers relieve overcrowding, they are not a cure-all for swarming.
The excluder restricts the queen to the lower box. If the brood nest becomes "honey-bound" (filled with nectar because workers can't move it up fast enough), the colony may still attempt to swarm. Weekly checks for queen cells in the brood box remain essential.
Making the Right Choice for Your Goal
To apply this to your specific apiary goals, consider the following:
- If your primary focus is maximum honey purity: Prioritize a tight-fitting excluder immediately after mite treatment removal to ensure zero brood contamination in the supers.
- If your primary focus is swarm prevention: Be aggressive with adding extra honey supers early in the flow to maximize hive volume and reduce population pressure.
Successful management during the flow relies on balancing the restriction of the queen with the unrestricted movement of the workers.
Summary Table:
| Step | Action | Timing/Condition |
|---|---|---|
| 1. Pre-requisite | Remove all Varroa mite treatments | Prior to adding supers (May) |
| 2. Excluder Placement | Place flat on top of the brood chamber | Start of peak nectar flow |
| 3. Super Installation | Stack honey supers above the excluder | Immediately after excluder is set |
| 4. Maintenance | Inspect weekly and add supers as needed | Throughout the flow (June) |
Scaling Your Apiary Operations?
At HONESTBEE, we specialize in empowering commercial apiaries and distributors with the tools needed for high-volume, high-quality production. From precision-engineered queen excluders and honey supers to advanced honey-filling machinery and hive-making equipment, our comprehensive wholesale catalog is designed to optimize your efficiency and output.
Partner with HONESTBEE to streamline your honey harvest. Whether you need industrial hardware or essential beekeeping consumables, our experts are ready to support your growth.
Contact Our Wholesale Team Today
Related Products
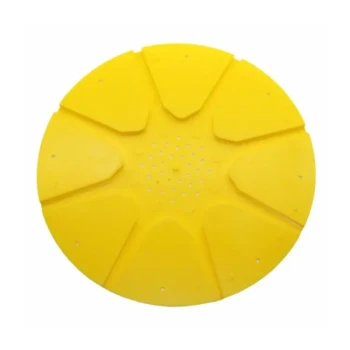
- High-Efficiency Diamond Maze Bee Escape for Clearing Supers
- Durable 16 Way Circular Bee Escape for Efficient Honey Harvesting
- Circular Labyrinth Bee Escape for Efficient Hive Management
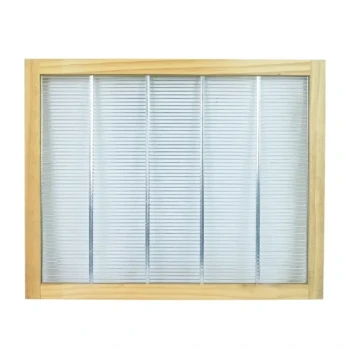
- Wooden Queen Bee Excluder for Beekeeping
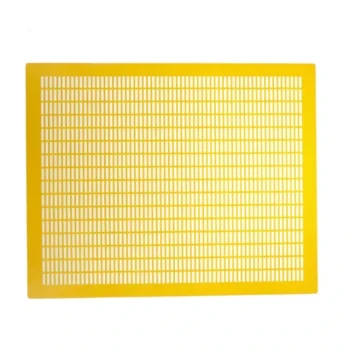
- High Performance Plastic Queen Excluder for Beekeeping and Apiary Management
People Also Ask
- How long should you wait after placing a bee escape board before harvesting honey? Clear Your Supers in 24-48 Hours
- What is the primary function of a bee escape? Simplify Your Honey Harvest with Stress-Free Hive Management
- How can bees be cleared off honey supers in a Langstroth hive? Use a Gentle Bee Escape
- What is a bee escape and why is it used in beekeeping? A Guide to Gentle Honey Harvesting
- What are some common types of bee escapes and how are they typically mounted? Optimize Your Honey Harvest Efficiency