The recommended procedure is to prepare a complete new hive, locate the original queen, transfer her with several brood frames and adhering worker bees, and leave the parent colony with sufficient brood and a viable queen source. Feed both colonies, replace removed frames with foundation or drawn comb, and inspect the split after several days to confirm that the queen is present and the colony is functioning normally.
A successful split depends less on simply dividing frames than on balancing queen status, brood, adult bees, food, and hive equipment between two viable colonies.
Prepare the Colonies Before Splitting
Choose a strong parent colony
Use a healthy, populous colony with ample brood, food stores, and enough adult bees to support both units. Early spring, roughly one month before the main nectar flow, is generally suitable when the colony has several frames of capped brood and developing larvae.
Do not split a weak, diseased, heavily infested, or poorly provisioned colony unless the split is part of a specific recovery plan.
Assemble the required equipment
Prepare the following before opening the hive:
- A complete deep hive body or 5-frame nuc box
- Bottom board, inner cover, and outer cover
- Frames with drawn comb or high-quality foundation
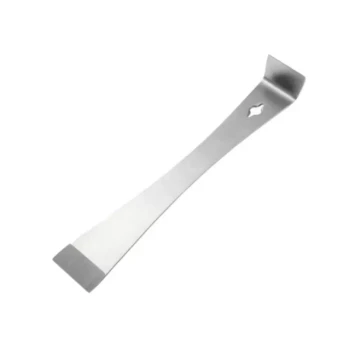
- A hive tool
- A feeder and sugar syrup for each colony
- A queen cage if introducing a purchased queen
- Optional: a queen excluder or temporary nuc box for queen isolation
Having all equipment ready minimizes the time the colonies remain open and reduces handling stress.
Select the new hive location
A split placed at the original hive location will receive returning foragers, while a split moved elsewhere may lose many flying bees. Plan the location before dividing the colony.
If the new colony is moved, compensate by transferring sufficient young worker bees and adhering bees from brood frames. Avoid relying only on returning foragers to establish the split.
Locate and Transfer the Original Queen
Open the hive carefully
Use the hive tool to separate frames without crushing bees or damaging comb. Begin with the outer frames and work gradually toward the brood nest.
Lift each frame slowly and vertically. Keep the queen frame secure once the queen is found, and avoid unnecessary searching that could injure or dislodge her.
Move the queen with brood
Place the frame containing the original queen into the new hive body or nuc box. Add two or three additional frames of brood, preferably including capped brood and some younger brood.
Ensure that the transferred frames have enough adhering worker bees to cover and care for the brood. If necessary, shake additional bees from other brood frames into the new hive, taking care not to transfer the queen accidentally.
Build a balanced new colony
Position the brood frames together in the center of the new hive. Add frames with drawn comb or foundation on the outside of the brood area.
The new colony needs more than brood alone. It requires sufficient adult bees, food, comb, and protection from excessive empty space.
Establish the Parent Colony
Inspect the remaining frames for queen cells
Examine the brood frames left in the original hive for viable queen cells. The parent colony must retain either a suitable queen cell, young eggs and larvae from which it can raise a queen, or a replacement queen supplied by the beekeeper.
Do not leave the parent colony hopelessly queenless. If no suitable queen source is present, introduce a caged mated queen or a viable queen cell according to the supplier’s instructions.
Replace removed frames
Fill the spaces created by removed brood frames with drawn comb or foundation. Frames should be positioned so the brood nest remains orderly and the bees can expand it efficiently.
Avoid leaving excessive empty space in a small or weakened colony, particularly during cool weather or periods of poor forage.
Feed the parent colony
Install a hive-top feeder or another suitable liquid feeder and provide sugar syrup when natural nectar is insufficient. Feeding supports comb construction and helps the colony maintain brood production during the transition.
Install and Feed the New Split
Introduce a replacement queen when required
If the new split does not contain the original queen, suspend a caged mated queen between the brood frames with the candy plug exposed, following the queen supplier’s handling instructions.
Allow the colony time to accept the queen before opening the hive again. Do not release a purchased queen directly unless the introduction method specifically recommends it.
Provide liquid feed
Install a feeder on the new colony and supply sugar syrup as needed. Feeding is particularly important when the split contains substantial foundation, because the bees must build comb while also maintaining brood.
Monitor feed consumption and keep the feeder clean. Feeding should support establishment, not substitute for proper colony strength or adequate forage.
Close and protect the hive
After installing the frames, queen, and feeder, close the hive securely. Reduce the entrance if the split is small or if robbing pressure is high.
Keep the colonies level, dry, and protected from excessive wind. The new colony should have enough ventilation without being exposed to uncontrolled drafts.
Inspect the Split After Installation
Check queen presence after several days
Inspect the colony after a few days to confirm that the queen is present, released if caged, and accepted by the bees. Look for normal worker behavior around her and evidence that the colony is settling.
Avoid repeatedly opening the hive during the first few days. Excessive disturbance can delay acceptance and disrupt the brood nest.
Confirm brood development
During a later inspection, look for eggs, young larvae, and an expanding brood pattern. These signs confirm that the queen is laying and that the split is becoming self-sustaining.
If the colony is raising its own queen, allow sufficient time for queen emergence, mating, and the beginning of egg laying before concluding that the split has failed.
Rebalance if necessary
A split may require additional bees, feed, or frames if it is not covering brood adequately. Conversely, overcrowding can create renewed swarming pressure in a strong unit.
Make adjustments gradually and avoid transferring bees or frames without first checking queen status and disease risk.
Understanding the Trade-offs
Queen-right versus queenless splits
A split containing the original queen usually begins laying sooner and is easier to evaluate. The parent colony must then raise or receive a replacement queen, creating a delay and introducing mating risk.
A split with a new mated queen can establish quickly, but queen availability, acceptance, transport, and cost become important factors.
Drawn comb versus foundation
Drawn comb allows bees to occupy the new hive and expand brood more rapidly. Foundation is more economical and useful for building equipment inventory, but it requires adequate feeding, temperature, and bee populations for proper construction.
For distributors and commercial apiaries, maintaining both drawn-comb capacity and reliable foundation supply provides greater flexibility during seasonal splitting.
Nuc box versus full-size hive body
A 5-frame nuc is efficient for a small split and easier to keep warm. A full-size hive body offers greater expansion capacity but can leave a weak colony with too much unused space.
Choose the box according to the number of brood frames, adult bees, available forage, and expected growth rate.
Common mistakes to avoid
Do not split without confirming a queen or viable queen source. Do not transfer brood without enough worker bees to cover it, and do not leave either colony without adequate food.
Avoid rough frame handling, excessive open-hive time, and mixing colonies without considering disease transmission. Frames containing abnormal brood or excessive drone brood should be evaluated before reuse.
Making the Right Choice for Your Goal
The best split design depends on whether the priority is rapid colony growth, swarm prevention, queen replacement, or large-scale apiary recovery.
- If your primary focus is rapid colony establishment: Transfer the original queen with several brood frames, sufficient adhering worker bees, drawn comb, and supplemental feed into a properly sized nuc or hive body.
- If your primary focus is producing a second queen-right colony: Leave a viable queen cell or young brood in the parent colony and introduce a healthy mated queen to the new split.
- If your primary focus is swarm prevention: Split before the main nectar flow while the parent colony is strong, and inspect both units for crowding and queen-cell development.
- If your primary focus is commercial scale and fulfillment reliability: Maintain ready inventory of hive bodies, frames, foundation, feeders, nuc equipment, and queen cages so splits can be completed without delay.
- If your primary focus is minimizing losses: Balance brood, adult bees, queen status, food, and space rather than dividing frames by an equal count alone.
A well-equipped, carefully balanced split gives both colonies the best opportunity to establish, expand, and return to productive strength.
Summary Table:
| Aspect | Recommendation | Key Points |
|---|---|---|
| Parent Colony Selection | Choose strong, healthy colony | Ample brood, food, adult bees; early spring before nectar flow |
| Equipment | Prepare all equipment beforehand | Hive body/nuc, frames, feeder, queen cage, etc. |
| Queen Transfer | Move original queen with brood frames | Include 2-3 brood frames, adhering bees; balance new colony |
| Parent Colony | Ensure viable queen source | Queen cell, young brood, or introduce replacement queen |
| Feeding | Feed both colonies with syrup | Supports comb building and brood rearing |
| Inspection | Check after several days | Confirm queen presence and brood development |
| Adjustments | Rebalance if necessary | Add bees, feed, or frames as needed |
Ready to optimize your bee colony splits? HONESTBEE offers a comprehensive range of beekeeping equipment, from hive bodies and frames to feeders and queen cages. We supply commercial apiaries and distributors with premium tools, fast delivery, and dedicated support. Whether you're expanding your operation or seeking reliable wholesale supply, our expertise ensures your bees thrive. Contact us today to discuss your needs and get a tailored solution.
Related Products
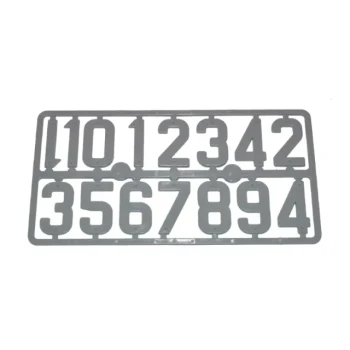
- Modern Flat-Mount Hive Number Set for Beekeeping
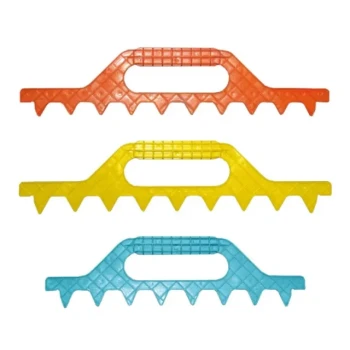
- Ergonomic Plastic Frame Spacer Tool for Rapid Hive Management Beekeeping
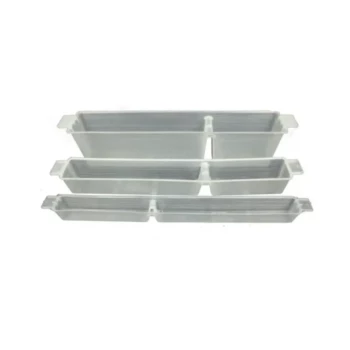
- In-Hive Dual Compartment Frame Bee Feeder for Targeted Colony Nutrition
- Stainless Steel Queen Grafting Tool for Beekeeping and Bee Queen Grafting
- Plastic Beekeeping Honey Bee Larvae Grafting Tools for Queen Rearing and Chinese Grafting
People Also Ask
- What are the primary advantages of modern beekeeping hives? Scale Your Apiary with Industrial Efficiency
- What is the impact of regular technical extension contact on the management of modern beekeeping hives? Enhance Hive Efficiency
- What are the structural and management advantages of modern beekeeping hives? Scale Your Honey Yields Today
- Why should the promotion of modern beekeeping hives be integrated with professional beekeeping tool kits and technical support?
- Why do forest beekeepers consider transitioning from traditional bark hives? Modernizing for Sustainable Yields