Precise timing is the key to success. After a period of 10 to 12 hours, you must inspect the frame to verify that the bees have cleaned the honey and the queen has laid eggs in the cell plugs. Once confirmed, remove the front queen excluder to allow the queen to exit onto an adjacent frame, then reassemble the equipment and place the frame centrally in the brood nest.
Core Takeaway The objective is to secure fertilized eggs in the cell plugs without isolating the queen longer than necessary. Promptly releasing her minimizes stress on the colony, while returning the frame to the center of the brood nest guarantees the warmth and nurse bee attention required for successful incubation.
Verification and Timing
The 10-12 Hour Window
You should check the frame approximately 10 to 12 hours after confining the queen. This duration is typically sufficient for the colony to prepare the cells and for the queen to perform her task.
Confirming Preparation
Upon inspection, ensure that the worker bees have successfully cleaned out the honey from the target area. This cleaning is a prerequisite for the queen to begin laying.
Verifying Egg Presence
Check the cell plugs closely. You should see that the queen has filled these plugs with eggs. Do not proceed to the release step until this has been confirmed.
Releasing the Queen
Removing the Barrier
Once you have visually confirmed the presence of eggs, carefully pry off the entire front queen excluder from the comb box.
The Natural Exit
Allow the queen to leave the box on her own volition. She should be permitted to walk out onto an adjacent frame. Avoid manual handling if possible to reduce the risk of damaging the queen.
Securing the Incubation Environment
Resealing the Box
After the queen has exited, you must replace the queen excluder on the comb box. This restores the integrity of the unit before it is returned to the hive.
Optimal Positioning
Place the complete frame back into the center of the brood nest. This specific placement is critical because the center of the nest maintains the most consistent temperature and humidity, which are vital for the development of the newly laid eggs.
Common Pitfalls to Avoid
Premature Release
Releasing the queen before verifying the presence of eggs in the plugs will render the process useless. If the bees have not finished cleaning out the honey, the queen will not have laid yet.
Incorrect Frame Placement
Returning the frame to the edge of the box rather than the center of the brood nest can lead to chilled brood. The eggs require the high density of nurse bees found only in the core of the hive.
Making the Right Choice for Your Goal
To ensure the highest success rate for your queen rearing or breeding project, follow these specific guidelines:
- If your primary focus is Grafting Efficiency: Ensure the cell plugs are fully populated with eggs before releasing the queen to maximize your potential queen cells.
- If your primary focus is Colony Stability: Move quickly during the release phase to minimize the time the hive is open and the queen is disturbed.
Successful queen rearing relies on adherence to strict schedules; maintain the 10-12 hour inspection routine for consistent results.
Summary Table:
| Step | Action Required | Timing/Location |
|---|---|---|
| 1. Verification | Check for honey removal and presence of eggs in cell plugs | 10-12 hours after confinement |
| 2. Queen Release | Remove front excluder; let queen exit to adjacent frame | Immediately after egg verification |
| 3. Resealing | Replace the queen excluder on the comb box | Before returning to hive |
| 4. Reinsertion | Place the frame in the center of the brood nest | Post-resealing for optimal warmth |
Maximize Your Colony’s Potential with HONESTBEE
At HONESTBEE, we understand that precision in queen rearing is the foundation of a thriving apiary. Whether you are a commercial beekeeper or a large-scale distributor, we provide the high-quality tools and machinery you need to succeed.
Our extensive wholesale catalog includes:
- Precision Equipment: Specialized hive-making and honey-filling machines.
- Beekeeping Essentials: A full spectrum of durable tools, machinery, and industry consumables.
- Brand Growth: Honey-themed cultural merchandise to expand your market reach.
Partner with us to streamline your operations and secure the best equipment for your business. Contact us today to discuss your wholesale needs!
Related Products
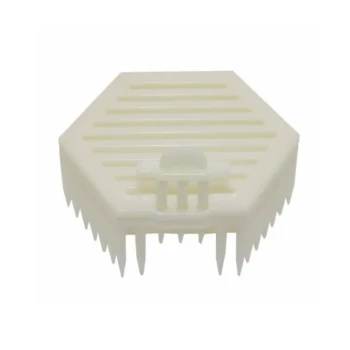
- Portable Bee Mating Hive Boxes Mini Mating Nucs 8 Frames for Queen Rearing
- Hexagonal Direct Comb Introduction Queen Bee Cage
- Twin Queen Styrofoam Honey Bee Nucs Mating and Breeding Box
- Premium Nicot Style Queen Rearing Kit with Hair Roller Bee Cages
- Jenter Queen Rearing Kit Complete Set for Bee Breeding
People Also Ask
- What are the technical benefits of mini nucleus mating hives? Optimize Queen Rearing Efficiency and Success
- How much weight can be saved by switching from a 10-frame hive box to an 8-frame hive box? Reduce Strain by 10 lbs
- What are the advantages of Portable Mating Nucs for island breeding? Maximize Efficiency with Specialized Gear
- What is an 8-frame box in beekeeping? Lightweight Hive Solutions for Easier Apiary Management
- What are the design advantages of professional mating nucleus boxes? Boost Queen Survival and Breeding Efficiency