Upon complete liquefaction, the most critical step is to immediately remove the beeswax from the heat source and proceed directly to pouring or filtering. Because beeswax begins to solidify the moment it is removed from heat, you must have your molds or project materials prepared in advance to ensure a smooth transfer. During this process, always wear oven gloves to protect against burns from hot steam or wax splashes.
Core Takeaway: Success relies on balancing speed with safety; you must filter and pour the wax while it is fully liquid to prevent uneven setting, yet you must move deliberately to avoid dangerous splashes or thermal shock to your containers.
Managing the Critical Transition Phase
Remove Heat Immediately
Once the wax is fully melted, prolonged exposure to heat is unnecessary and potentially detrimental. Remove the container from the heat source instantly to stop the temperature from rising further.
Execute the Pour Quickly
Beeswax has a rapid solidification rate once removed from its heat source. You must pour the wax into your molds or project containers without delay to ensure a smooth, even finish before it begins to set.
Handling Premature Solidification
If the wax begins to harden or "set up" before you have finished pouring, do not force it. Simply return the container to the original heat source (such as a double boiler) to re-melt it effectively.
Ensuring Purity and Quality
Straining Particulates
If you observe large particles or debris in the melted wax, you must filter it immediately before the final pour. Pour the liquid wax through cheesecloth or a coffee filter to capture impurities.
Multi-Cycle Purification
For raw wax that requires deep cleaning, you may need to allow the wax to harden over water, remove the debris, and re-melt it. This process, often involving filtration through a stocking, may need to be repeated up to three times to fully remove non-visible impurities.
Safety and Equipment Protocols
Personal Protective Equipment
Hot wax and the resulting steam pose a significant burn risk. Always wear oven gloves when handling the hot container, and consider goggles to protect your eyes from accidental splashes.
Selecting the Right Container
If you are pouring wax into glass vessels, they must be strictly heat-resistant. Standard glass can crack or shatter under the thermal shock of hot wax, creating a dangerous spill.
Using Flexible Molds for Storage
If you are processing wax for future use rather than a specific project, pour it into flexible plastic molds or silicone containers. This allows the hardened wax to be "popped out" easily for convenient storage in a cool, dry place.
Common Pitfalls to Avoid
Water Contamination
You must ensure that no water from your double boiler splashes into the melting wax. Water contamination can ruin the texture of the wax and negatively impact the quality of your final product.
The Danger of Adding Water
Never add water to a pot of wax that is already melted and hot. This can cause a violent reaction where the hot wax erupts from the container, leading to serious injury.
Making the Right Choice for Your Goal
Depending on what you intend to do with the melted wax, your immediate next steps will vary slightly.
- If your primary focus is specific project application: Immediately strain the wax through cheesecloth directly into your final heat-resistant containers or molds to capture debris before it sets.
- If your primary focus is deep purification of raw wax: Allow the wax to cool and harden over water, then scrape off the bottom impurities and repeat the melting cycle.
- If your primary focus is bulk storage: Pour the unfiltered liquid into flexible plastic molds or Styrofoam cups to create easy-to-store wax cakes for future use.
Prioritize preparation and protection, as the window between a smooth pour and a clumpy mess closes rapidly.
Summary Table:
| Step | Action Required | Key Reason |
|---|---|---|
| 1. Heat Removal | Remove from source instantly | Prevents overheating and wax degradation. |
| 2. Filtration | Strain through cheesecloth/filter | Removes debris and ensures material purity. |
| 3. Pouring | Transfer to molds immediately | Beeswax sets quickly; speed ensures a smooth finish. |
| 4. Safety | Wear oven gloves and use heat-resistant gear | Protects against steam burns and thermal shock. |
| 5. Storage | Use flexible silicone or plastic molds | Allows for easy removal and organized bulk storage. |
Elevate Your Beekeeping Operation with HONESTBEE
At HONESTBEE, we understand that processing high-quality beeswax requires precision and the right tools. We cater to commercial apiaries and distributors worldwide, providing a comprehensive wholesale selection of professional-grade equipment. From hive-making machinery and honey-filling systems to essential industry consumables and honey-themed merchandise, we empower your business with the scale and reliability you need.
Ready to streamline your production? Contact us today to discover how our expert solutions and hardware portfolio can drive your success.
Related Products
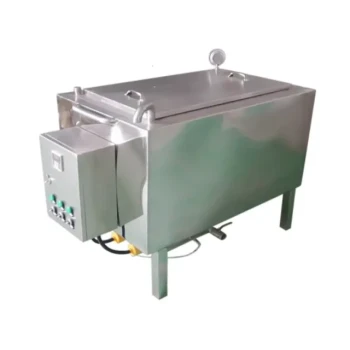
- Steam Beeswax Melter Wax Warmer for Wax Processing
- Electric Commercial Beeswax Melter for Factory Use
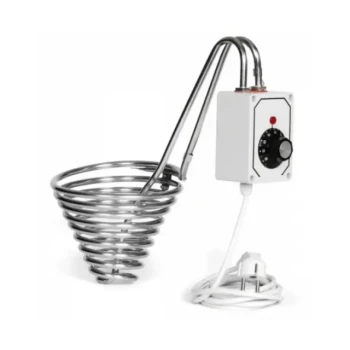
- Beeswax Melter for Candle Making Honey Bee Wax Melter
- Solar Beeswax Melter Easy Solar Wax Melter for Beeswax
- Electric Flatting and Embossing Machine with Tray for Beekeeping
People Also Ask
- What are the steps to use a steam wax melter? Master Safe & Efficient Wax Rendering
- How do you operate a steam wax melter? Master Efficient Wax Extraction and Frame Sterilization
- What types of beeswax melters are available for different scales of beekeeping? Solar vs. Electric Melters Compared
- What are the three popular methods for melting beeswax? Safely Process Your Wax with Ease
- How do steam wax melters function in the disinfection of apiary equipment? Achieve Chemical-Free Organic Sterilization