To convert a colony into a Queenright Cell Finisher on Day 1, you must reconfigure the hive from a temporary swarm box setup back into a double-deep configuration.
This involves moving the three central frames from your starter box—the young brood, the cell frame, and the pollen frame—into the center of the upper brood box, positioned directly above a queen excluder. This setup allows the resident queen to continue laying in the bottom box while nurse bees in the upper box focus on feeding and capping the developing queen cells.
The objective is to transition the developing cells from a high-density, queenless "starter" environment to a stable, queenright colony without interrupting their care. By isolating the queen below an excluder and surrounding the cells with brood above, you simulate a natural supersedure or swarming impulse that drives bees to finish the cells.
Executing the Transfer
The physical reconfiguration of the hive requires precision to maintain the temperature and nurse bee population around your grafted cells.
Preparing the Upper Assembly
Begin by setting aside the swarm box and the horizontal swarm board you used for the starter phase.
Focus on the upper brood box of the main hive, which must be situated above a queen excluder.
Create a void in the center of this box by spreading the existing frames apart to accommodate the incoming frames from the starter.
Relocating the Starter Frames
Transfer the three central frames from your starter box into the gap you created in the upper brood box.
You must maintain the specific order of these frames: the young brood, the frame with new queen cells, and the pollen frame.
Keeping the cell frame sandwiched between brood and pollen ensures immediate access to the resources nurse bees need to feed the larvae.
Consolidating the Population
Once the frames are seated, shake any remaining bees from the starter box into the main hive.
This returns the colony to a full double-deep structure, ensuring maximum population density to keep the hive warm and the cells well-fed.
Ensuring Cell Security
Merely moving the frames is not enough; you must arrange the surrounding environment to support the cells and prevent colony confusion.
The "Sandwich" Technique
Push frames of sealed brood tightly against the newly inserted trio of starter frames on both sides.
Sealed brood releases heat and attracts nurse bees, creating a stable thermal environment essential for cell development.
Fill any remaining space in the upper box with drawn combs to prevent the bees from building rogue burr comb in the gaps.
Critical Quality Control
There is one specific risk factor during this transfer that can ruin your graft if ignored.
Removing Emergency Cells
Before finalizing the placement, you must inspect the young brood frame transferred from the starter.
Look closely for any emergency queen cells the bees may have started on their own during the isolation period.
It is critical to remove these rogue cells; if left, they can distract the bees from your grafted cells or lead to early emergence and destruction of your desired queens.
Making the Right Choice for Your Goal
To ensure the highest acceptance rates and quality queens, follow these specific guidelines based on your immediate priority.
- If your primary focus is Cell Acceptance: Ensure the sealed brood frames are pressed tightly against the cell frame to maximize heat and nurse bee density.
- If your primary focus is Genetic Control: rigorously inspect the young brood frame to destroy wild emergency cells, ensuring only your selected genetics survive.
By re-establishing the double-deep structure with the queen below and the cells above, you leverage the colony's full strength to finish the work started in isolation.
Summary Table:
| Step | Action | Objective |
|---|---|---|
| 1. Preparation | Set aside swarm box; use queen excluder | Isolate queen in bottom box |
| 2. Transfer | Move 3 central frames (Brood/Cells/Pollen) | Maintain resource proximity for nurse bees |
| 3. Insulation | Sandwich with sealed brood frames | Maintain stable thermal environment for cells |
| 4. Inspection | Remove emergency queen cells | Ensure genetic purity and graft focus |
| 5. Consolidation | Shake remaining bees into main hive | Maximize population density for hive warmth |
Scaling Your Queen Rearing Operation?
At HONESTBEE, we specialize in empowering commercial apiaries and beekeeping distributors with the industrial-grade tools necessary for high-volume queen production. From specialized hive-making and honey-filling machinery to a full spectrum of beekeeping hardware and consumables, our wholesale offerings are designed to streamline your efficiency and maximize output.
Whether you are expanding your colony count or sourcing premium equipment for resale, our team provides the expert support and specialized tools you need to succeed. Contact us today to discuss your wholesale needs and see how HONESTBEE can elevate your beekeeping business.
Related Products
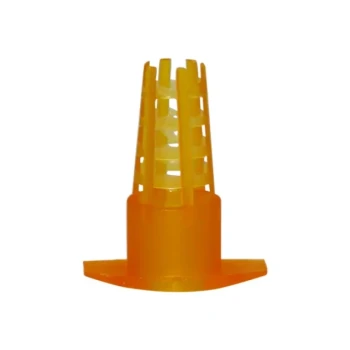
- JZBZ Style Shipping Cell Protector for Queen Rearing Kit
- Premium Nicot Style Cell Bar Holder and Queen Cell Cup Holder System
- JZBZ Style Push-In Cell Protector for Professional Queen Rearing Kits
- JZBZ Push-In Queen Cell Cups for Beekeeping
- JZBZ Type Wide Base Plastic Queen Cell Cups for Base Mounting and Queen Rearing
People Also Ask
- What is the primary reason for using queen cell protectors? Secure Your Yield with Proven Protection
- What is the purpose of queen cell protectors? Safeguard Your Queen Rearing Success
- What are some methods to protect a queen cell from being destroyed by bees? Essential Protection for Successful Queen Rearing
- What is the purpose of using queen cell protectors or introduction cages? Maximize Your Queen Rearing Success
- What is the role of queen cell protectors and emergence cages? Secure Your Genetic Stock and Hive Stability