To apply smoke effectively, prioritize cool, gentle application over volume. Begin by aiming the smoker nozzle at the hive entrance to allow a few puffs of smoke to drift inside, then wait one to two minutes for the colony to adjust. Once the hive is open, apply smoke sparingly across the top bars of the frames—never directly down onto the bees—to maintain a calm environment without causing agitation.
The goal is to use smoke as a subtle signal, not a weapon. Success relies on producing cool, white smoke and giving the colony time to react, rather than overwhelming them with heat or excessive fumes.
Ensuring Smoke Quality Before You Begin
The Importance of Cool White Smoke
Before approaching the hive, verify that your smoker is producing cool, dense, white smoke. This indicates the fuel is burning correctly and the smoke is safe for the bees.
Avoiding the "Blow Torch" Effect
If the smoke appears grey or you see sparks, the fire is too hot. This turns your smoker into a "blow torch" that can singe the bees' wings and incite aggression; add more fuel immediately to dampen the fire and cool the smoke.
The Step-by-Step Application Process
The Initial Entrance Signal
Approach the hive calmly and deliver a few gentle puffs into the main entrance. This initial application acts as a signal to the guard bees and begins the calming process before you expose the colony.
The Crucial Waiting Period
After smoking the entrance, wait one to two minutes before opening the hive. This pause allows the smoke to circulate and the bees to react, significantly reducing defensive behavior when you lift the cover.
Opening the Hive
Crack the outer cover slightly and aim a gentle puff under the lid, holding the smoker nozzle 8-10 inches away. Replace the cover loosely for another minute if necessary, then proceed to fully open the hive.
Technique During the Inspection
Apply Across, Not Down
When working with open frames, direct the smoke across the top bars. Never blow smoke directly down into the spaces between frames, as this forces the smoke directly onto the bees and can cause panic.
Focus on High-Density Areas
Apply small puffs specifically around areas with high bee density. The smoke should be allowed to drift over the bees naturally rather than being blasted at them.
Maintenance Puffs
Use smoke sparingly and consistently throughout the inspection to maintain order. A good rule of thumb is to puff the smoker once or twice every 5 minutes to remind the bees of the signal.
Common Pitfalls and Trade-offs
The Risk of Over-Smoking
There is a fine line between calming a hive and agitating it. Too much smoke can confuse the bees and make them more difficult to manage, while too little will fail to mask alarm pheromones.
Masking Alarm Pheromones
If you or your equipment are stung, immediately smoke the specific area of the sting. This masks the alarm pheromone released by the sting, preventing other bees from targeting the same spot.
recognizing the "Patience Limit"
If you find yourself needing to smoke the bees repeatedly to keep them under control, their patience is likely worn thin. This is a clear signal to close the hive and end the inspection for the day.
Making the Right Choice for Your Goal
Mastering the use of a smoker is about observation and restraint. Use the following guide to adjust your technique:
- If your primary focus is a Routine Inspection: Use minimal, cool smoke across the top bars to gently guide bees away from the areas where your hands are working.
- If your primary focus is Safety Management: Prioritize the 1-2 minute wait time after the initial puff to ensure the colony is fully subdued before exposing the frames.
Your smoker is your primary tool for communication with the hive; use it to whisper, not to shout.
Summary Table:
| Application Step | Technique Recommendation | Desired Outcome |
|---|---|---|
| Smoke Quality | Cool, dense, white smoke | Safe for bees; prevents singeing wings |
| Initial Signal | Few puffs into the hive entrance | Alerts guard bees and starts calming process |
| Waiting Period | Pause for 1 to 2 minutes | Allows smoke to circulate and bees to react |
| Inner Frames | Smoke across top bars (8-10 inches away) | Prevents panic and guides bees downward |
| Maintenance | 1-2 puffs every 5 minutes | Maintains order throughout the inspection |
Elevate Your Apiary Management with HONESTBEE
Effective hive management starts with the right tools. At HONESTBEE, we specialize in supporting commercial apiaries and distributors by providing a comprehensive range of high-quality beekeeping equipment. From professional-grade smokers that ensure cool smoke delivery to advanced hive-making and honey-filling machinery, our portfolio is designed to enhance your operational efficiency.
Whether you are scaling your honey production or looking for reliable industry consumables and honey-themed cultural merchandise, we offer the wholesale solutions you need to succeed.
Ready to optimize your beekeeping operations? Contact us today to explore our full catalog and wholesale offers!
Related Products
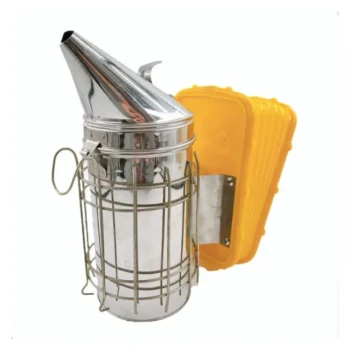
- Stainless Steel Honey Bee Smoker Hive and Honeycomb Smoker for Beekeeping
- Stainless Steel Bee Hive Smoker Beekeeping Smoker for Wholesale
- Galvanized Beekeeping Smoker for Honey Bee and Apiculture
- Professional Bee Smoker with Elongated Spout and Durable Bellows for Beekeeping
- Economy Galvanized Beekeeping Honey Bee Smoker for Wholesale
People Also Ask
- What is the best material for a bee smoker? Choose the Right Fuel for a Calm Hive
- What type of bee smoker is recommended for a beginner? Top Picks for Easy Hive Management
- Why is a stainless steel bee smoker considered indispensable? Master Hive Management with Cool Smoke Technology
- Why is a smoker important in beekeeping? Essential for Safe and Calm Hive Management
- How should a beekeeper use a smoker when approaching a hive? A Guide to Calm, Safe Inspections