To clean cow leather beekeeping gloves effectively, you must treat them with a gentle, manual process rather than submersion. Start by dry-brushing off loose dirt, then wipe the leather with a soft cloth or brush dampened in a solution of mild soap and warm water. Treat sticky residues like propolis with a small amount of white vinegar, towel dry to remove excess moisture, and apply a leather conditioner once fully air-dried to prevent the material from stiffening.
Cow leather is durable but porous; the goal of cleaning is to remove hive debris and pathogens without stripping the natural oils that keep the gloves flexible and sting-resistant.
The Cleaning Procedure
Initial Debris Removal
Before introducing any moisture, you must mechanically remove loose contaminants.
Use a soft-bristled brush to sweep away dirt, dried mud, and surface debris. This prevents dirt from turning into mud during the washing process, which can become embedded in the leather grain.
The Gentle Wash Method
Prepare a cleaning solution using warm water and a mild soap or specialized leather cleaner.
Dip a soft cloth or brush into the solution, wringing it out so it is damp but not dripping. Gently wipe the gloves to lift grime. Do not soak or submerge the gloves, as excessive water saturation can damage the structural integrity of the leather.
Targeting Stubborn Residues
Beekeeping gloves often accumulate sticky substances like beeswax and propolis that mild soap cannot dissolve.
For these tough stains, apply a small amount of white vinegar to a cloth. Test this on an inconspicuous area first to ensure it does not discolor the leather. Rub the affected areas gently to break down the propolis and disinfect the surface.
Drying and Restoration
Moisture Removal
Once the gloves are clean, use a clean, dry towel to wipe off any excess moisture immediately.
It is critical to remove as much standing water from the surface as possible to prevent water spots and saturation.
The Air Drying Process
Allow the gloves to air dry naturally.
Hang them in a shaded area with good air circulation. Never use artificial heat such as hair dryers, radiators, or direct sunlight, as rapid drying will cause the cowhide to shrink, crack, and become brittle.
Conditioning for Longevity
Cow leather is thick and prone to becoming stiff after interacting with water.
Once the gloves are dry, apply a high-quality leather conditioner. Buff the conditioner into the leather with a clean cloth. This step replenishes the oils lost during cleaning, keeping the gloves supple and maintaining the dexterity needed for hive work.
Common Pitfalls to Avoid
The Danger of Submersion
While it may be tempting to submerge gloves in a bucket or machine wash them for a "deep clean," this is often detrimental to cow leather.
Fully saturating the leather fibers causes them to swell and then contract tightly upon drying. This results in gloves that are uncomfortable, difficult to move in, and prone to cracking, which compromises their sting protection.
Ignoring the Seams
Debris and pathogens frequently accumulate in the stitching and seams of the gloves.
During the wiping process, pay special attention to these crevices. Failing to clean the seams can allow bacteria or wax moths to harbor in the gloves, reducing hive hygiene.
Making the Right Choice for Your Gear
Proper maintenance extends the life of your equipment and ensures safety during hive inspections.
- If your primary focus is longevity: Prioritize the conditioning step to ensure the thick cowhide remains flexible and does not crack over time.
- If your primary focus is hygiene: Utilize the white vinegar step more frequently to break down propolis and utilize its antibacterial properties to prevent cross-contamination between hives.
Treat your leather gloves as a tool that requires care, not just a fabric to be washed; consistent, gentle maintenance ensures they remain a reliable barrier between you and the colony.
Summary Table:
| Step | Action | Tools/Materials Needed |
|---|---|---|
| 1. Debris Removal | Dry-brush loose dirt and mud | Soft-bristled brush |
| 2. Gentle Wash | Wipe surfaces with damp cloth | Mild soap & warm water |
| 3. Spot Cleaning | Remove propolis and beeswax | White vinegar |
| 4. Drying | Air dry naturally (No heat) | Shaded, airy location |
| 5. Restoration | Apply leather conditioner | High-quality conditioner |
Maximize Your Apiary's Efficiency with HONESTBEE
Maintaining your gear is essential, but having the right equipment is the foundation of a successful beekeeping operation. At HONESTBEE, we empower commercial apiaries and distributors with a comprehensive range of professional-grade tools and machinery.
Why partner with us?
- Full Spectrum Supply: From premium sting-resistant leather gloves to industrial-scale honey-filling machines and hive-making equipment.
- Wholesale Excellence: We offer bulk consumables and specialized hardware designed to withstand the rigors of commercial use.
- Industry Expertise: Beyond tools, we provide the cultural merchandise and essential supplies that keep your business thriving.
Ready to upgrade your equipment or restock your inventory? Contact us today to explore our wholesale offerings and see how HONESTBEE can support your growth.
Related Products
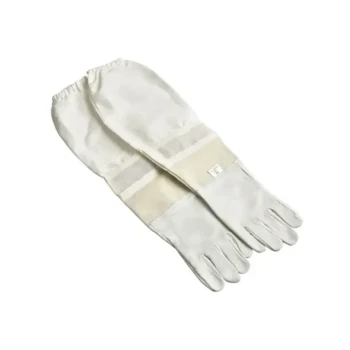
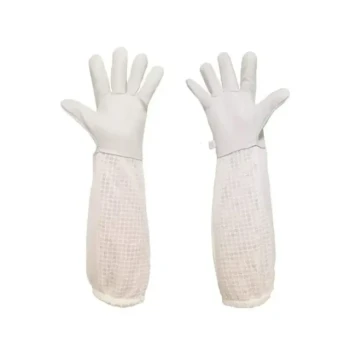
- Goatskin Leather Beekeeper Gloves with Vent Long Sleeve for Beekeeping Honey Bee Sting Proof Protection
- Beekeeping Gloves Goatskin Leather with Long Cotton Sleeve for Beekeepers
- Goat Skin Leather Bee Sting Proof Beekeeping Gloves with Canvas Sleeve
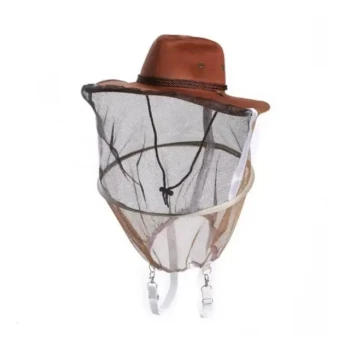
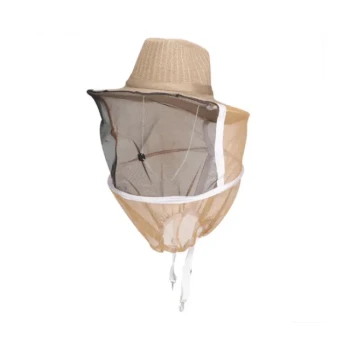
- Premium Cowboy Beekeeper Hat with Visibility Veil Outdoor Professional Beekeeping Protective Gear
- Premium Ventilated Goatskin Beekeeping Gloves with Full 3-Layer Mesh Sleeve
People Also Ask
- What are the characteristics of goatskin beekeeping gloves? Enhance Dexterity and Protection in Your Apiary
- What types of gloves are used in beekeeping for hand protection? Choose the Best Gear for Safety and Dexterity
- How do beekeeping gloves help in maintaining hygiene? Essential for Hive Biosecurity
- How should beekeeping gloves be maintained? Protect Your Investment and Dexterity
- Why is it important to have gloves available even if not always worn? Essential Risk Management for Beekeepers