Calibration is the single most critical maintenance step for ensuring the integrity of your refractometer readings. It is vital because these optical instruments are highly sensitive to physical handling, vibration, and temperature changes, all of which can cause the internal scale to drift and produce false data. To maintain accuracy, you must calibrate the device before its very first use, after any long period of storage, and at regular intervals—typically once per season.
The core purpose of calibration is to synchronize your instrument against a proven standard. Without this adjustment, even a high-end refractometer will provide data that is statistically unreliable due to mechanical settling or environmental shifts.
The Mechanics of Accuracy Drift
Why Defaults Fail
A refractometer relies on an internal optical assembly to measure light refraction.
This assembly is delicate. The adjustment screw, which sets the "zero" or baseline reading, is not permanently fixed in place.
The Impact of Transport
Vibration is the enemy of optical precision. During shipping or transport, the adjustment screw often loosens or shifts.
Consequently, a brand-new instrument is rarely accurate right out of the box. You must assume it has drifted until you verify it.
Environmental Sensitivity
Temperature fluctuations affect both the liquid being tested and the metal of the instrument itself.
Regular calibration acts as a reset button, neutralizing these variables to ensure the scale reflects the true chemical properties of your sample.
Defining the Schedule
The "First Use" Rule
The most important calibration happens before you take your first measurement.
Because of the shifting mentioned above, relying on factory settings is a gamble. Establishing a trusted baseline immediately is essential.
Seasonal Recalibration
For ongoing projects, you should recalibrate at least once every season.
Over time, daily handling and minor bumps will cause micro-adjustments in the optics that accumulate into significant errors.
Post-Storage Verification
If the instrument has been sitting in a drawer for a long period, do not use it immediately.
Time and temperature changes during storage can alter the calibration. Always re-verify the device after it has been dormant.
Common Pitfalls to Avoid
Neglecting the Reference Standard
You cannot calibrate based on a guess. You must use a reference liquid with a strictly known value (such as a specific Brix solution).
Using a fluid with unknown properties to "check" your device will simply transfer that unknown error to your future readings.
The Bubble Error
When applying your reference solution, air bubbles are a major source of distortion.
Bubbles trapped between the prism and the cover panel disrupt the light path. This creates a fuzzy reading line, making precise calibration impossible.
Visual Clarity Issues
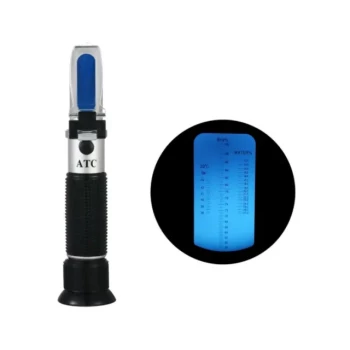
Calibration requires a sharp, distinct line between the blue and white fields.
Attempting to calibrate in dim lighting or with a dirty prism will lead to a "best guess" adjustment rather than a precise setting.
Making the Right Choice for Your Goal
Calibration is not a repair; it is a standard operating procedure for valid data collection.
- If your primary focus is new equipment setup: Calibrate immediately upon unboxing to correct for mechanical loosening that occurred during shipping.
- If your primary focus is data consistency: Enforce a strict schedule to recalibrate at the start of every season or after significant temperature shifts.
Treat calibration not as a chore, but as the essential foundation that makes your measurements worth recording.
Summary Table:
| Calibration Milestone | Frequency / Timing | Reason for Calibration |
|---|---|---|
| Initial Setup | Before first use | Corrects mechanical shifts caused during shipping and transport. |
| Seasonal Check | Once per season | Neutralizes accumulated micro-adjustments from daily handling. |
| Post-Storage | After long-term dormancy | Adjusts for optical drift caused by time and temperature changes. |
| Environmental Shift | Significant temp changes | Ensures the internal scale accounts for material expansion/contraction. |
Elevate Your Beekeeping Standards with HONESTBEE
At HONESTBEE, we understand that precision is the backbone of a successful commercial apiary. As a premier partner for distributors and large-scale operations, we provide more than just tools—we deliver reliability. From high-precision refractometers and honey-filling machines to specialized hive-making equipment and industry-essential consumables, our comprehensive wholesale offering is designed to optimize your production and profitability.
Ready to scale your operation with professional-grade hardware?
Contact our team of experts today to discuss how our tailored beekeeping solutions and cultural merchandise can enhance your value to the market.
Related Products
- Precision Honey Refractometer Instrument for Quality Assessment
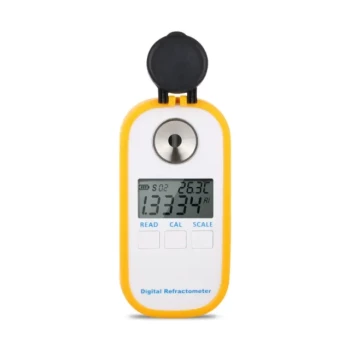
- Digital Honey Refractometer for Precision Measurement of Optimal Honey Quality
People Also Ask
- Why is a honey refractometer considered essential for harvesting honey? Guarantee Quality and Prevent Fermentation
- How should honey from a large container be tested with a refractometer? Mastering Bulk Sampling and Accuracy
- How do professional scientific instruments contribute to honey quality testing? Ensure Purity and Market Compliance
- What temperature considerations are important when using a honey refractometer? Expert Tips for Precise Readings
- What parameter is a portable refractometer primarily used to measure for honey? Ensure Ripeness and Stability