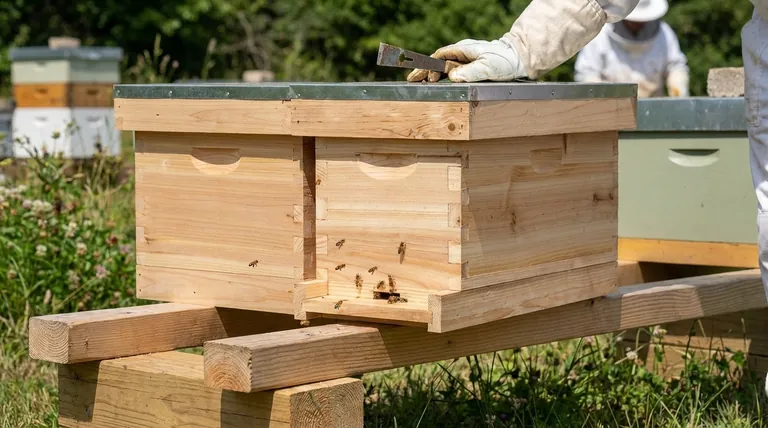
To properly install a nuc in your apiary, you must first place the sealed nucleus box exactly where the permanent hive will be located. Once positioned, you should open the small entrance on the nuc, allowing the bees to exit and begin their critical orientation flights from this precise location.
The most critical goal when installing a nuc is not simply placing the box, but allowing the colony to orient to its final location. Doing this before transferring the frames into the main hive body dramatically reduces bee confusion and ensures a stronger, more stable colony.
The Critical First Step: Orientation
The moments after a nuc arrives in your apiary are crucial. The colony has been confined and transported, and its first priority is to understand its new environment. Your job is to facilitate this process with minimal stress.
Why Orientation Matters
Bees map their surroundings with incredible precision. On their first flights from a new location, they perform "orientation flights"—circling in expanding patterns to memorize landmarks and the exact position of their entrance.
If you move the hive even a few feet after these flights have occurred, returning foragers will become lost, clustering where the entrance used to be. This weakens the colony by depriving it of its workforce.
Placement is Everything
The rule is simple: place the nuc where the hive will live.
Set up your final hive stand first. Then, place the sealed nuc box directly on the stand, or on the ground immediately in front of it. This ensures the bees' internal GPS is locked onto the correct coordinates from their very first flight.
Opening the Nuc Entrance
The entrance is typically a small hole or sliding gate on one of the short sides of the nuc box, often sealed with tape, a plug, or a screen.
Use a hive tool to gently pry open or remove the seal. Stand to the side of the entrance as you do this, not directly in front of it. It is normal for a rush of bees to emerge, but they will quickly settle down and begin exploring.
Preparing for the Hive Transfer
Placing the nuc and opening the entrance is just phase one. This initial orientation period sets the stage for the main event: transferring the frames into the full-sized hive.
Give Them Time to Settle
Allow the bees to fly from the nuc box for at least a few hours, and ideally for the rest of the day. This gives the colony time to acclimate after the stress of travel and ensures thousands of foragers have successfully mapped the location.
Choose the Right Conditions
The best time to transfer the frames from the nuc into the larger hive box is during a warm, calm, and sunny part of the day, typically between 10 a.m. and 4 p.m.
Performing the transfer in good weather minimizes stress on the bees and reduces the risk of chilling the delicate brood (bee larvae).
Common Pitfalls to Avoid
Success often comes from avoiding simple mistakes. A calm and methodical approach prevents most common problems.
Rushing the Process
The most common mistake is transferring the frames into the large hive body immediately upon arrival, without letting the nuc orient first.
Bees will emerge from the large hive, orient to that new entrance, and all will be well. However, the bees still inside the nuc will be confused. When they eventually emerge, they will look for the tiny nuc entrance they are accustomed to, not the larger one on the new box.
Incorrect Final Placement
Do not let the bees orient to one spot in your apiary and then move the hive to another spot a week later. Any bees out foraging during the move will return to the original spot and be lost. Establish the permanent location from day one.
Making the Right Choice for Your Timeline
Your approach depends on the weather and time of day you receive your bees.
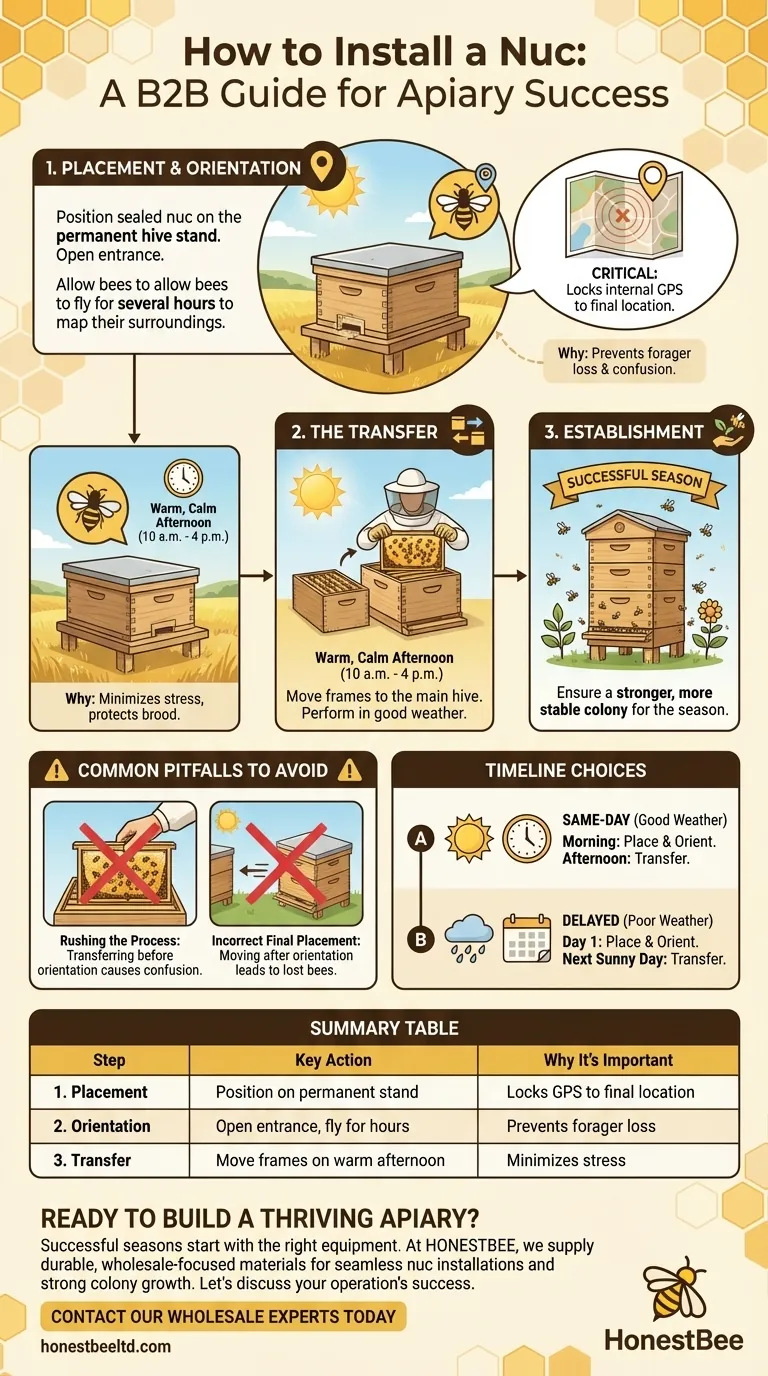
- If your primary focus is a same-day installation in good weather: Place the nuc in its final location in the morning, open the entrance, and allow the bees to orient for several hours before transferring the frames that afternoon.
- If your primary focus is installing in the evening or during poor weather: Place the nuc in its final location and open the entrance, but wait for the next warm and sunny day to perform the actual frame transfer into the main hive.
Properly orienting your new colony is the first and most important step in setting them up for a successful season.
Summary Table:
| Step | Key Action | Why It's Important |
|---|---|---|
| 1. Placement | Position the sealed nuc box on the permanent hive stand. | Locks the bees' GPS to the final location from their first flight. |
| 2. Orientation | Open the nuc entrance and allow bees to fly for several hours. | Prevents forager loss and confusion by letting the colony map its surroundings. |
| 3. Transfer | Move frames to the main hive on a warm, calm afternoon. | Minimizes stress on the bees and protects the brood during the transition. |
Ready to build a thriving apiary? A successful season starts with the right equipment and knowledge. At HONESTBEE, we supply commercial apiaries and beekeeping equipment distributors with the durable, wholesale-focused supplies needed for seamless nuc installations and strong colony growth. Let's discuss how our products can support your operation's success.
Contact our wholesale experts today to get started.
Visual Guide
Related Products
- Automatic Heat Preservation 6 Frame Pro Nuc Box for Honey Bee Queen Mating
- Styrofoam Mini Mating Nuc Box with Frames Feeder Styrofoam Bee Hives 3 Frame Nuc Box
- 5 Frame Wooden Nuc Box for Beekeeping
- 5 Frame Langstroth Poly Nuc Corrugated Plastic Nuc Boxes
- Professional Grade Foldable Beehive Handles
People Also Ask
- What are the practical uses for an empty nuc box? Essential Tools for Swarm Control and Apiary Management
- What is the process for managing a new bee colony started in a nuc box? Expert Tips for Hive Success
- What are nuc boxes used for in beekeeping? Essential Tools for Queen Rearing and Colony Growth
- How are nuc boxes used in queen rearing? The Essential Tool for Reliable Queen Mating
- Under what conditions should a captured swarm be upgraded to a two-deep hive? Maximize Colony Growth Today