Spring hive inspections rely on strict thermal limits to ensure colony safety. You should only conduct an inspection when the outside temperature reaches approximately 50 degrees Fahrenheit and you actively observe bees taking flights. These initial checks must be executed rapidly, keeping the hive open for 30 seconds or less.
The primary goal of early spring inspection is confirmation, not manipulation. Because the colony is emerging from winter with sensitive brood, inspections must be timed to coincide with specific weather windows to prevent fatal chilling of the developing bees.
The Critical Environmental Thresholds
Temperature and Activity
The absolute baseline for opening a hive is 50 degrees Fahrenheit. However, the thermometer is not your only guide; you must visually confirm that bees are taking flights. If the bees are not active outside, it is generally too cold to disturb the cluster inside.
Timing for Optimal Conditions
Plan your inspection for midday on a clear, still day. The high sun position maximizes visibility into the hive box, allowing you to see details without removing frames unnecessarily.
Leveraging Forager Activity
Inspecting around midday offers a distinct strategic advantage. During this peak warmth, many active foragers will be out of the hive, reducing the population density you have to manage inside the box.
The Importance of Speed
The 30-Second Limit
Your initial spring check is a "peek," not a deep dive. Limit the total time the hive is open to 30 seconds or less. This timeframe is sufficient to verify survival and food stores without exposing the colony to prolonged heat loss.
Preventing Brood Chilling
The deep need behind this speed is the protection of the brood (developing bees). In early spring, the colony is working hard to maintain a specific internal temperature to rear the next generation; exposing them to 50-degree air for too long can chill and kill the brood, setting the colony back significantly.
Preparation and Execution
Readying Your Equipment
Because speed is paramount, you cannot afford to fumble for equipment. Ensure you have your protective clothing on and your hive tool ready for manipulating frames before you approach the hive.
Smoker Management
Prepare your smoker before opening the cover. It should be filled with fuel and lit to produce a consistent volume of cool smoke. This is essential for calming the bees quickly, ensuring a smooth and rapid procedure.
Maintenance and Trade-offs
Cleaning the Foundation
While the hive is accessible, turn your attention to the bottom board. Tilt the hive to access the board and use your hive tool to scrape off accumulated winter debris.
Monitoring for Pests
Inspect the debris on solid bottom boards for Varroa mites. This provides an early indicator of pest pressure without requiring an invasive frame-by-frame search.
Hardware Trade-offs
If you detect mites on a solid bottom board, consider the trade-off of switching to a screened bottom board. While a solid board offers more wind protection, a screened board allows for better ongoing pest management and monitoring.
Making the Right Choice for Your Goal
If your primary focus is Colony Survival:
- Strictly adhere to the 50°F minimum and keep the inspection under 30 seconds to prevent brood chilling.
If your primary focus is Pest Management:
- Utilize the brief inspection window to scrape the bottom board and swap to a screened board if Varroa mites are present.
If your primary focus is Ease of Inspection:
- Wait for a clear, still midday window when foragers are absent to minimize the number of bees inside the hive.
Prioritize the thermal health of the brood over your curiosity to ensure the colony thrives into the summer.
Summary Table:
| Condition/Factor | Requirement | Purpose |
|---|---|---|
| Minimum Temperature | 50°F (10°C) | Prevents fatal chilling of the brood |
| Ideal Timing | Midday on a clear, still day | Maximizes visibility and leverages forager activity |
| Inspection Duration | 30 seconds or less | Minimizes heat loss and colony stress |
| Bee Activity | Active flights observed | Signals it is safe to disturb the cluster |
| Equipment Readiness | Fully prepared beforehand | Ensures speed and efficiency during the check |
Elevate Your Apiary's Success with HONESTBEE
Transitioning your colony from winter to a productive spring requires more than just timing—it requires the right tools. HONESTBEE specializes in supporting commercial apiaries and distributors with high-quality, wholesale beekeeping solutions. From precision hive-making and honey-filling machinery to essential consumables and specialized hardware, we provide everything needed to scale your operations.
Whether you are upgrading to screened bottom boards for better pest management or stocking up on professional-grade protective gear, our comprehensive portfolio is designed for industry leaders. Discover how our expertise can streamline your production and enhance your yields—contact us today to discuss your wholesale needs!
Related Products
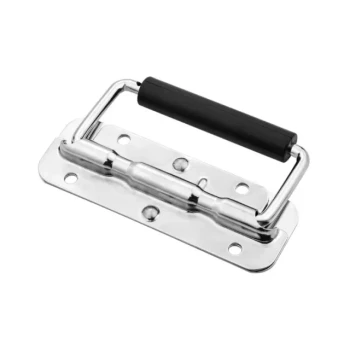
- Premium Comfort Grip Spring-Loaded Hive Handles
- Australian Pine Wood Langstroth Screen Bottom Board for Wholesale
- Professional Large-Format Hive Number Set for Beekeeping
People Also Ask
- Which intervention materials and management tools are used in commercial apiaries? Protect Your Bees from Pesticides
- How do hive tools and queen rearing equipment facilitate the bee colony splitting process? Restore Your Apiary Faster
- How do bee hive handles facilitate the evaluation of food stores? Use the Lift Test for Winter Survival
- What are some alternatives to a hive tool? 5 Common Substitutes and Why a Dedicated Tool is Better
- What are some common types and styles of hive tools? Choose the Best Beekeeping Lever for Your Apiary