To properly light a bee smoker, begin by igniting a fast-burning starter material like crumpled newspaper or cardboard and immediately using a hive tool to push the flames to the very bottom of the chamber. Once this base fire is established, stack your primary slow-burning fuel—such as pine cones or wood shavings—on top of the flames. The goal is to create a smoldering pile that emits a steady stream of cool, dense white smoke without generating an open flame.
The objective of a bee smoker is not to maintain a fire, but to sustain a smolder. A properly lit smoker produces cool, white smoke that masks alarm pheromones, whereas a hot smoker with open flames can singe bees and trigger defensive behavior.
Preparing the Chamber
Before lighting, you must ensure the smoker is mechanically ready to sustain a fire.
Clear the Airflow
Empty any old ashes from the previous use. The space below the internal grate must be clear to allow the bellows to force air upward through the fuel.
Check the Lid
Scrape any sticky buildup (creosote) from the rim of the lid. A clean seal ensures the smoke is directed out of the nozzle rather than leaking from the sides.
The Ignition Sequence
The primary reference highlights that a successful smoker fire is built from the bottom up.
Establish the Starter
Light a piece of highly flammable material, such as crumpled newspaper or cardboard. Place it into the chamber.
Position the Flame
Use your hive tool to push this burning material down to the bottom of the burning chamber. This ensures the heat source is below the main fuel, utilizing the natural upward draft.
Engage the Bellows
Gently puff the bellows to feed oxygen to the starter fire. You want a robust flame at the bottom before adding heavier materials.
Fueling and Compressing
Once the starter is burning well, you must transition to the main fuel source to create the necessary smoke volume.
Add Main Fuel
Add your slow-burning fuel, such as pine cones, wood shavings, or smoker pellets, directly on top of the starter flame. Do not dump it all in at once; add a handful at a time.
The "Puff and Pack" Technique
As you add fuel, squeeze the bellows to keep the fire breathing. As the flames rise, use your hive tool to tamp (compress) the fuel down.
This step is critical: compression slows the burn rate, turning open flames into a thick, smoldering smoke.
Verify Smoke Quality
Continue pumping the bellows until the smoke turns from wispy and grey to thick, cool, and white. Once this density is achieved, close the lid.
Common Pitfalls to Avoid
Building a smoker fire involves balancing airflow with fuel density.
The "Chimney Effect" Error
If you pack the fuel too loosely, the oxygen flows too freely. This creates a hot fire that burns out quickly and may shoot sparks or flames out of the nozzle, endangering the bees.
The Over-Compression Error
If you pack the fuel too tightly without sufficient bellows activity, you will choke the fire. The smoker will go out shortly after you close the lid.
The Temperature Trap
Always test the smoke temperature against the back of your hand before approaching the hive. If it is too hot for your skin, it is too hot for the colony.
Making the Right Choice for Your Goal
The fuel and packing method you choose should depend on the duration of your work.
- If your primary focus is a quick check: Use lighter fuels like pine needles or loosely packed burlap, as they ignite quickly but burn faster.
- If your primary focus is a full apiary inspection: Use dense fuels like hardwood pellets or tightly packed pine cones, and spend extra time tamping the fuel to ensure a long-lasting smolder.
A reliable smoker is your most important safety tool; take the time to light it correctly, and it will remain lit for the duration of your inspection.
Summary Table:
| Stage | Action | Materials/Tools | Goal |
|---|---|---|---|
| Preparation | Clear airflow & scrape creosote | Hive tool, brush | Ensure clean seal & oxygen flow |
| Ignition | Light starter & push to bottom | Newspaper, cardboard | Establish a heat source at the base |
| Fueling | Add slow-burning fuel in layers | Pine cones, wood shavings | Transition from flame to smolder |
| Compression | Tamp fuel while pumping bellows | Hive tool, bellows | Create thick, cool, white smoke |
| Safety Check | Temperature test on hand | Smoker nozzle | Avoid singeing bees with hot air |
Elevate Your Apiary Operations with HONESTBEE
At HONESTBEE, we understand that a reliable smoker is the backbone of a safe hive inspection. As a premier partner for commercial apiaries and distributors, we provide more than just tools—we deliver a comprehensive wholesale solution designed for industry success.
Our portfolio features high-performance beekeeping machinery, professional-grade smokers, and essential consumables that ensure your team or customers work with precision and safety. Whether you need specialized honey-filling machines to scale your production or honey-themed cultural merchandise to expand your brand, we have the expertise to support your growth.
Partner with a global leader in beekeeping equipment today.
Contact HONESTBEE for Wholesale Inquiries
Related Products
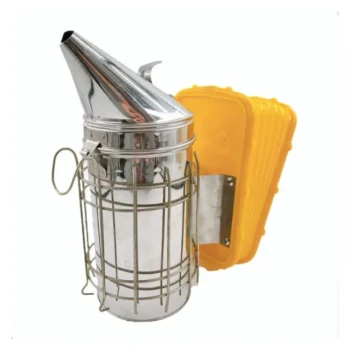
- Stainless Steel Honey Bee Smoker Hive and Honeycomb Smoker for Beekeeping
- Professional Bee Smoker with Elongated Spout and Durable Bellows for Beekeeping
- Premium Traditional Copper Bee Smoker with Bellows
- Heavy Duty Manual Bee Smoker Blower for Beekeeping
- European Stainless Steel Bee Smoker for Honey Bee Hive
People Also Ask
- Why is a specialized bee smoker considered a critical tool for apiary safety? Master Hive Control & Productivity
- Why is a bee smoker considered an essential auxiliary tool? Boost Safety and Efficiency in Honey Harvesting
- What are bee smokers made out of? Choose the Right Material for Your Apiary
- How should a beekeeper use a smoker when approaching a hive? A Guide to Calm, Safe Inspections
- What type of bee smoker is recommended for a beginner? Top Picks for Easy Hive Management