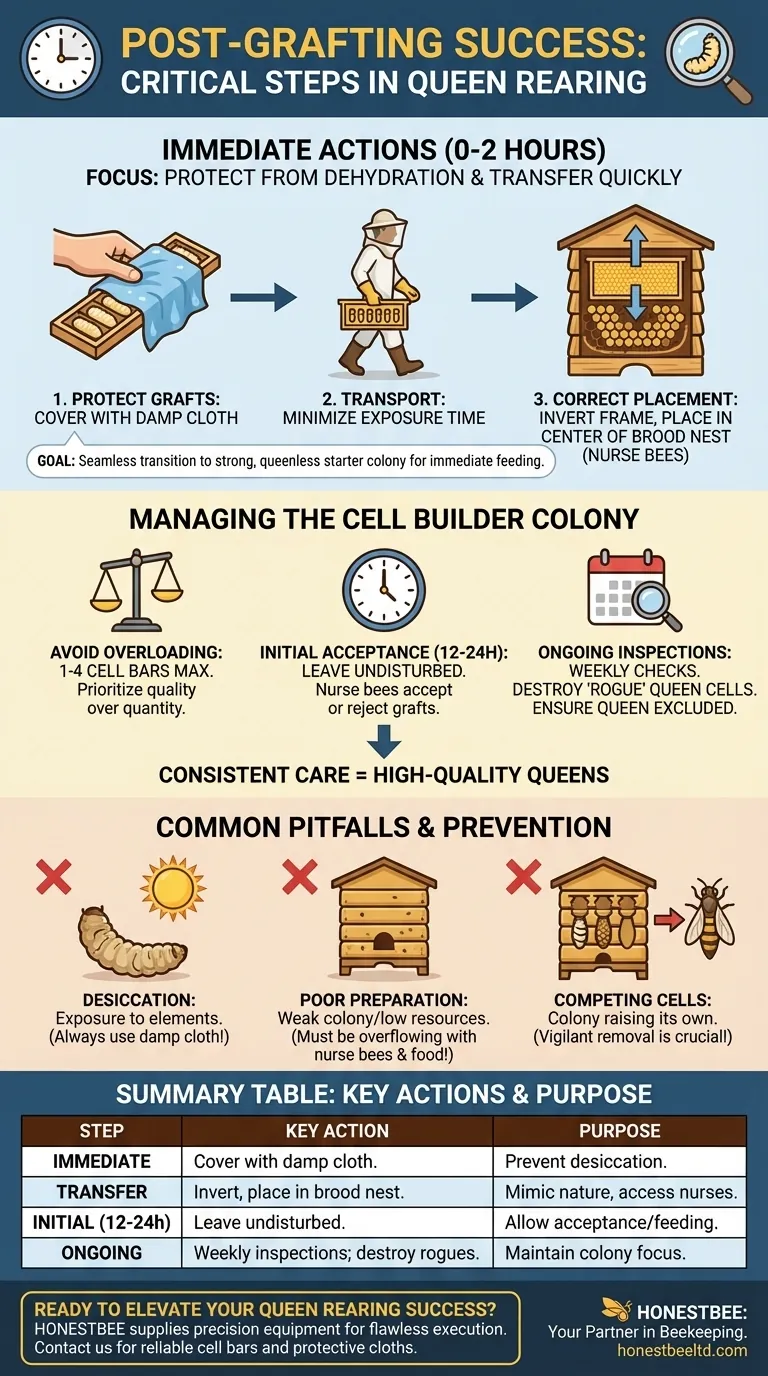
Immediately after you finish grafting, your sole focus is to protect the delicate larvae from dehydration and get them into a prepared cell builder colony as quickly as possible. The cell bar holding the grafted larvae should be covered with a damp cloth during transport and then inserted into the center of a strong, queenless "starter" colony. This colony is specifically configured to accept and begin feeding the larvae with royal jelly.
Your success in queen rearing hinges less on the moment of grafting itself and more on the critical hours that follow. The goal is to seamlessly transition the larvae into a highly populated, queenless environment that is primed to accept and nurture them into new queens.
The Immediate Transfer to the Cell Builder
The moments after the grafting tool is put down are a race against the clock. The larvae are incredibly vulnerable and require immediate, precise care.
Protecting Grafts from Dehydration
The single greatest threat to your newly grafted larvae is desiccation, or drying out. A larva that dries out is a dead larva.
To prevent this, place a damp (not dripping wet) cloth over the cell bars as soon as they are full. This maintains a humid micro-climate during the short journey from your grafting station to the cell builder colony.
Correctly Placing the Cell Bar
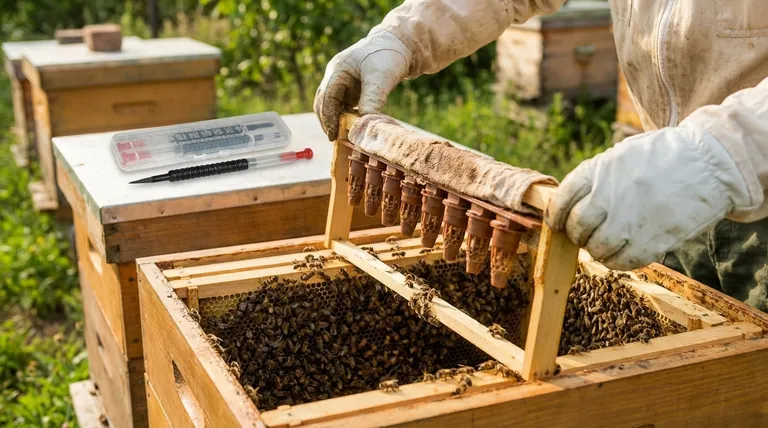
Transport the frame with the cell cups facing up to avoid dislodging the larvae.
Upon reaching the cell builder colony, carefully invert the frame so the cell cups face down. This mimics the natural orientation of queen cells.
Lower the frame into the designated space in the center of the brood nest. This area has the highest concentration of young nurse bees, which are essential for feeding the larvae.
Managing the Cell Builder Colony
A cell builder is not just any hive; it is a specialized unit managed for one purpose: raising queens. Its proper management is key to your success.
Avoid Overloading the System
Do not overwhelm the cell builder's capacity. A very strong starter colony can typically handle up to four bars of cells, but fewer is often better.
Overloading the colony spreads the nurse bees too thin. This results in lower acceptance rates and poorly fed larvae, which develop into lower-quality queen bees.
The Initial Acceptance Period
Leave the grafted cells in the starter colony undisturbed until the next morning. This initial 12-24 hour period is when the nurse bees will either accept or reject the grafts.
After this critical period, you can inspect the cells to gauge your success rate and potentially add more grafted cells if the colony has the capacity.
Ongoing Colony Inspections
Regular inspections are crucial to prevent the colony from reverting to its own instincts. Check the cell builder colony weekly.
The primary task is to find and destroy any "rogue" queen cells the colony may have started on its own frames. If these are allowed to develop, the bees will likely abandon your grafted cells.
Ensure the queen excluder is properly in place to keep the colony queenless in the cell-raising area. A laying queen in this section will result in the immediate destruction of your grafts.
Common Pitfalls to Avoid
Success requires anticipating and preventing common mistakes. A small error in post-grafting care can undo all your meticulous work.
Losing Larvae to the Elements
Never leave a finished cell bar exposed to open air, sun, or wind. Even a minute of exposure can be fatal. Always have your damp cloth ready.
A Poorly Prepared Cell Builder
Do not assume any strong, queenless colony will work. A proper cell builder must be overflowing with young nurse bees and have abundant stores of pollen and honey to produce the vast amount of royal jelly required.
Competing Queen Cells
The colony's natural impulse is to raise its own queen from its own brood. You must be vigilant in removing these competing queen cells. Missing even one can lead to the failure of your entire batch of grafts.
Making the Right Choice for Your Goal
Your post-grafting strategy should align with your specific queen-rearing objectives.
- If your primary focus is maximum acceptance rate: Prioritize speed and moisture. Move the grafts from your station to the hive in under a minute and never let them dry out.
- If your primary focus is raising high-quality queens: Be conservative with numbers. Provide a very strong cell builder with only one or two cell bars to ensure each larva receives exceptional care.
- If your primary focus is a consistent, repeatable process: Develop a strict schedule for weekly inspections and be methodical about destroying all rogue queen cells to maintain control over the hive.
Ultimately, post-grafting care is where the art of queen rearing truly proves its value, transforming a simple larva into a viable queen.
Summary Table:
| Step | Key Action | Purpose |
|---|---|---|
| Immediately After | Cover cell bars with a damp cloth. | Prevent larval desiccation (drying out). |
| Transfer | Invert frame & place in center of brood nest. | Mimic natural cell orientation; access nurse bees. |
| Initial Period (12-24h) | Leave colony undisturbed. | Allow bees to accept and begin feeding grafts. |
| Ongoing Management | Weekly inspections; destroy rogue queen cells. | Maintain colony's focus on your grafted cells. |
Ready to Elevate Your Queen Rearing Success?
Mastering the post-grafting process is essential for commercial apiaries and distributors aiming for high-quality, viable queens. HONESTBEE supplies the durable, precision beekeeping equipment you need to execute these critical steps flawlessly. From reliable cell bars to protective cloths, our wholesale-focused operations ensure you have the right tools for consistent results.
Contact HONESTBEE today to discuss how our beekeeping supplies can support your queen rearing program and boost your operation's productivity.
Visual Guide
Related Products
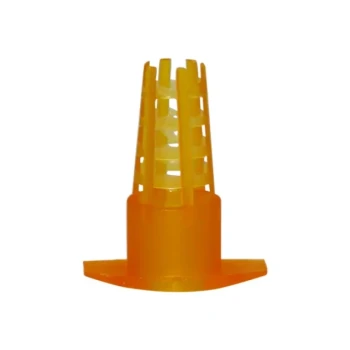
- Retractable Chinese Queen Rearing Grafting Tools Equipment
- Nicot Queen Rearing Kit for Beekeeping and Grafting in Nicot System
- Plastic Chinese Queen Grafting Tool for Bee Queen Rearing
- Stainless Steel Queen Grafting Tool for Beekeeping and Bee Queen Grafting
- Stainless Steel Beekeeping Queen Grafting Tool for Honey Bee Rearing
People Also Ask
- What is the function of Queen Rearing Tools in genetic improvement? Achieve Superior Colony Breeding Today
- Which specialized tools are necessary for implementing standardized queen rearing? Scale Your High-Yield Apiary
- How do specialized breeding tools assist in addressing honey bee colony decline? Fast-track Bee Genetic Resilience
- How do professional queen rearing tools and AI equipment improve bee stock? Elevate Your Apiary's Genetic Potential
- Why are specialized queen rearing tools necessary to mitigate winter hive losses? Boost Apiary Survival and Recovery