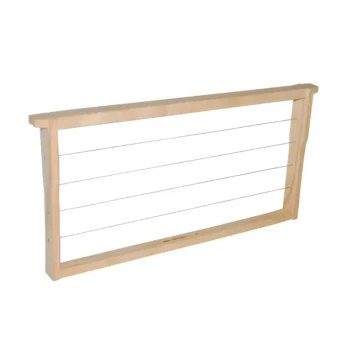
Standard Langstroth frames are built from four wooden parts: one top bar, one bottom bar, and two side bars. Assembly typically involves fitting the bars together with weatherproof wood glue and nails, installing a correctly sized beeswax foundation sheet, securing its wires or support pins, and checking that the foundation is centered and taut.
The frame’s accuracy matters as much as its strength: correctly aligned bars, secure joints, and properly supported foundation help bees draw straight comb and reduce sagging, distortion, and handling problems under heavy honey loads.
What Makes Up a Standard Langstroth Frame?
Top bar
The top bar is the frame’s upper horizontal member and usually includes a groove or slotted area for holding the foundation.
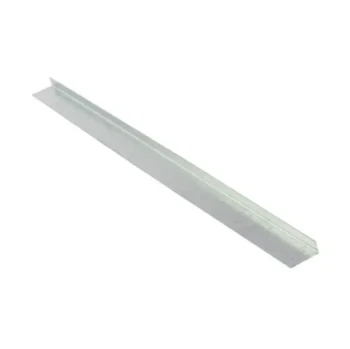
Many wooden frames use a wedge strip or wedge cleat that is removed during foundation installation and then fastened back into place to lock the foundation securely.
Bottom bar
The bottom bar closes the lower portion of the frame and helps maintain the correct foundation position.
A common design uses a continuous center kerf approximately 1/8 inch wide by 5/16 inch deep. The exact profile can vary by manufacturer, so the bottom bar should match the side bars and foundation system being used.
Side bars
Two side bars connect the top and bottom bars and establish the frame’s vertical structure.
They may include predrilled holes, commonly spaced about 1-3/4 inches apart, for inserting metal foundation support pins or wires. These supports help prevent the foundation from bowing or sagging.
Beeswax foundation
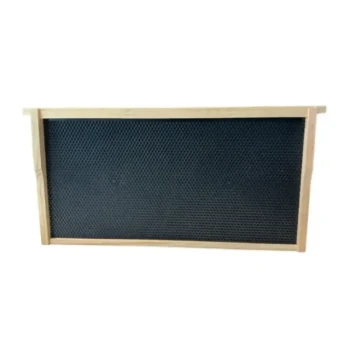
The foundation is a rectangular sheet of crimp-wire or hooked-wire beeswax foundation sized for the selected frame.
It provides a starting surface that encourages the colony to build straight, uniform comb rather than beginning unevenly from an unsupported bar.
Fasteners and support hardware
Typical assembly hardware includes:
- Weatherproof wood glue for reinforcing the joints.
- Flat-head diamond-point wire nails, commonly around 5/32 inch by 1-1/8 inch, for the main frame joints.
- 5/8-inch finish brads for securing the wedge strip.
- Metal foundation support pins for stabilizing the foundation through the side-bar holes.
Hardware specifications can differ between suppliers, so distributors should verify compatibility rather than treating every frame component as interchangeable.
How to Assemble the Frame
1. Confirm component compatibility
Before assembly, verify that the top bar, bottom bar, side bars, and foundation all belong to the same frame size and style.
A deep, medium, or shallow frame requires matching foundation dimensions. Mixing components from different profiles can produce poor fits, incorrect bee space, or a frame that does not sit properly in the hive box.
2. Prepare the top bar and foundation
If the frame uses a wedge strip, remove or loosen it according to the manufacturer’s design.
Position the foundation so its upper edge fits into the top bar groove. The foundation should be centered and oriented correctly, with its support wires aligned toward the side-bar holes.
3. Fit the side bars to the top bar
Insert one side bar into the top bar groove, keeping the wedge cleat or foundation groove facing inward.
Repeat the process with the second side bar. Check that both side bars are fully seated and parallel before fastening.
4. Apply glue and install the bottom bar
Turn the partially assembled frame as required to access the lower joints.
Apply weatherproof wood glue to the mating grooves, then insert the bottom bar into the side-bar slots. Press it fully into position so the frame is square and the bottom bar sits evenly on both sides.
5. Fasten the wooden joints
Secure the top-bar and bottom-bar joints with the specified frame nails or equivalent fasteners.
The nails should be driven straight and deeply enough to hold the joint without splitting the wood. Pre-drilling may be useful when working with harder timber or narrow bar sections.
6. Secure the foundation
Insert the foundation’s support wires through the prepared side-bar holes, or install the dedicated metal support pins specified for the frame design.
The supports should hold the foundation taut, centered, and vertical without bending or buckling the wax sheet.
7. Reinstall and fasten the wedge strip
Replace the wedge strip over the upper edge of the foundation.
Use the specified finish brads to lock it in place. The strip must hold the foundation securely while avoiding excessive pressure that could crack or deform the wax.
8. Inspect the finished frame
Check that the frame is square, the joints are tight, and the foundation is centered.
Confirm that no nail points protrude, no wood is split, and the frame has no loose components that could interfere with neighboring frames or bee space.
Why Precision Matters in Frame Construction
Maintaining bee space
Langstroth equipment depends on consistent spacing between wooden parts and frames.
A distorted frame can create excessive gaps or tight spots, encouraging irregular comb construction and making inspections more difficult.
Supporting heavy comb
Honey-filled comb places substantial load on the frame.
Secure joints, properly supported foundation, and rigid side bars reduce the risk of comb sagging, foundation failure, or frame distortion during lifting and transport.
Improving colony management
Straight frames are easier to inspect, rotate, remove, and return to the hive.
Uniform assembly also supports more consistent inventory management for beekeepers, distributors, and commercial apiaries using large quantities of replacement frames.
Understanding the Trade-offs
Wooden versus assembled frames
Unassembled frames generally require more labor but can reduce shipping volume and allow buyers to control final assembly quality.
Assembled frames provide faster deployment and more consistent preparation, but they may carry higher handling and freight costs.
Wax foundation versus other foundation options
Beeswax foundation supports natural comb-building behavior and is widely used with standard wooden frames.
However, wax is more vulnerable to bending, heat, and rough handling than rigid alternatives. Packaging and delivery conditions therefore matter, particularly for wholesalers and long-distance shipments.
Glue and mechanical fasteners
Glue improves joint strength, while nails and brads provide immediate mechanical retention.
Using fasteners without adequate joint alignment can still produce a weak or distorted frame. Conversely, excessive glue can interfere with fit or create unnecessary cleanup.
Prewired versus manually supported foundation
Prewired or hooked-wire foundation can speed installation and improve repeatability.
Manually inserting support pins or wires provides flexibility, but it requires careful spacing and inspection. Incorrectly positioned supports may fail to keep the foundation centered.
Standardization versus component variation
The term “standard Langstroth frame” describes a common system, not a guarantee that every manufacturer’s component profile is identical.
Top-bar grooves, bottom-bar kerfs, side-bar hole patterns, and frame dimensions should be confirmed before placing large procurement orders.
What Distributors and Beekeepers Should Specify
Match the frame to the hive box
Specify whether the order is for deep, medium, or shallow frames, and whether the hive body is an eight-frame or ten-frame configuration.
Frame height and foundation size must match the hive box, while the number of frames must match the box configuration.
Define the assembly condition
Product descriptions should state whether frames are:
- Unassembled or assembled
- With or without foundation
- Prewired or unwired
- With wedge strips or alternative top-bar retention
- Supplied with nails, pins, or other hardware
Clear specifications reduce substitution errors and speed fulfillment.
Check material and hardware quality
Inspect the wood for straightness, sound joints, and freedom from significant splits or warping.
Verify that nails, brads, glue, and foundation support hardware are appropriate for apiary use and compatible with the selected frame design.
Plan for volume fulfillment
Commercial buyers often need frames, foundation, hive bodies, bottom boards, covers, and related accessories from one source.
A supplier with a full-spectrum Langstroth portfolio, responsive technical support, and reliable order fulfillment can reduce compatibility issues and simplify replenishment.
How to Apply This to Your Project
Use the following priorities when selecting or assembling standard Langstroth frames:
- If your primary focus is reliable field performance: Use matched top bars, bottom bars, side bars, foundation, and support hardware, then verify that every frame is square and taut.
- If your primary focus is fast hive deployment: Source fully assembled frames or standardized assembly kits with the required nails, brads, pins, and correctly sized foundation.
- If your primary focus is wholesale or distribution efficiency: Specify frame depth, eight- or ten-frame compatibility, assembly condition, foundation type, packaging, and delivery requirements before ordering.
- If your primary focus is minimizing comb failure: Prioritize rigid joints, secure foundation support, straight timber, and careful inspection for distortion before the frames enter the hive.
With compatible components, accurate assembly, and dependable quality control, standard Langstroth frames provide a durable foundation for efficient hive management and scalable supply.
Summary Table:
| Component | Role | Assembly Consideration |
|---|---|---|
| Top Bar | Holds foundation and provides upper structure | Ensure wedge strip or groove orientation; center the foundation |
| Bottom Bar | Closes frame and positions foundation | Match kerf profile; fit tightly into side bars |
| Side Bars | Connect top and bottom bars; support foundation | Align with predrilled holes for pins/wires; check parallelism |
| Beeswax Foundation | Guides bees to build straight comb | Size correctly; keep taut and centered |
| Fasteners & Hardware | Secure frame and foundation | Use weatherproof glue and correct nails; insert supports properly |
Streamline Your Beekeeping Supply with HONESTBEE – Your One-Stop Wholesale Partner. We offer a comprehensive range of standard Langstroth frame components, from wedge strips to wired foundation, ensuring precise fit and durability. With OEM/ODM support, certifications, and rapid fulfillment, we help distributors and commercial apiaries reduce downtime and maximize profitability. Contact our team today to discuss your bulk needs and enjoy fast, reliable delivery. Get a quote →
Related Products
- JZBZ Langstroth Queen Rearing Frame for Beekeeping
- Professional Observation Hive: The Ultimate Portable Solution for Beekeeping Education, Exhibitions, and Colony Displays
- Stainless Steel 9 Frame Hive Spacer Durable Precise for Commercial Beekeeping
- Wooden Bee Hive Frames for Beekeeping and Wholesale
- Durable Plastic Frame Spacer
People Also Ask
- Why use finishing colonies for queen cell capping? Secrets to Superior Queen Quality and Performance
- How do queen rearing frames and grafting needles function together? Master the Doolittle Method for High-Quality Queens
- What is the purpose of queen rearing frames? Master Controlled Queen Production for Your Apiary
- What are the functions of queen rearing frames and artificial queen cells? Master Bee Genetic Improvement
- What roles do professional queen rearing frames and artificial queen cells play? Scaling Your Queen Bee Production