To calibrate an analogue refractometer, you must mechanically adjust the optical path so that a known reference standard aligns perfectly with the scale. This process involves applying a reference solution (often distilled water) to the prism, viewing the boundary line through the eyepiece, and using a calibration screwdriver to move that line until it reads exactly at the reference value, typically zero.
Calibration is the baseline for all data integrity. It corrects for mechanical shifts and ensures your device reads "true" before you begin measuring valuable samples.
Preparing the Device
Cleaning the Optical Surface
Lift the clear daylight plate to expose the main prism. Using a soft, lint-free cloth, gently wipe the prism surface to ensure it is free of dust, fingerprints, or residue from previous tests.
Applying the Reference Solution
Place two or three drops of your reference solution onto the center of the prism. Distilled water is the most common standard, representing 0 Brix.
Ensuring Even Distribution
Gently lower the daylight plate onto the prism. The liquid should spread across the entire surface without any air bubbles or dry spots, as these will distort the light refraction.
Adjusting the Scale
Viewing the Interface
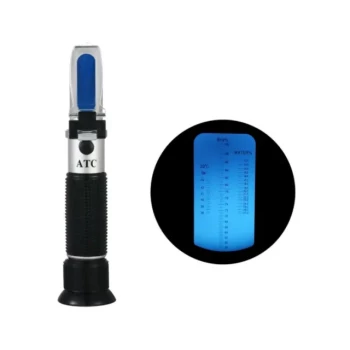
Hold the refractometer up toward a bright natural or artificial light source. Look through the eyepiece to view the internal scale.
Focusing the Image
You will see a circular field with a blue area and a white area. If the numbers or the boundary line are blurry, rotate the eyepiece ring until the image is sharp and distinct.
Aligning the Calibration Line
While looking through the eyepiece, insert the small calibration screwdriver into the adjustment screw (usually located on the top of the device). Turn the screw slowly.
Setting the Zero Point
Watch the boundary line where the blue and white fields meet. Adjust the screw until this line sits exactly on the specific value of your reference solution (e.g., the "0" line for distilled water).
Finalizing the Process
Securing the Calibration
Once the line is perfectly aligned, remove the screwdriver. If your model has a protective cap for the adjustment screw, replace it immediately to prevent accidental shifts.
Cleaning the Prism
Lift the daylight plate and wipe the reference solution off the prism using a damp, soft, lint-free cloth. Ensure the prism is completely dry before storing the device or testing a new sample.
Common Pitfalls to Avoid
Ignoring Temperature
Refractometers are sensitive to temperature changes. Ensure the instrument and the calibration fluid are at the same ambient temperature (ideally 20°C or 68°F) to avoid skewing the "zero" point.
Using Abrasive Materials
Never use rough paper towels or abrasive cleaners on the prism. Scratches on the optical glass will permanently degrade the clarity and accuracy of the boundary line.
Trapped Air Bubbles
If air bubbles are trapped under the daylight plate, light will not refract correctly. If you see bubbles, you must clean the prism and reapply the solution before calibrating.
Making the Right Choice for Your Goal
Consistent accuracy requires treating calibration as a habit, not a one-time event.
- If your primary focus is high-precision data: Calibrate the device at the start of every testing session to account for daily environmental shifts.
- If your primary focus is equipment longevity: Use only distilled water or specific calibration fluids, avoiding tap water which can leave mineral deposits on the prism.
A properly calibrated tool is the only way to trust the measurements that guide your decisions.
Summary Table:
| Calibration Phase | Key Action | Goal |
|---|---|---|
| Preparation | Clean prism with lint-free cloth | Remove dust and residue |
| Application | Apply 2-3 drops of distilled water | Create a bubble-free film |
| Adjustment | Turn calibration screw | Align boundary line to '0' |
| Finalization | Wipe clean and dry prism | Protect optics from deposits |
Maximize Your Harvest Accuracy with HONESTBEE
Precision is the backbone of successful commercial beekeeping and honey distribution. At HONESTBEE, we empower commercial apiaries and distributors with high-performance tools that ensure your products meet the highest industry standards.
Our extensive portfolio includes professional-grade beekeeping tools, advanced honey-filling machines, and essential consumables designed for efficiency. Whether you are scaling your honey production or looking for reliable equipment for your distribution network, we offer the comprehensive wholesale solutions you need.
Ready to elevate your operation? Contact us today to explore our full spectrum of specialized beekeeping hardware and machinery!
Related Products
- Digital Honey Refractometer for Precision Measurement of Optimal Honey Quality
- Precision Honey Refractometer Instrument for Quality Assessment
People Also Ask
- Why is the precise control of moisture content using professional refractometers critical for honey quality?
- What should be considered when choosing a honey refractometer? Key Factors for Accurate Moisture Testing
- What should be done after taking a reading with a honey refractometer? Protect Your Investment and Ensure Accuracy
- How do refractometers ensure technical precision when measuring honey moisture? Secure Quality and Prevent Fermentation
- What is a honey refractometer? The Essential Tool for Perfect Honey Quality