The fundamental process for making a beeswax candle in a silicone mold involves four key stages: melting the wax, preparing the mold and wick, pouring the hot wax, and letting it cool completely before removal. This method is straightforward and accessible, but success depends on careful preparation and controlling the temperature of your wax.
The secret to a perfect molded beeswax candle isn't just in the pouring; it's in the preparation. Properly securing your mold and managing the wax temperature are the two most critical factors for achieving a clean, detailed finish without leaks or defects.

Understanding the Core Components
Before beginning, it's essential to have the right materials on hand. Each component plays a specific role in the final outcome of your candle.
### Your Materials Checklist
- Beeswax: Use pellets or a chopped block for even melting.
- Silicone Mold: Choose a design you like. Many have a split down the side for easier removal.
- Appropriate Wick: The wick size should correspond to the diameter of your candle.
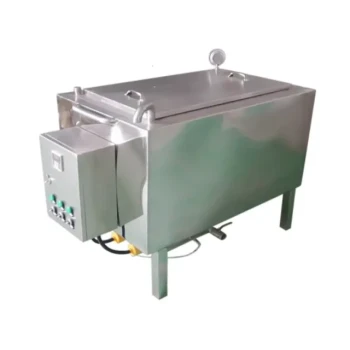
- Double Boiler: This is essential for melting wax safely without scorching it. A pot with a pouring spout inside a larger pot of water works perfectly.
- Strong Rubber Bands: If your mold is split, you will need these to hold it together securely.
- Parchment Paper: Protect your work surface from wax spills.
The Step-by-Step Candle Making Process
Follow these steps in order to ensure a smooth and successful process from solid wax to a finished candle.
### Step 1: Prepare the Mold and Wick
Most 3D silicone molds have a small hole at the top (which will be the bottom of the candle) for the wick. Thread your wick through this hole, leaving a few inches sticking out.
Secure the wick at the other end (the open, top part of the mold) by centering it and wrapping it around a stick or pencil laid across the opening.
If your mold has a split down the side, this is the time to align it perfectly. Use at least two strong rubber bands to hold the mold together tightly, preventing any wax from leaking out.
### Step 2: Melt the Beeswax Correctly
Place your beeswax in the top pot of your double boiler. Heat the water in the bottom pot gently.
Beeswax has a low melting point of around 144°F (62°C). It is critical that the wax temperature does not exceed 185°F (85°C), as higher temperatures can damage the wax, affecting its color and natural aroma.
### Step 3: Pour the Wax
Once the beeswax is fully melted, carefully pour it from your melting pot into the prepared silicone mold.
Pour slowly and steadily to avoid introducing air bubbles. Fill the mold completely to the top.
### Step 4: Cool and Solidify
Leave the filled mold on a flat, protected surface to cool at room temperature. Do not try to speed this process up by placing it in a fridge or freezer.
The cooling time will vary depending on the size of your candle but can take several hours. The candle must be completely solid and cool to the touch before you attempt to remove it.
### Step 5: Demold Your Candle
Once fully hardened, carefully remove the rubber bands. Gently pull the sides of the silicone mold away from the candle to break the seal.
Flex the mold and carefully work the candle out. If you used a split mold, it will open easily. Trim the wicks at the top and bottom to your desired length.
Common Pitfalls to Avoid
Attention to detail prevents the most common frustrations in candle making. Avoiding these mistakes will significantly improve your results.
### Leaks from Improper Sealing
The most common issue is wax leaking from a split mold. This is almost always caused by not using enough rubber bands or by using bands that are too weak to hold the seam shut against the pressure of the hot wax.
### Overheating the Wax
Exceeding the 185°F (85°C) threshold will ruin the delicate properties of the beeswax. It can become discolored and lose its subtle, sweet honey scent. Always use a double boiler for gentle, indirect heat.
### Cracking from Rapid Cooling
Cooling the candle too quickly can cause the wax to shrink unevenly, leading to cracks or a large sinkhole (or "well") around the wick. Always allow your candles to cool slowly and naturally at room temperature.
### Wax Sticking to the Mold
While silicone is naturally non-stick, some complex molds can be tricky. One suggested technique is to lightly spray the inside of the mold with water before pouring. The water creates a barrier that can help the candle release more easily.
Making the Right Choice for Your Goal
Your approach may change slightly depending on what you value most in your final product.
- If your primary focus is a flawless, highly detailed finish: Be meticulous about sealing your mold and pour the wax at the lower end of the temperature range to minimize shrinkage.
- If your primary focus is simplicity and speed: Choose a simple, one-piece silicone mold that does not have a split, as this eliminates the need for rubber bands and removes the risk of leaking.
By following these deliberate steps, you can reliably transform raw beeswax into a beautiful, functional candle.
Summary Table:
| Step | Key Action | Critical Tip |
|---|---|---|
| 1 | Prepare Mold & Wick | Use strong rubber bands to seal split molds and prevent leaks. |
| 2 | Melt Beeswax | Use a double boiler; do not exceed 185°F (85°C) to preserve quality. |
| 3 | Pour Wax | Pour slowly and steadily to avoid air bubbles. |
| 4 | Cool Candle | Allow to cool at room temperature; avoid rapid cooling to prevent cracks. |
| 5 | Demold | Gently flex the silicone mold to release the finished candle. |
Ready to scale your candle-making operation with premium supplies? HONESTBEE is your trusted wholesale partner, supplying commercial apiaries and beekeeping equipment distributors with high-quality beeswax, reliable wicks, and durable silicone molds. Let us help you produce perfect candles efficiently and profitably. Contact our team today to discuss your bulk supply needs and get a quote!
Visual Guide

Related Products
- Beeswax Melter for Candle Making Honey Bee Wax Melter
- 3D Square Honeycomb Pillar Silicone Candle Molds for Making Beeswax Candles
- 3D Beehive Silicone Skep Wax Candle Molds for Candles
- Bee Floral Relief Silicone Mold for Artisan Soap Candle Making
- Professional Stainless Steel Wax Melter for Beekeeping and Crafts
People Also Ask
- Can I melt beeswax in a wax melter? The Key to Safe, High-Quality Results
- What is the best way to melt beeswax? Use a Solar Wax Melter for Simple, Pure Results
- What is the advantage of the temperature control feature when melting beeswax? Tips for Color and Aroma Preservation
- What is the best way to melt beeswax? Safely Preserve Quality with Indirect Heat
- How do you melt beeswax without making a mess? Master Safe & Clean Techniques