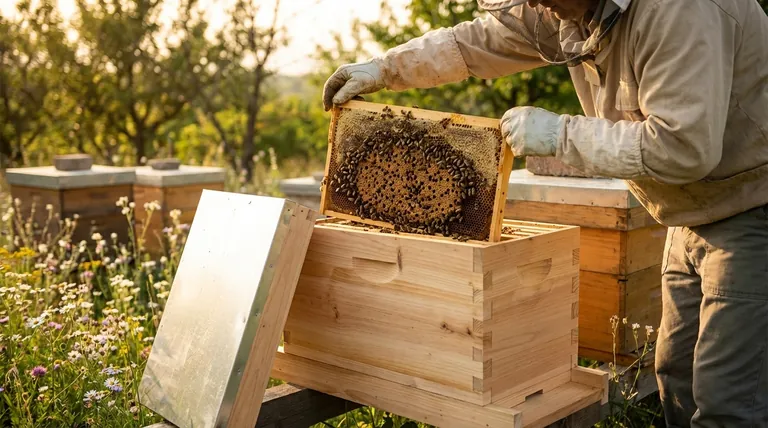
Once your nucleus hive is installed, your role shifts from installer to observer and facilitator. The primary considerations are to monitor the queen's health and laying pattern, manage the colony's space as it expands, feed only when necessary, and remain vigilant against common pests like varroa mites and small hive beetles.
Your core task is not to manage the bees, but to manage the resources they need to thrive. A nucleus hive is an established colony in miniature; your job is to remove barriers to its natural and rapid growth into a full-sized, productive hive.
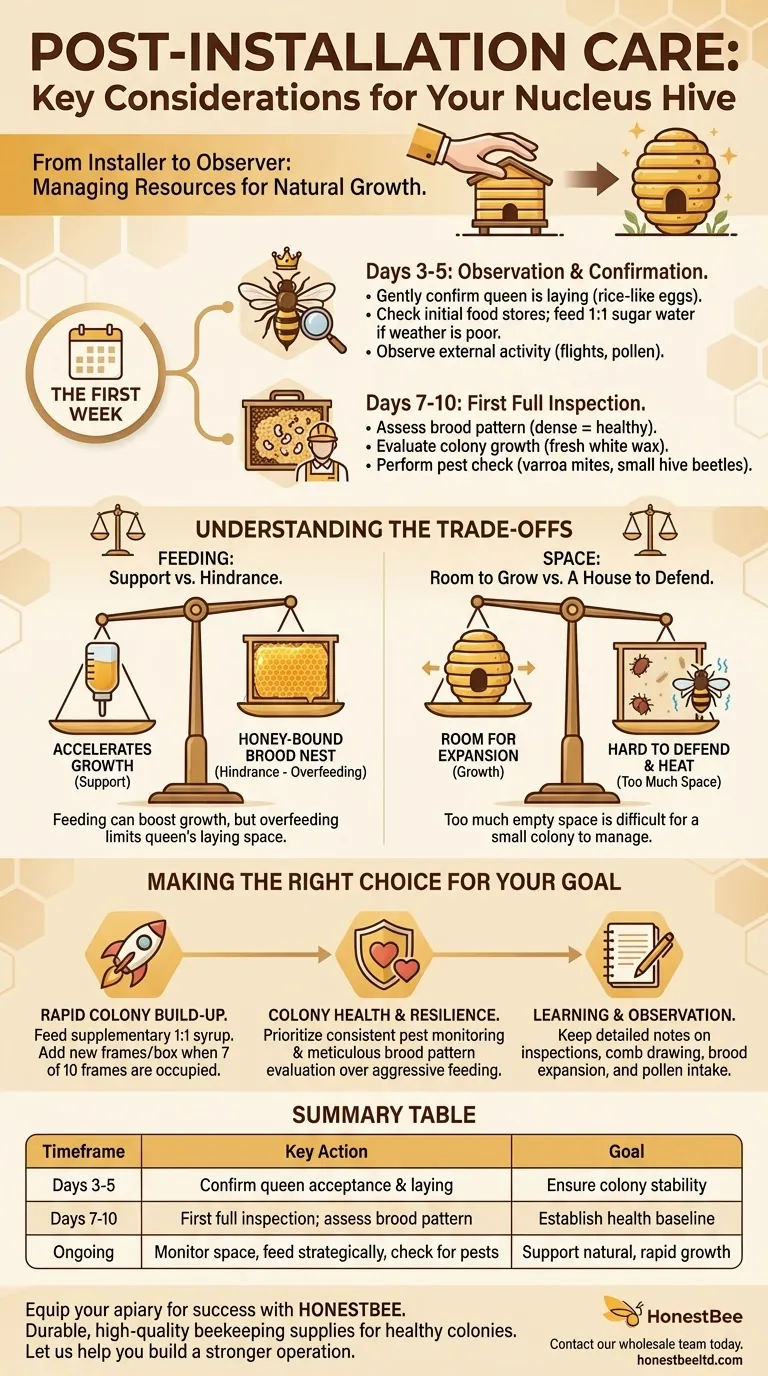
The First Week: Observation and Confirmation
The days immediately following installation are critical for ensuring the colony has successfully adapted to its new home. Your goal is to confirm the queen is healthy and the bees are orienting to their new location with minimal disturbance.
Confirming Queen Acceptance (Days 3-5)
Your first, brief check should be to confirm the queen is present and laying. You are not performing a full inspection.
Gently open the hive and pull one of the central frames. Look for tiny, rice-like eggs at the bottom of the cells, which confirms the queen is accepted and active.
Monitoring Initial Food Stores
A nucleus hive comes with its own honey stores, but the stress of the move can cause the bees to consume them quickly.
If the weather is poor and prevents foraging, you may need to provide a 1:1 sugar water solution. However, avoid overfeeding, which can clog the brood nest.
Observing Hive Activity
Stand back and watch the hive entrance. You should see bees actively coming and going, performing orientation flights, and bringing back pollen. This external activity is a strong indicator of the colony's internal health.
The First Full Inspection (Days 7-10)
After one week, the colony should be well-established, allowing for your first comprehensive inspection. This is your baseline for tracking all future progress.
Assessing the Brood Pattern
The brood pattern is the single most important indicator of queen health. A strong queen will lay eggs in a dense, compact pattern with very few empty cells.
A spotty or scattered brood pattern can be an early sign of a failing queen or a disease issue that requires immediate attention.
Evaluating Colony Growth
Look for signs of expansion. The bees should be drawing out fresh, white wax on the existing frames and may have started working on the new frames you added during installation.
Performing a Pest Check
Check for pests, especially varroa mites and small hive beetles. Look for beetles scurrying into corners and examine drone brood for signs of varroa mites. This initial check establishes a baseline for future pest management.
Understanding the Trade-offs
Successfully growing a nucleus hive involves balancing intervention with patience. Misjudging this balance can slow the colony's progress or create new problems.
Feeding: Support vs. Hindrance
Feeding a nuc can accelerate comb-building and growth, especially during periods of poor weather.
However, overfeeding is a common mistake. It can create a "honey-bound" brood nest, where the bees store syrup in cells the queen needs for laying eggs, effectively limiting colony expansion.
Space: Room to Grow vs. A House to Defend
A growing colony needs space, but giving a small nuc a full ten-frame hive body at once can be counterproductive.
Too much empty space is difficult for a small population to defend from pests and to thermoregulate, forcing them to expend excess energy on heating the hive instead of raising brood.
Making the Right Choice for Your Goal
Your post-installation care strategy should align with your primary objective for the hive.
- If your primary focus is rapid colony build-up: Provide supplementary 1:1 sugar water to encourage comb drawing and add new frames or a second box as soon as the bees are occupying 7 of the 10 frames.
- If your primary focus is colony health and resilience: Prioritize consistent pest monitoring and meticulous evaluation of the brood pattern over aggressive feeding.
- If your primary focus is learning and observation: Keep detailed notes on every inspection, tracking how quickly the bees draw comb, how the brood pattern expands, and when you see pollen coming in.
Ultimately, your greatest tool is careful and consistent observation of the colony's needs.
Summary Table:
| Timeframe | Key Action | Goal |
|---|---|---|
| Days 3-5 | Confirm queen acceptance & laying | Ensure colony stability |
| Days 7-10 | First full inspection; assess brood pattern | Establish health baseline |
| Ongoing | Monitor space, feed strategically, check for pests | Support natural, rapid growth |
Equip your apiary for success with HONESTBEE.
Growing a nucleus hive into a strong, productive colony requires the right equipment and supplies. Whether you are a commercial apiary focused on rapid build-up or a distributor serving beekeepers, HONESTBEE provides the durable, high-quality beekeeping supplies you need to support healthy colonies.
Let us help you build a stronger operation. Contact our wholesale team today to discuss your needs.
Visual Guide
Related Products
- Automatic Heat Preservation 6 Frame Pro Nuc Box for Honey Bee Queen Mating
- 5 Frame Wooden Nuc Box for Beekeeping
People Also Ask
- Why is a nuc box excellent for starting a new honey bee colony? Maximize Survival & Rapid Growth
- What are the practical uses for an empty nuc box? Essential Tools for Swarm Control and Apiary Management
- What is the process for managing a new bee colony started in a nuc box? Expert Tips for Hive Success
- Under what conditions should a captured swarm be upgraded to a two-deep hive? Maximize Colony Growth Today
- How long can bees be kept in a nuc box? Expert Timeline for Hive Transfer

