Days 9 and 10 represent a pivotal transition point in the queen rearing timeline where the focus shifts from nutrition to protection. Your primary objectives during this window are to secure the now-sealed queen cells against destruction by rogue queens and to prepare the infrastructure for their upcoming emergence.
Core Takeaway This stage is defined by a choice between artificial incubation or rigorous colony management to protect your investment. You must secure sealed cells against "volunteer" queens and simultaneously begin establishing mating nucs for the final phase of development.
Securing the Queen Cells
Once the queen cells are sealed, their care requirements change. You have two primary options for managing the cells until they hatch, each requiring a different approach.
Utilizing an Incubator
If you have access to an incubator, this is the ideal time to remove the sealed cells from the colony.
Placing them in an incubator ensures safekeeping in a controlled environment. This eliminates the variables of the hive environment and protects the developing queens from potential aggression within the colony.
Managing Cells in the Finisher Colony
If an incubator is not available, the cells must remain in the finisher colony. However, leaving them in the hive requires heightened vigilance.
You must accept that the colony environment poses specific risks that do not exist in an incubator.
The Critical Risk: Volunteer Cells
The most significant threat to your grafted queens during Days 9 and 10 is the presence of "volunteer" or emergency queen cells.
The Danger of Missed Cells
If you leave grafted cells in the finisher, you must rigorously recheck the colony for any wild queen cells the bees may have started on their own.
If even a single emergency cell was missed during previous inspections, it poses a catastrophic risk.
The Consequence of Early Emergence
A native "volunteer" queen often emerges slightly earlier than your grafted queens.
If this occurs, the newly hatched virgin queen will instinctually seek out and destroy the grafted cells before they have a chance to hatch. A thorough inspection is the only way to prevent this loss.
Preparing for the Next Phase
While protecting the current cells is paramount, you must also look ahead to the final stage of the process.
Establishing Mating Nucs
Days 9 and 10 are the correct time to begin making up mating nucs.
These small colonies must be established and organized now so they are ready to receive the ripe queen cells immediately upon harvest. Delaying this step can result in having ripe cells with nowhere to place them.
Understanding the Trade-offs
When deciding how to handle Days 9 and 10, you are balancing security against equipment availability.
Incubator vs. Colony Management
Using an incubator offers the highest security by physically isolating the queens from biological threats. It removes the need for the intense scrutiny required to find every hidden volunteer cell.
Relying on the finisher colony is resource-efficient but high-risk. It places the burden of success entirely on your ability to spot and remove every competing emergency cell.
Making the Right Choice for Your Goal
Your actions on Days 9 and 10 should be dictated by your equipment and your tolerance for risk.
- If your primary focus is maximum security: Move the sealed cells to an incubator immediately to eliminate the threat of rogue queens.
- If your primary focus is colony-based finishing: Perform a meticulous inspection of the finisher hive to destroy all "volunteer" cells.
- If your primary focus is workflow efficiency: Start assembling mating nucs now to ensure a seamless transfer when the cells are ripe.
Vigilance during these two days protects the work of the previous week and secures the success of the next.
Summary Table:
| Key Task | Objective | Critical Consideration |
|---|---|---|
| Cell Protection | Secure sealed cells | Choose between Incubator (safety) or Finisher Hive (risk) |
| Rogue Management | Eliminate "Volunteer" cells | Missed emergency cells will destroy your grafted queen cells |
| Infrastructure | Establish Mating Nucs | Prepare small colonies now to receive ripe cells upon harvest |
| Vigilance | Risk Mitigation | Perform meticulous inspections if keeping cells in the colony |
Scaling Your Queen Rearing Operation?
As a commercial apiary or distributor, maintaining a precise queen rearing schedule requires the right infrastructure. HONESTBEE is your strategic partner in growth, providing a comprehensive wholesale range of beekeeping tools, machinery, and essential industry consumables.
From hive-making and honey-filling machines to specialized hardware for queen production, we empower your business with high-quality equipment designed for efficiency. Whether you are stocking shelves or expanding your honey-themed cultural merchandise, we deliver the value and reliability your operation demands.
Ready to upgrade your apiary’s performance? Contact us today to explore our wholesale catalog!
Related Products
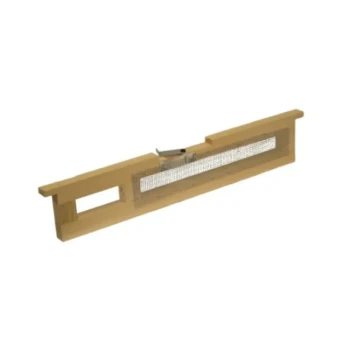
- Jenter Queen Rearing Kit Complete Set for Bee Breeding
- Premium Nicot Style Queen Rearing Kit with Hair Roller Bee Cages
- JZBZ Langstroth Queen Rearing Frame for Beekeeping
- Nicot Queen Rearing Kit for Beekeeping and Grafting in Nicot System
- No Grafting Queen Rearing Kit: System for Royal Jelly Production and Queen Rearing
People Also Ask
- How do modern queen bee rearing and breeding kits improve apiary management? Transition to Proactive Precision Breeding
- How do you prepare the frame for the Queen Rearing kit? Boost Queen Acceptance & Larval Quality
- How is 'active' queen rearing defined in beekeeping? Master Intentional Colony Management & Genetic Control
- What components are typically included in a queen rearing kit? Simplified Non-Grafting Systems for Success
- What technical advantages do professional Queen Rearing Kits provide? Maximize Apiary Yields and Genetic Quality