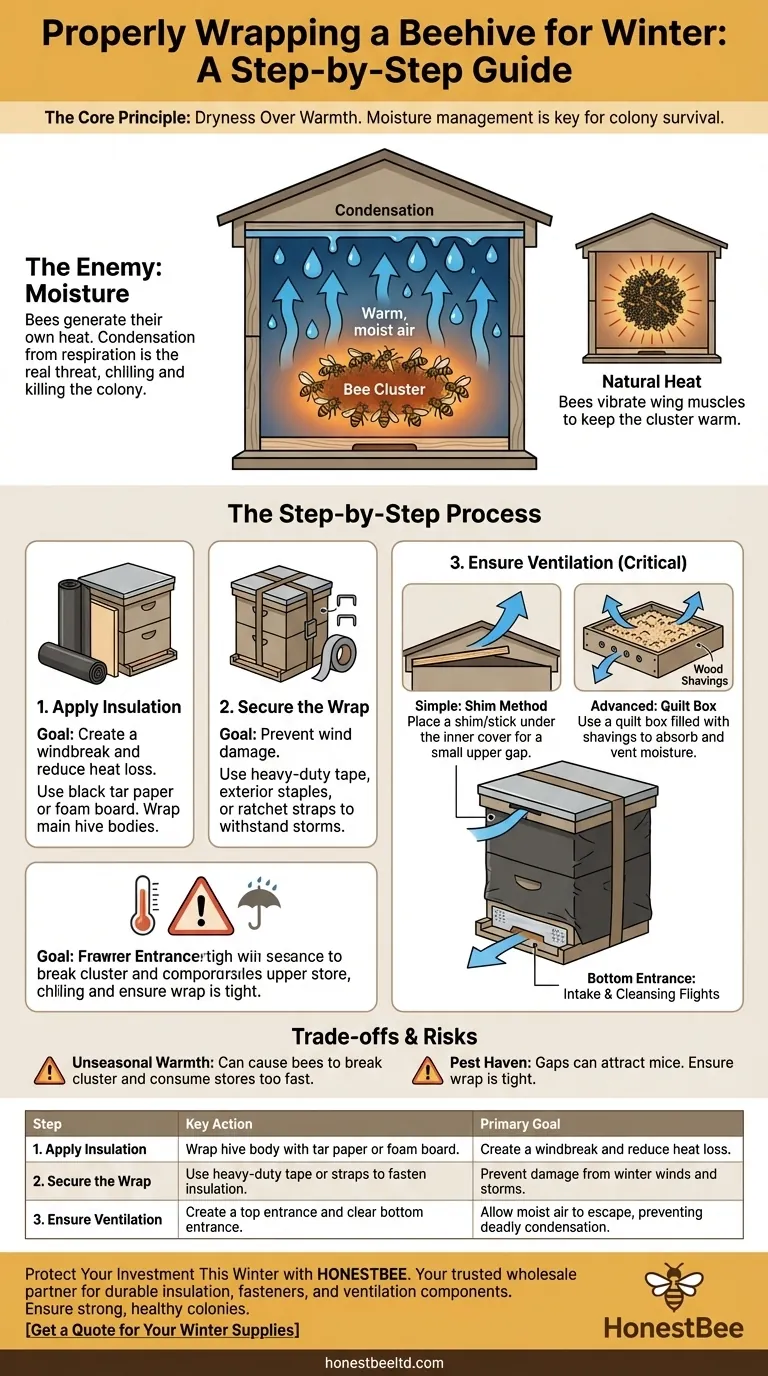
Properly wrapping a beehive is a process of adding insulation while ensuring crucial ventilation. To do this correctly, you must secure insulation around the hive body in late fall, create an upper entrance for moist air to escape, and ensure the main bottom entrance remains clear for the bees.
Winter survival for a honeybee colony is less about keeping bees warm and more about keeping them dry. A healthy, well-fed cluster can generate its own heat, but it cannot survive the chilling effect of condensation dripping from above. Your primary goal is moisture management.

The Core Principle: Dryness Over Warmth
Before applying any wrap, it is critical to understand what you are trying to solve. The biggest threat to a wintering colony is not the external temperature, but internal moisture.
Why Moisture is the Real Enemy
As bees consume honey, they metabolize the sugars and release a significant amount of warm, moist air through respiration. When this air rises and hits the cold inner cover of the hive, it condenses into water droplets.
This cold "rain" can drip back down onto the cluster, chilling the bees and leading to disease and death. A wet bee is a dead bee.
How Bees Generate Their Own Heat
Bees do not heat the entire hive cavity. Instead, they form a tight winter cluster and vibrate their wing muscles to generate heat, keeping the center of the cluster at a stable, warm temperature.
The outer layer of bees acts as a living blanket of insulation. Your job is not to heat the hive, but to protect this cluster from wind and, most importantly, from internal moisture.
The Step-by-Step Wrapping Process
Execute these steps after the bees have mostly stopped flying for the season and have begun to form their winter cluster, typically in late fall before the first hard freeze.
Step 1: Select and Apply Insulation
The goal of insulation is twofold: to provide a windbreak and to reduce heat loss through the hive walls, making it easier for the bees to maintain their cluster temperature.
Common materials include black tar paper, which absorbs solar radiation on sunny days, or rigid foam board insulation for a higher R-value. Wrap the insulation around the main hive bodies, leaving the entrances and any ventilation holes uncovered.
Step 2: Secure the Wrap for Winter Weather
Secure the insulation firmly so it can withstand winter winds and storms. Use heavy-duty tape (like Gorilla tape), exterior wood staples, or ratchet straps.
A loose wrap can flap in the wind, disturbing the colony and potentially tearing away when you are not there to fix it.
Step 3: Ensure Bottom and Top Ventilation
This is the most critical step. You must create a path for air to move through the hive to carry away the moisture the bees produce.
- Bottom Entrance: Ensure the main entrance at the bottom of the hive is clear and reduced to a smaller opening to defend against mice. This is for ventilation and allows bees to exit for "cleansing flights" on warmer days.
- Top Entrance: You must provide an exit for warm, moist air at the top of the hive. This prevents condensation from forming and dripping on the bees.
Engineering Proper Ventilation
A wrap without ventilation is a death trap. It seals in moisture and guarantees a wet, dead colony by spring.
Creating an Upper Exit for Moist Air
The simplest method is to place a small object, like a popsicle stick or a small wood shim, under the front edge of the inner cover. This creates a small gap (about 1/8 inch) for moist air to escape.
This small crack allows humid air to vent out before it can condense on the cold inner cover.
Using a Quilt Box for Superior Moisture Control
A more advanced method is a quilt box, also known as a moisture quilt. This is a shallow box placed on top of the uppermost hive body, just below the outer cover.
The box has a screen bottom and is filled with a layer of wood shavings. The shavings absorb the rising moisture from the hive, keeping it from condensing, while small holes in the sides of the box allow the moisture to vent to the outside.
Understanding the Trade-offs
Wrapping is not a universally perfect solution and comes with risks that must be managed.
The Risk of Unseasonal Warmth
On a sunny winter day, a heavily insulated or dark-colored hive can heat up too quickly. This can trick the bees into breaking their cluster and becoming too active, causing them to consume their winter food stores too rapidly.
Creating a Haven for Pests
The space between the wrap and the hive body is an attractive winter shelter for pests like mice and other insects. Ensure your wrap is tight against the hive walls with no gaps.
The False Sense of Security
Wrapping a hive does not solve underlying problems. A colony that is weak, has a high varroa mite load, or lacks sufficient honey stores will likely perish, wrapped or not. Wrapping is a supplement to, not a replacement for, fundamental beekeeping practices.
Making the Right Choice for Your Goal
Your winterizing strategy should be adapted to your specific climate and the needs of your colony.
- If your primary focus is a mild, wet climate (e.g., Pacific Northwest): Prioritize moisture control above all; a quilt box or a simple top vent may be more important than heavy insulation.
- If your primary focus is a very cold, windy climate (e.g., The Prairies, Upper Midwest): Use both insulation for a windbreak and a robust top ventilation system to handle moisture in extreme cold.
- If you are a new beekeeper: Focus first on ensuring the hive is heavy with honey and has a low mite count; then apply a simple wrap (like tar paper) and add a top ventilation shim.
By managing moisture and protecting your colony from wind, you are creating the ideal conditions to support their natural winter survival strategy.
Summary Table:
| Step | Key Action | Primary Goal |
|---|---|---|
| 1. Apply Insulation | Wrap hive body with tar paper or foam board. | Create a windbreak and reduce heat loss. |
| 2. Secure the Wrap | Use heavy-duty tape or straps to fasten insulation. | Prevent damage from winter winds and storms. |
| 3. Ensure Ventilation | Create a top entrance (e.g., with a shim) and clear bottom entrance. | Allow moist air to escape, preventing deadly condensation. |
Protect Your Investment This Winter with HONESTBEE
A successful winter depends on more than just good technique; it requires reliable, high-quality equipment. As a trusted wholesale supplier to commercial apiaries and beekeeping equipment distributors, HONESTBEE provides the durable insulation materials, secure fasteners, and ventilation components you need to execute a perfect winter wrap.
Let us help you ensure your colonies emerge strong and healthy in the spring. Contact our expert team today to discuss your wholesale needs and get your apiary winter-ready.
Get a Quote for Your Winter Supplies
Visual Guide
Related Products
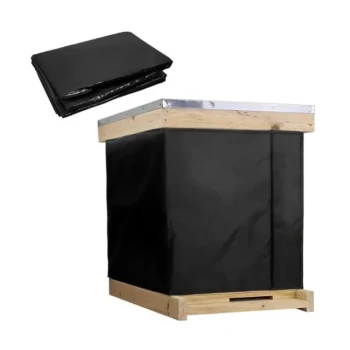
- Professional Insulated Winter Hive Wrap for Beekeeping
- Inner Beehive Cover for Beekeeping Bee Hive Inner Cover
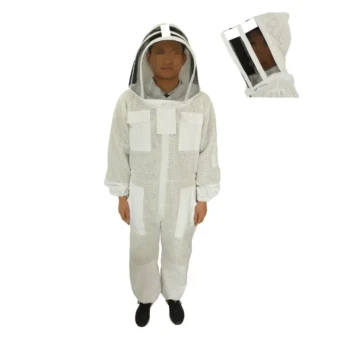
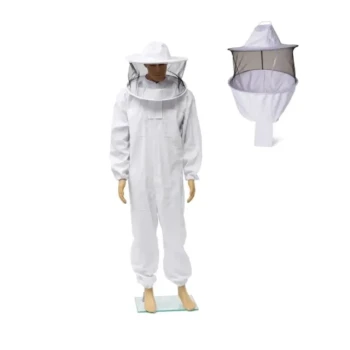
- Premium Three Layer Ventilated Bee Suit with Round Veil
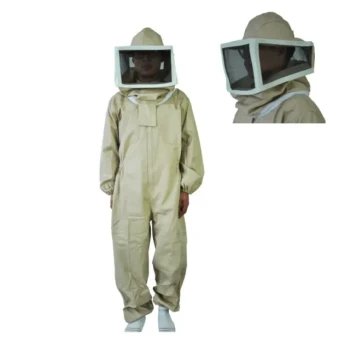
- Professional Beekeeper Suit with Square Folding Cotton Veil
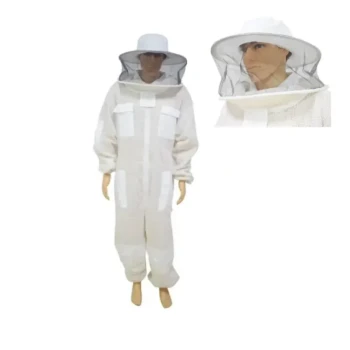
- White Cotton Beekeeping Jacket and Veil for Bee Keepers
People Also Ask
- When is the best time to wrap a beehive for winter? A Guide to Perfect Winterization Timing
- Why is proper ventilation essential for an insulated beehive in winter? Balance Heat and Humidity for Colony Survival
- How do insulation wraps and hive wraps protect bee colonies during winter? Maximize Survival & Honey Reserves
- What are the benefits of using insulated covers for hives? Ensure Colony Survival and Health
- How do professional insulation wraps provide protection for bee colonies? Optimize Winter Survival & Energy Efficiency