Order and assemble hive equipment during winter, then introduce new colonies in early to mid-to-late spring, timed with local early floral blooms. All hive bodies, frames, hardware, and management tools should be inspected and ready before bees arrive, because package bees and nucleus colonies are stressed by transport and need prompt installation. Early establishment gives colonies time to draw comb, raise brood, build population, and store enough food for their first winter.
The essential sequence is source early, prepare completely, and install in sync with forage availability. Apiaries that delay equipment procurement or introduce colonies too late in the season reduce the time available for colony development and winter preparation.
Plan Procurement Around the Biological Calendar
Use winter for sourcing and assembly
Winter is the most reliable time to select hive styles, purchase woodenware, and assemble equipment. Completing this work before spring avoids last-minute shortages when demand for bees and hive components increases.
For distributors and B2B buyers, winter procurement also creates time to confirm product specifications, consolidate orders, and arrange delivery before live bee shipments are scheduled. A dependable supplier should be able to support the complete requirement, from hive bodies and frames to tools and replacement components.
Match equipment quantities to planned colonies
Each incoming colony should have a complete, usable hive setup rather than a partially prepared one. Plan for the required boxes, frames, covers, entrances, stands, and essential inspection equipment before confirming bee deliveries.
Standardized, pre-assembled equipment can simplify installation and spring management, particularly for commercial apiaries or resellers supporting multiple customers. Consistency also makes replacement parts, inventory control, and field servicing more efficient.
Build in delivery and inspection time
Equipment should arrive early enough to allow inspection for damage, missing hardware, unsuitable materials, or assembly defects. Do not schedule live bee delivery for the same period that hive equipment is expected to arrive.
A short operational buffer is especially important for wholesalers and distributors managing multiple apiaries. It allows time to correct order discrepancies without placing transported colonies at risk.
Time Colony Introduction to Spring Forage
Install colonies before the main nectar flow
Early spring—often around April or early May, depending on local climate—generally provides the strongest establishment window. Installation should coincide with the first dependable blossoms and occur before or near major fruit blooms where possible.
Nucleus colonies may also be installed in mid-to-late spring when local conditions support continued forage. The practical objective is not a fixed calendar date, but enough remaining season for the colony to build strength and stores.
Avoid late-season starts when possible
Introducing colonies in mid-to-late summer severely limits the time available for comb construction, brood production, and food storage. A late start may require additional management and feeding, while still leaving the colony less prepared for winter.
If a late-season acquisition is unavoidable, the apiary should treat it as a higher-risk establishment project and confirm that equipment, forage, monitoring, and support resources are available in advance.
Consider the type of colony being introduced
Package bees and nucleus colonies have different starting conditions, but both require fully prepared hives. Transport stress means bees should be installed promptly after arrival rather than held while equipment is assembled or the site is prepared.
The delivery date should therefore be coordinated with equipment readiness, suitable weather, and the presence of a trained person who can complete installation and begin follow-up management.
Prepare the Apiary Before Bees Arrive
Select a practical and safe location
The site should provide access to forage and water, a clear flight path, and enough room for inspections and harvesting. Each hive should have approximately one metre of clear working space around it.
Position hives away from frequently used paths and direct flight activity away from high-traffic areas. Physical barriers or thoughtful hive alignment can encourage bees to rise above head height as they leave the entrance.
Establish water before installation
An on-site water source should be available before colonies are introduced. This reduces the likelihood that bees will establish a preference for nearby swimming pools, ponds, or garden water features.
Water planning is particularly important in urban and residential apiaries, where unwanted bee activity can quickly create neighbour concerns.
Control urban colony density
Urban or residential sites should generally limit colony density to approximately two or three hives per location unless local conditions and management capacity support more. Entrances can be directed in varying directions to reduce drifting and concentrated flight activity in confined spaces.
Where possible, hives should be placed out of sight, such as on suitable rooftops or within enclosed gardens. Local regulations, property access, and neighbour safety requirements should also be confirmed before installation.
Prepare swarm-management capacity
Growing colonies need active monitoring as worker populations and internal frame occupancy increase. Swarm-prevention planning should include reliable swarm collection equipment and a defined response procedure.
As a colony expands, add another hive box or honey super when only three or four empty frames remain in the existing setup. Providing additional capacity supports comb construction, brood rearing, and honey storage while reducing overcrowding pressure.
Verify Equipment Readiness Before Delivery
Assemble and inspect every hive
Hive bodies, frames, covers, entrances, stands, and other woodenware should be completely assembled before bees arrive. Check that frames fit correctly, boxes are stable, and all required hardware is present.
This final inspection is the point at which missing or damaged items should be identified—not during the installation of a transported colony.
Stage tools at the apiary
Essential management tools should be positioned at the site before delivery. These may include hive tools, protective clothing, feeders where required, inspection equipment, and materials for immediate colony support.
Staging equipment prevents interruptions during installation and allows the beekeeper to respond quickly if weather, colony condition, or site conditions require adjustments.
Confirm the site is operational
The hive stand, entrance orientation, working clearance, water source, and access route should all be ready before the delivery vehicle arrives. The apiary should not still be undergoing construction or layout changes when live bees are on site.
For commercial operations, a written pre-arrival checklist can reduce omissions across multiple installation locations.
Understanding the Trade-offs
Earlier installation offers more development time
An early spring installation maximizes the time available for bees to draw comb, produce brood, increase population, and collect stores. Its limitation is that cold or unstable weather can temporarily restrict forage and flight activity.
This makes local climate and blossom timing more important than relying on a universal date. The best schedule is the earliest practical window with dependable forage and suitable installation conditions.
Later installation may simplify logistics but raises risk
Mid-to-late spring installation can be appropriate for nucleus colonies when early spring conditions are unsuitable or when supply timing requires it. However, every delay shortens the colony’s development period before winter.
Late-summer installation is the most challenging option because the colony has less time to establish and may need substantially closer monitoring and support.
Larger inventories improve readiness but increase carrying cost
Holding equipment in advance protects against delivery delays and seasonal shortages, especially for distributors serving multiple beekeepers. The trade-off is the cost of inventory, storage space, and the risk of holding the wrong hive style or component specification.
Standardized product portfolios and responsive replenishment can reduce these risks while preserving operational readiness.
High-density placement saves space but complicates management
Placing more colonies in a limited area may improve land utilization, but it can increase drifting, congestion, neighbour exposure, and inspection difficulty. Urban sites require particularly careful control of entrances, flight paths, water, and swarm activity.
How to Apply This to Your Apiary
The following schedule connects procurement decisions with colony biology and site readiness:
- If your primary focus is reliable spring installation: Order and assemble all hive equipment during winter, then schedule bee delivery for early spring or mid-to-late spring when local blossoms are available.
- If your primary focus is distributor or reseller fulfillment: Build inventory around standardized, complete hive packages and maintain enough lead time for inspection, consolidation, and rapid replacement of missing or damaged components.
- If your primary focus is colony survival through the first winter: Avoid late-summer installation and give colonies the longest practical season to draw comb, raise brood, and store food.
- If your primary focus is urban or residential apiary management: Prepare the water source, flight barriers, working clearance, entrance orientation, colony-density plan, and swarm-control equipment before bees arrive.
A well-timed apiary is built during winter, activated with spring forage, and supported by equipment that is ready before the colony needs it.
Summary Table:
| Consideration | Timing & Preparation |
|---|---|
| Equipment Ordering | Order and assemble during winter to avoid shortages and ensure readiness. |
| Colony Introduction | Install in early to mid-late spring, timed with local floral blooms. |
| Site Preparation | Set up water source, flight barriers, and clear working space before bees arrive. |
| Equipment Inspection | Check for damage, missing parts, and assembly defects before delivery. |
| Urban Density | Limit to 2-3 hives per location and manage entrances to reduce conflicts. |
| Swarm Management | Have equipment ready and add boxes when only 3-4 frames remain empty. |
Partner with HONESTBEE for Reliable, One-Stop Sourcing
Whether you're a distributor, wholesaler, or commercial beekeeper, HONESTBEE delivers comprehensive beekeeping solutions to keep your apiary thriving. From hive-making and honey-filling machinery to essential tools and honey-themed merchandise, our full-spectrum portfolio ensures you get everything you need in one order. With rapid response times, dedicated service, and ultra-fast delivery, we help you cut costs, reduce lead times, and maximize profitability. Contact us today to discuss your requirements and experience seamless B2B support!
Related Products
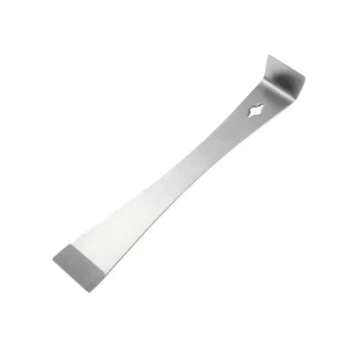
- Professional Stainless Steel Pry-Bar Hive Tool
- HONESTBEE Classic Pry Bar Hive Tool with High Visibility Finish for Beekeeping
- Ergonomic Two Person Foldable Hive Lifter
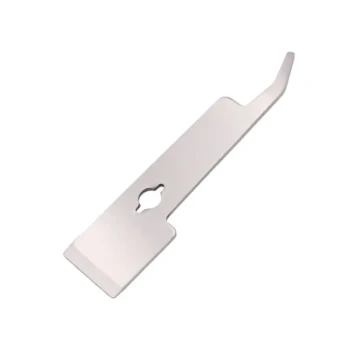
- HONESTBEE Professional Long Handled Hive Tool with Precision Cutting Blade
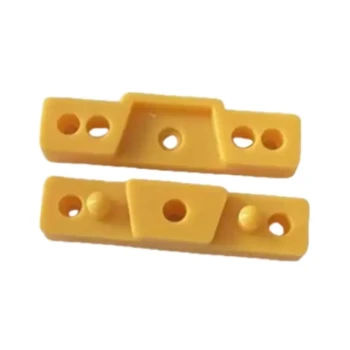
- Durable Plastic Interlocking Hive Connector for Beekeeping
People Also Ask
- Which technical challenges in hive maintenance are addressed by using a professional stainless steel hive tool?
- What is the function of a professional stainless steel hive tool in IFB? Optimize Your Colony Strength Assessment
- What are the primary functions of a stainless steel hive tool? Essential Tips for Efficient Apiary Maintenance
- What are the primary functions of a stainless steel hive tool? Essential Equipment for Professional Beekeeping
- What is the role of professional hive tools in routine apiary maintenance? Expert Tips for Hive Health and Longevity