For the most durable assembly, you must combine water-resistant glue with a specific multi-directional nailing pattern. Start by removing the wedge and gluing all contact points, then secure the bottom bar with two nails per joint and the top bar with nails driven downward. The assembly is finished by driving a final nail horizontally through the end bar into the top bar, specifically on the side opposite the removed wedge.
The structural integrity of a wedge top frame relies on preventing vertical separation. The most vital step is driving a horizontal nail through the end bar into the top bar, which specifically counteracts the force applied when prying frames out of the hive.
Preparation and Basic Assembly
Removing the Wedge
Before applying any adhesive, remove the wooden wedge from the top bar. This piece will be used later for securing foundation, but it interferes with the initial frame construction if left in place.
Applying Adhesive
Apply a high-quality water-resistant glue to all joints. While nails provide mechanical hold, the glue prevents the wood from shifting and loosening over time due to humidity changes within the hive.
Orienting the End Bars
Attach the end bars to the top bar. Pay close attention to the orientation if your end bars have rounded sides; they must be consistent to ensure proper spacing within the hive box.
Securing the Structure
Attaching the Bottom Bar
Turn the partially assembled frame upside down to access the bottom. Attach the bottom bar using two nails at each joint. Using two nails here prevents the bottom bar from twisting or pivoting.
Securing the Top Bar
Drive nails down through the top bar into the end bars. This provides the primary vertical support for the weight of the comb and honey.
The Critical Reinforcement Step
The "Anti-Separation" Nail
The most common failure point in beehive frames occurs when a hive tool is used to pry a stuck frame upward; the top bar often rips off the end bars. To prevent this, drive a final nail through the end bar into the side of the top bar.
Proper Placement
This horizontal nail must be placed on the side opposite where the wedge was removed. This ensures the nail bites into the solid, thick portion of the top bar rather than the thinner wedge area, effectively locking the joint against upward prying forces.
Common Pitfalls to Avoid
Relying Solely on Nails
Skipping the glue is a significant error. Nails alone will eventually work loose as the wood expands and contracts with hive moisture, leading to a wobbly frame that crushes bees and is difficult to handle.
Misplacing the Horizontal Nail
If you drive the final reinforcement nail into the side where the wedge was removed, you risk splitting the wood or hitting the wedge itself. This offers little structural support and jeopardizes the frame's integrity.
Making the Right Choice for Your Goal
To ensure your frames withstand years of manipulation, follow these specific guidelines:
- If your primary focus is longevity: Ensure every joint is coated with water-resistant glue before nailing to prevent loosening from humidity.
- If your primary focus is mechanical strength: Prioritize the horizontal side-nail through the end bar, as this is the only mechanical fastening that directly resists hive tool prying forces.
A durable frame is defined not by how well it holds honey, but by how well it resists being pulled apart during inspection.
Summary Table:
| Assembly Step | Key Action | Benefit |
|---|---|---|
| Adhesive | Apply water-resistant glue to all joints | Prevents loosening from humidity and shifting |
| Bottom Bar | Use two nails per joint | Prevents twisting and pivoting of the frame base |
| Top Bar | Vertical nailing through top bar | Provides primary support for comb and honey weight |
| Reinforcement | Horizontal nail through end bar (opposite wedge) | Specifically resists prying forces from hive tools |
Maximize Your Apiary Productivity with HONESTBEE
Building durable frames is just the first step toward a successful beekeeping operation. At HONESTBEE, we empower commercial apiaries and distributors by providing the industry's most reliable equipment and consumables.
Whether you need precision hive-making machinery, high-capacity honey-filling machines, or bulk supplies of beekeeping tools and hardware, we offer a comprehensive wholesale portfolio designed to withstand the rigors of professional use. Our expertise ensures your operation runs efficiently, from the first frame assembly to the final honey harvest.
Ready to scale your beekeeping business with high-quality equipment?
Contact HONESTBEE Today to discuss our wholesale offerings and how we can support your growth.
Related Products
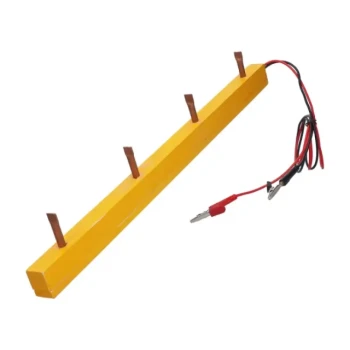
- Wooden Bee Hive Frames for Beekeeping and Wholesale
- Assembled Wooden Bee Frames with Beeswax Foundation Ready to Use by HONESTBEE
- Premium Frame Grip with Ergonomic Wood Handles
- Assembled Wooden Bee Frames with Plastic Foundation for Durability and Convenience by HONESTBEE
- HONESTBEE Wired and Assembled Wooden Bee Frames Foundation for a Thriving Hive
People Also Ask
- What are the differences between wooden and plastic frames in beehives? Choose the Best for Your Apiary
- Can I reuse old beehive frames? Save Money and Boost Hive Productivity
- Why are standardized beehives and hive frames essential for comb honey? Ensure Uniformity and Premium Quality
- What are the main considerations when choosing between wooden and plastic bee hive frames? Optimize Your Apiary's Efficiency
- How do wooden and plastic hive frames compare in terms of durability? Wood vs. Plastic Longevity & Repairability